Disassembly [12/2019 - 10/2022]: Procedure
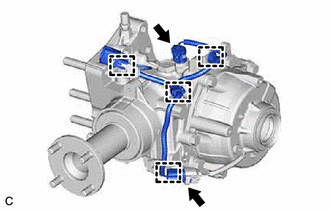
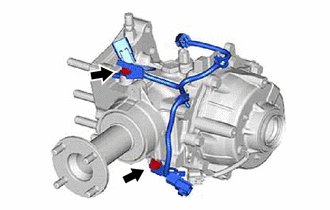
- REMOVE CLUTCH CONTROL SOLENOID WIRE
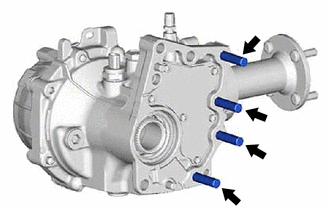
- REMOVE TRANSFER AND TRANSAXLE SETTING STUD BOLT
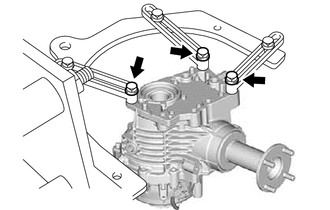
- SECURE TRANSFER ASSEMBLY
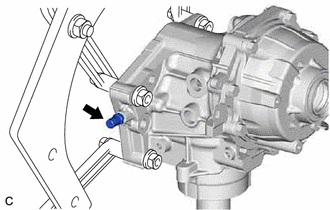
- REMOVE TRANSFER CASE STRAIGHT PIN
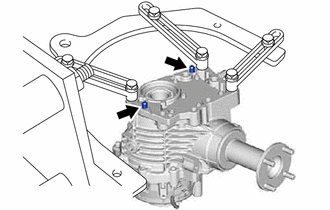
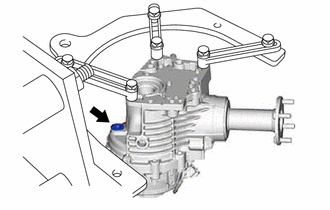
- REMOVE NO. 1 TRANSFER CASE PLUG
- REMOVE NO. 2 TRANSFER CASE PLUG
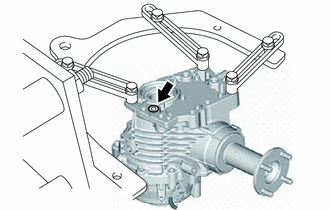
- REMOVE TRANSFER DRAIN PLUG
- REMOVE TRANSFER FILLER PLUG
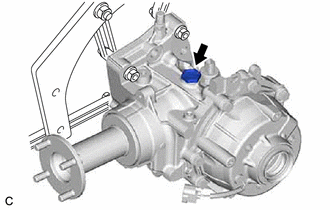
- REMOVE NO. 1 4 WHEEL DRIVE POSITION SWITCH
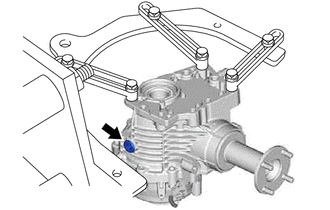
- REMOVE TRANSFER CASE BREATHER PLUG
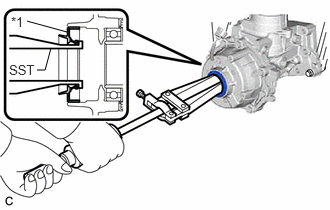
- REMOVE TRANSFER CASE OIL SEAL
See step 4
- REMOVE TRANSFER CASE OIL SEAL RH
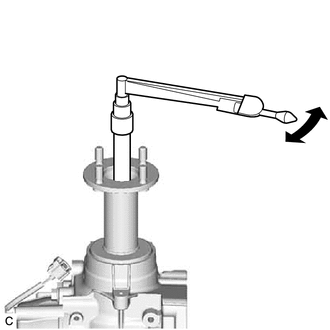
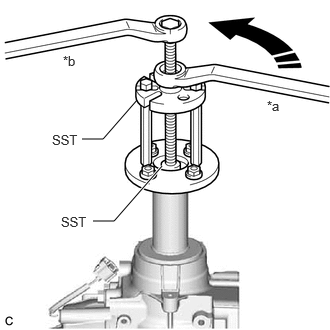
- INSPECT TOTAL PRELOAD NOTE:
- When replacing the transfer output shaft companion flange sub-assembly and transfer case oil seal, be sure to check the preload.
- If the transfer output shaft companion flange sub-assembly and transfer case oil seal were replaced without checking the preload, replace the transfer assembly.
- REMOVE OUTPUT SHAFT COMPANION FLANGE NUT
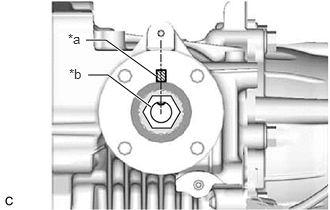
- Place a matchmark on the transfer output shaft companion flange sub-assembly as shown in the illustration.
*a Matchmark *b Transfer Driven Pinion HINT:
Place a matchmark aligned with the groove on the transfer driven pinion.
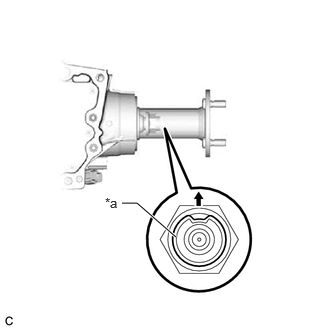
- Using a screwdriver and hammer, unstake the output shaft companion flange nut.
*a Transfer Driven Pinion NOTE:- Completely unstake the output shaft companion flange nut.
- Do not damage the threads of the transfer driven pinion.
- Remove the output shaft companion flange nut from the transfer assembly.
- Place a matchmark on the transfer output shaft companion flange sub-assembly as shown in the illustration.
- REMOVE TRANSFER OUTPUT SHAFT COMPANION FLANGE SUB-ASSEMBLY
- REMOVE TRANSFER CASE OIL SEAL
See step 7