Removal [10/2022 - 11/2023]: Procedure
- REMOVE REAR WHEEL
Refer to PROCEDURE - Step 1
- REMOVE TAIL EXHAUST PIPE ASSEMBLY (for RH Side)
for A25A-FXS: Refer to REMOVAL [10/2022 - ]
for T24A-FTS: Refer to INITIALIZATION [10/2022 - ]
- REMOVE REAR SUSPENSION ARM COVER
See step 3
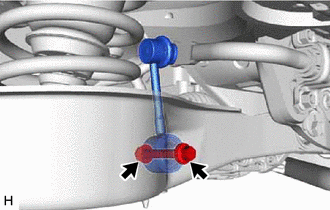
- SEPARATE REAR STABILIZER LINK ASSEMBLY
- REMOVE REAR COIL SPRING
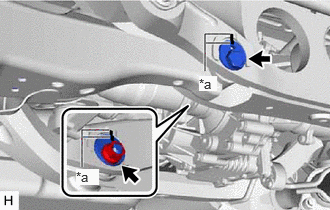
- Place matchmarks on the rear No. 2 suspension camber adjust cam, rear suspension toe adjust cam sub-assembly and rear suspension member sub-assembly.
*a Matchmark - Loosen the nut (rear suspension member sub-assembly side) of the rear No. 2 suspension arm assembly.NOTE:
Hold the rear suspension toe adjust cam sub-assembly while rotating the nut.
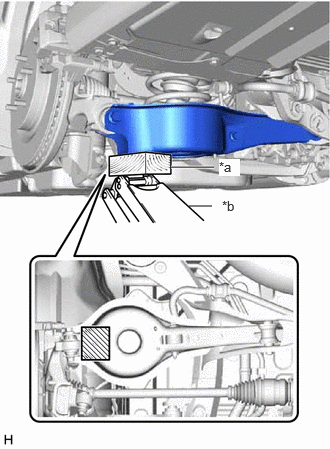
- Using a jack and a wooden block, support the rear No. 2 suspension arm assembly.NOTE:
- When jacking up the rear No. 2 suspension arm assembly, be sure to jack it up slowly.
- Make sure to perform this operation with the vehicle kept as low as possible.
*a Wooden Block *b Jack 
Wooden Block Placement Location - Remove the bolt and nut, and separate the rear No. 2 suspension arm assembly from the rear axle carrier sub-assembly.NOTE:
Because the nut has its own stopper, do not turn the nut. Loosen the bolt with the nut secured.
- Slowly lower the rear No. 2 suspension arm assembly, and then remove the rear coil spring.
- Place matchmarks on the rear No. 2 suspension camber adjust cam, rear suspension toe adjust cam sub-assembly and rear suspension member sub-assembly.
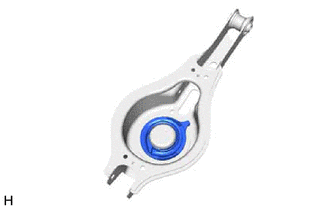
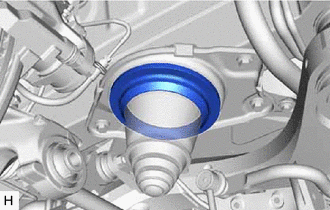
- REMOVE REAR LOWER COIL SPRING INSULATOR
- REMOVE REAR UPPER COIL SPRING INSULATOR
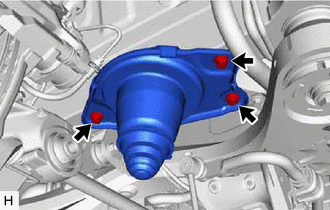
- REMOVE SPRING SEAT SUB-ASSEMBLY
HINT:
Perform this procedure only when replacement of the spring seat sub-assembly is necessary.