Removal [11/2023 - ]: Procedure
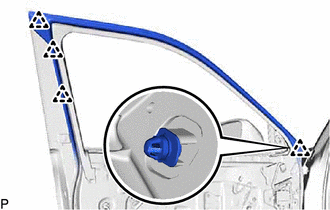
- REMOVE FRONT DOOR BELT MOULDING ASSEMBLY
Refer to REMOVAL [11/2023 - ]
- DISCONNECT FRONT DOOR WEATHERSTRIP
- REMOVE FRONT DOOR WINDOW FRAME MOULDING
HINT:
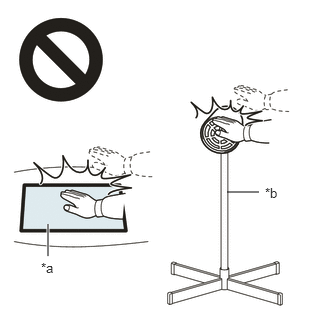
When removing the front door window frame moulding, heat the vehicle body and front door window frame moulding using a heat light.
Heating Temperature
Item Temperature Front Door Window Frame Moulding and Vehicle Body 40 to 60°C (104 to 140°F) WARNING:- Do not touch the heat light and heated parts, touching the heat light may result in burns.
- Touching heated parts for a long time may result in burns.
*a Heated Part *b Heat Light NOTE:Do not heat the vehicle body and front door window frame moulding excessively.
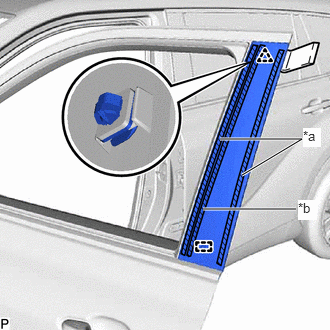
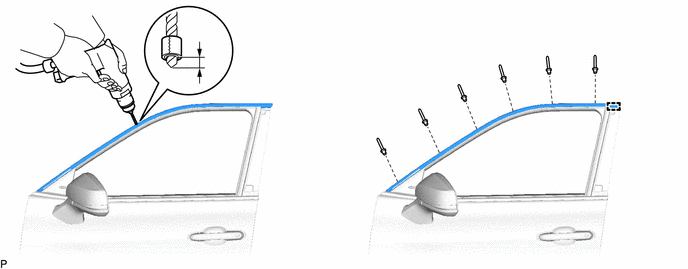
- REMOVE FRONT DOOR UPPER WINDOW FRAME MOULDING
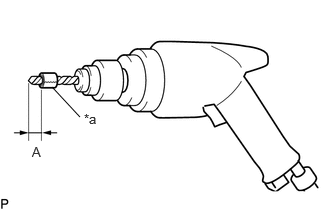
- Insert a 4.0 mm (0.157 in.) drill bit into a drill.
- Tape the 4.0 mm (0.157 in.) drill bit 5.0 mm (0.197 in.) from the tip as shown in the illustration.
*a Tape Standard Measurement
Area Measurement A 5.0 mm (0.197 in.) NOTE:Tape the 4.0 mm (0.157 in.) drill bit to prevent the drill bit from going too deep.
- Lightly press the drill bit against the rivets to drill off the rivet flanges, and remove the 6 rivets.WARNING:
Be careful of the drilled rivets, as they may be hot.
NOTE:- Pressing the drill too firmly will cause the rivet to turn and result in the rivet not being drilled through.
- Prying the rivets with the drill may damage the rivet installation holes or drill bit.
- Using a vacuum cleaner, remove the rivet fragments and shavings from the drilled areas.
- Disengage the guide to remove the front door upper window frame moulding from the door frame.