Reassembly [12/2019 - 09/2020]: Procedure
- INSTALL FRONT DOOR LOWER OUTSIDE MOULDING
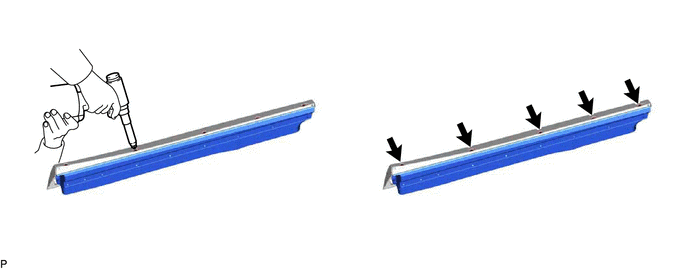
- Using an air riveter or hand riveter with a nose piece, install the front door lower outside moulding with 5 new rivets.
HINT:
If the mandrel of the rivet does not come off on the first operation of the rivet gun, slide the rivet gun forward on the mandrel and operate it again.
NOTE:- Do not pry the rivet with the riveter, as this will cause damage to the riveter and mandrel.
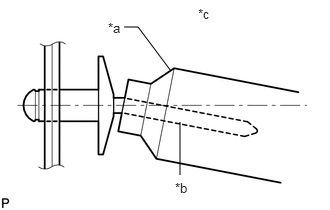
*a Riveter *b Mandrel *c Incorrect - Confirm that the rivets are seated properly against the moulding.
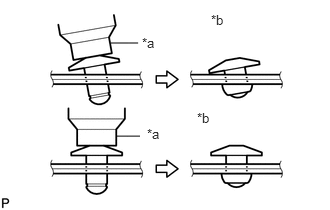
*a Riveter *b Incorrect - Do not tilt the riveter when installing the rivet to the moulding.
- Do not leave any space between the rivet head and moulding.
- Do not leave any space between the moulding. Firmly hold the 2 items together while installing the rivet.
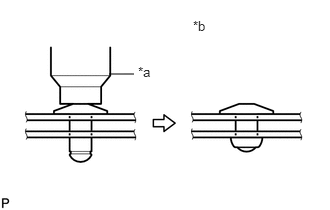
*a Riveter *b Incorrect
- Do not pry the rivet with the riveter, as this will cause damage to the riveter and mandrel.
- Using an air riveter or hand riveter with a nose piece, install the front door lower outside moulding with 5 new rivets.
- INSTALL FRONT DOOR UPPER OUTSIDE MOULDING PAD
HINT:
When installing the front door upper outside moulding pad, heat the front door outside moulding sub-assembly using a heat light.
Heating Temperature
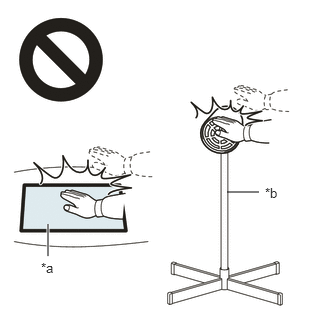
Item Temperature Front Door Outside Moulding Sub-assembly 20 to 30 °C (68 to 86 °F) WARNING:- Do not touch the heat light and heated parts, touching the heat light may result in burns.
- Touching heated parts for a long time may result in burns.
*a Heated Part *b Heat Light - Clean the front door outside moulding sub-assembly.
- Using a heat light, heat the front door outside moulding sub-assembly surface.
- Remove any remaining double-sided tape from the front door outside moulding sub-assembly.
- Wipe off any tape adhesive residue with cleaner.
- Using a brush or felt, apply primer or equivalent to the front door upper outside moulding pad installation area.NOTE:
- Use a clean brush or felt.
- Do not touch the front door outside moulding sub-assembly until the primer has dried.
- Install a new front door upper outside moulding pad.
- Using a heat light, heat the front door outside moulding sub-assembly surface.
- Remove the release paper from the front door upper outside moulding pad.
HINT:
After removing the release paper, keep the exposed adhesive free from foreign matter.
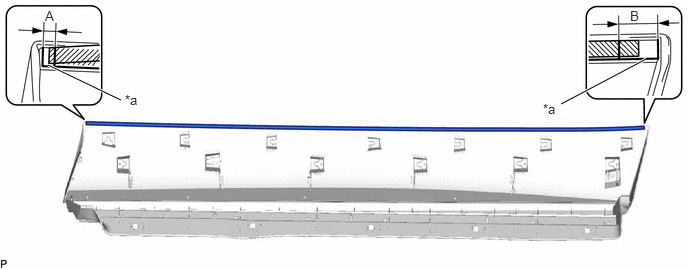
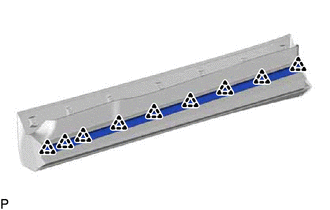
- Install the front door upper outside moulding pad as shown in the illustration.
*a Line - - Standard Measurement
Area Measurement Area Measurement A 3 mm (0.118 in.) B 10 mm (0.394 in.) HINT:
Press the front door upper outside moulding pad firmly to install it.
- INSTALL NO. 2 FRONT DOOR WEATHERSTRIP