Removal [11/2023 - ]: Procedure
- REMOVE COOL AIR INTAKE DUCT SEAL
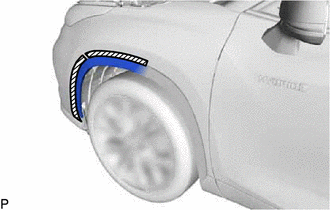
- DISCONNECT FRONT FENDER WHEEL OPENING MOULDING SUB-ASSEMBLY LH
- Apply protective tape around the front fender wheel opening moulding sub-assembly LH.

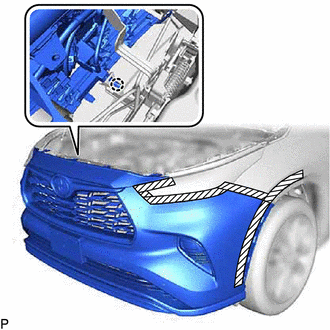
Protective Tape - Remove the 3 clips.
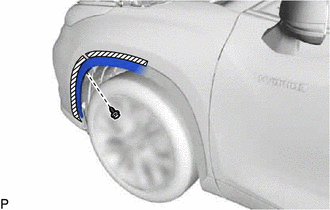
- Remove the screw.
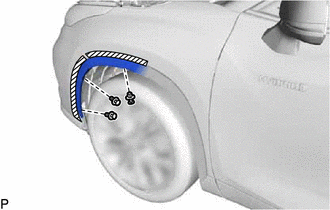
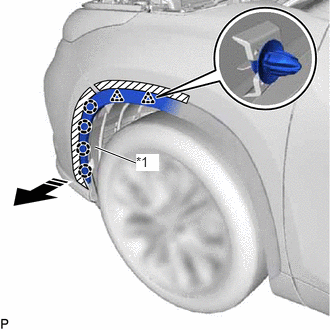
- Pull back the edge of the front fender liner LH and disengage the 4 claws by pushing the area indicated by the arrow in the illustration with a finger.
*1 Front Fender Liner LH 
Remove in this Direction NOTE:- Do not apply excessive force when pulling back the front fender liner LH.
- To avoid damaging the claws, do not forcibly pull the front fender wheel opening moulding sub-assembly LH.
- Disengage the 2 clips and disconnect the front fender wheel opening moulding sub-assembly LH.
- Remove the 2 clips from the front fender wheel opening moulding sub-assembly LH.
- Apply protective tape around the front fender wheel opening moulding sub-assembly LH.
- DISCONNECT FRONT FENDER WHEEL OPENING MOULDING SUB-ASSEMBLY RH
HINT:
Use the same procedure as for the LH side.
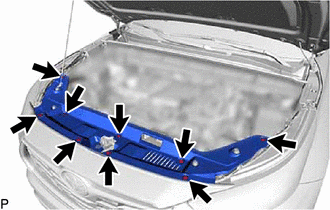
- REMOVE FRONT BUMPER ASSEMBLY
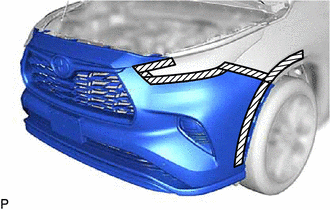
- Apply protective tape around the front bumper assembly.
Protective Tape HINT:
Use the same procedure for the RH side and LH side.
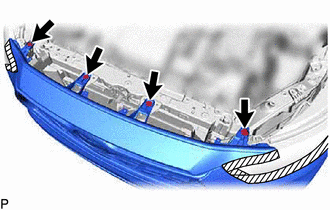
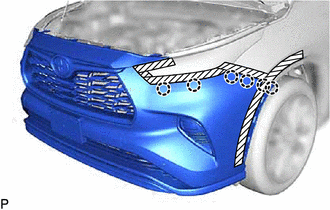
- Remove the 10 screws.
- Remove the 4 bolts.
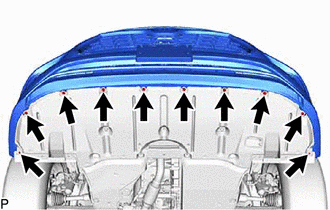
- Disengage the 6 claws.
HINT:
Use the same procedure for the RH side and LH side.
- Disengage the claw to remove the front bumper assembly.
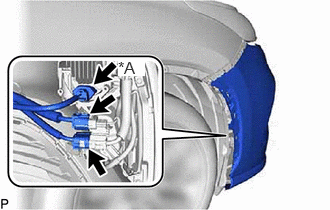
- Disconnect each connector.
*A w/ Fog Light HINT:
Use the same procedure for the LH side and RH side.
- Apply protective tape around the front bumper assembly.