Installation [12/2019 - ]: Procedure
- INSTALL BACK DOOR WEATHERSTRIP
- Make sure to remove any non-drying sealant from the vehicle body.NOTE:
If there is any non-drying sealant remaining on the vehicle body, the back door weatherstrip may not be able to be securely installed and may fall off. Make sure to completely remove the non-drying sealant from both the interior side and exterior side installation surfaces on the vehicle body.
- Align the joint of a new back door weatherstrip with the back door lock striker and temporarily install the back door weatherstrip.
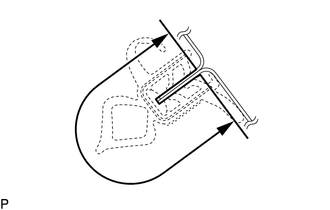
*a Paint mark (White) *b Paint mark (Yellow) *c Joint - - 
Cutout 
Flange Position - Align the paint marks on the back door weatherstrip with the flange on the vehicle body indicated by the arrow, and install the back door weatherstrip.NOTE:
- Make sure to position the paint mark correctly during installation. Failure to do so may lead to water ingress.
- After installation, check that the corners fit correctly.
HINT:
Make sure to install the parts of the back door weatherstrip near the joint and paint mark shown in the illustration first, and then install the corners.
- Make sure to remove any non-drying sealant from the vehicle body.