Bleeding [12/2019 - ]: Procedure
- BLEED BRAKE LINE (When Using the GTS)
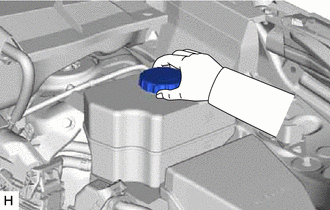
- Fill the reservoir with brake fluid.
- Bleed the brake line.
- Bleed the brake line following the instructions on the GTS.
Chassis > Brake/EPB > Utility
Tester Display Brake Line Air Bleeding HINT:
When the brake pedal is released, the piston inside the master cylinder may take longer than the brake pedal to return to its original position. Therefore, make sure to wait for 1 second or more between each depression of the brake pedal.
- After air bleeding, tighten each bleeder plug.
Torque: 8.3 N.m (85 kgf/cm, 73 in.lbf)
- Clear the DTCs.
Refer to DTC CHECK / CLEAR [12/2019 - ]
- Bleed the brake line following the instructions on the GTS.
- Install the brake master cylinder reservoir filler cap assembly.
- Inspect for brake fluid leaks.
- BLEED BRAKE LINE (When Not Using the GTS) NOTE:
- Performing the following procedure enters ECB (Electronically Controlled Brake system) Deactivate Mode without using the GTS.
- ECB (Electronically Controlled Brake system) Deactivate Mode allows the brake lines to be bled without using the GTS.
- The brake warning light blinks (yellow) to indicate that ECB (Electronically Controlled Brake system) Deactivate Mode is selected.
- Be sure to confirm that the brake warning light is blinking (yellow) throughout the brake line bleeding procedure.
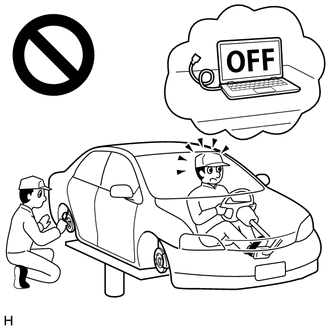
- If any of the following conditions are met, ECB (Electronically Controlled Brake system) Deactivate Mode is canceled and the brake warning light (yellow) turns off. Do not allow ECB (Electronically Controlled Brake system) Deactivate Mode to be canceled while bleeding the brake lines or DTCs may be stored.
The shift lever is moved from P to any other position. The ignition switch is turned to ON (READY). The ignition switch is turned off. The parking brake is released. The vehicle speed is more than 0 km/h (0 mph). - Do not rotate any brake disc while ECB (Electronically Controlled Brake system) Deactivate Mode is selected.
- Although the brake warning light (yellow) will blink and a buzzer will sound while performing brake line bleeding, this is not a malfunction.
- Remove all 4 wheels.
Refer to REMOVAL [12/2019 - 10/2022] , or refer to REMOVAL [10/2022 - ]
- Enter ECB (Electronically Controlled Brake system) Deactivate Mode.
- Perform the procedure listed below within 1 minute.
- Turn the ignition switch to ON with the shift lever in P and parking brake applied.
- Move the shift lever to N and then depress the brake pedal more than 8 times within 5 seconds.
- Move the shift lever to P and then depress the brake pedal more than 8 times within 5 seconds.
- Move the shift lever to N and then depress the brake pedal more than 8 times within 5 seconds.
- Move the shift lever to P.
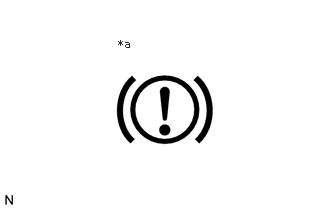
- Check that the brake warning light is blinking (yellow).
*a Brake Warning Light (Yellow)
- Perform the procedure listed below within 1 minute.
- Fill the reservoir with brake fluid.
- Bleed the brake lines.
- Connect a vinyl tube to the bleeder plug of the front disc brake cylinder assembly RH.
- Depress the brake pedal several times with approximately 1 second between each depression, and then loosen the bleeder plug with the pedal depressed.*1
- When brake fluid stops coming out, tighten the bleeder plug and then release the brake pedal for 1 second or more.*2
HINT:
When the brake pedal is released, the piston inside the master cylinder may take longer than the brake pedal to return to its original position. Therefore, make sure to wait for 1 second or more between each depression of the brake pedal.
- Repeat steps *1 and *2 until all the air in the brake fluid is completely bled out.
- Tighten the bleeder plug completely.
Torque: 8.3 N.m (85 kgf/cm, 73 in.lbf)
- Bleed the brake lines from the front disc brake cylinder assembly LH using the same procedure as for the RH side.
- Connect a vinyl tube to the bleeder plug of the rear disc brake cylinder assembly LH.
- Depress the brake pedal several times with approximately 1 second between each depression, and then loosen the bleeder plug with the pedal depressed.*3
- When brake fluid stops coming out, tighten the bleeder plug and then release the brake pedal for 1 second or more.*4
HINT:
When the brake pedal is released, the piston inside the master cylinder may take longer than the brake pedal to return to its original position. Therefore, make sure to wait for 1 second or more between each depression of the brake pedal.
- Repeat steps *3 and *4 until all the air in the brake fluid is completely bled out.
- Tighten the bleeder plug completely.
Torque: 8.3 N.m (85 kgf/cm, 73 in.lbf)
- Bleed the brake lines from the rear disc brake cylinder assembly RH using the same procedure as for the LH side.
- Turn the ignition switch off.
- Inspect for brake fluid leaks.
- Adjust the brake fluid level in the reservoir.
See step 2
- Install the brake master cylinder reservoir filler cap assembly.
- Install all 4 wheels.
Refer to INSTALLATION [12/2019 - 10/2022] , or refer to INSTALLATION [10/2022 - ]
- BLEED BRAKE SYSTEM WARNING:
The GTS must be used for bleeding the brake system. If not used, the air bleeding will be incomplete, which is hazardous and may lead to an accident.
- Fill the reservoir with brake fluid.
- Bleed the brake system.
- Bleed the brake system following the instructions on the GTS.
Chassis > Brake/EPB > Utility
Tester Display Brake System Air Bleeding NOTE:Before following the instructions on the GTS to perform linear valve offset calibration, release the parking brake. When calibration is complete, immediately apply the parking brake.
HINT:
When the brake pedal is released, the piston inside the master cylinder may take longer than the brake pedal to return to its original position. Therefore, make sure to wait for 1 second or more between each depression of the brake pedal.
- After air bleeding, tighten each bleeder plug.
Torque: 8.3 N.m (85 kgf/cm, 73 in.lbf)
- Clear the DTCs.
Refer to DTC CHECK / CLEAR [12/2019 - ]
- Bleed the brake system following the instructions on the GTS.
- Install the brake master cylinder reservoir filler cap assembly.
- Inspect for brake fluid leaks.