Disassembly [12/2019 - 10/2022]: Procedure
- REMOVE INTAKE VALVE
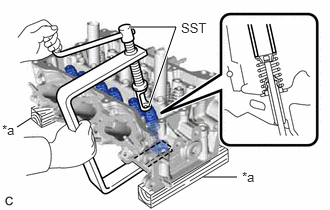
- Using SST and wooden blocks, compress the inner compression spring and remove the 6 valve spring retainer locks from the valve spring retainer.
*a Wooden Block - SST: 09202-70020
- 09202-01010
- 09202-01020
- SST: 09202-00021
HINT:
Arrange the removed parts in such a way that they can be reinstalled to their original locations.
- SST: 09202-70020
- Remove the 6 valve spring retainers, 6 inner compression springs and 6 intake valves from the cylinder head LH.
HINT:
Arrange the removed parts in such a way that they can be reinstalled to their original locations.
- Using SST and wooden blocks, compress the inner compression spring and remove the 6 valve spring retainer locks from the valve spring retainer.
- REMOVE EXHAUST VALVE
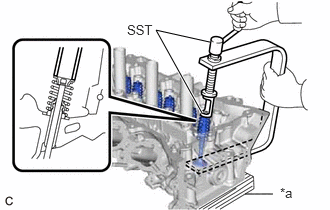
- Using SST and wooden blocks, compress the inner compression spring and remove the 6 valve spring retainer locks from the valve spring retainer.
*a Wooden Block - SST: 09202-70020
- 09202-01010
- 09202-01020
- SST: 09202-00021
HINT:
Arrange the removed parts in such a way that they can be reinstalled to their original locations.
- SST: 09202-70020
- Remove the 6 valve spring retainers, 6 inner compression springs and 6 exhaust valves from the cylinder head LH.
HINT:
Arrange the removed parts in such a way that they can be reinstalled to their original locations.
- Using SST and wooden blocks, compress the inner compression spring and remove the 6 valve spring retainer locks from the valve spring retainer.
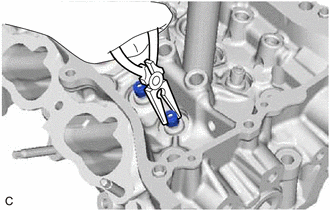
- REMOVE INTAKE VALVE STEM OIL SEAL
- REMOVE EXHAUST VALVE STEM OIL SEAL
HINT:
Use the same procedure as for the intake side.
- REMOVE VALVE SPRING SEAT
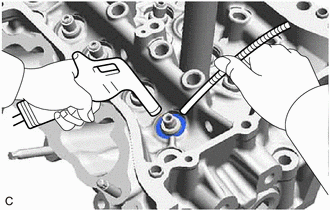
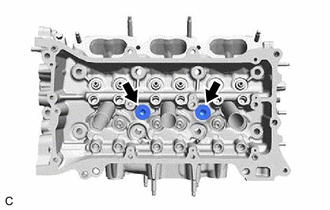
- REMOVE NO. 1 STRAIGHT SCREW PLUG NOTE:
If coolant leaks from a No. 1 straight screw plug or a plug is corroded, replace it.
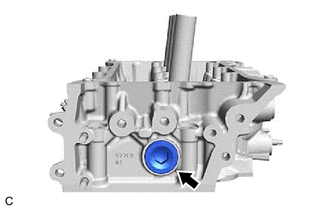
- REMOVE NO. 2 STRAIGHT SCREW PLUG NOTE:
If coolant leaks from a No. 2 straight screw plug or a plug is corroded, replace it.
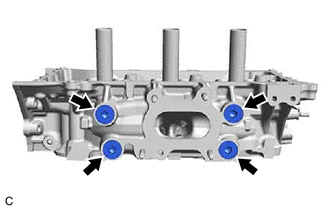
- REMOVE NO. 3 STRAIGHT SCREW PLUG NOTE:
If coolant leaks from a No. 3 straight screw plug or a plug is corroded, replace it.