Removal [11/2023 - ]: Procedure
WARNING: This page is about a different variant/trim than selected.
- REMOVE FRONT WHEEL OPENING EXTENSION PAD LH
Refer to PROCEDURE - Step 7
- REMOVE FRONT WHEEL OPENING EXTENSION PAD RH
Refer to PROCEDURE - Step 8
- REMOVE NO. 1 ENGINE UNDER COVER
Refer to PROCEDURE - Step 9
- REMOVE NO. 2 ENGINE UNDER COVER ASSEMBLY
Refer to PROCEDURE - Step 10
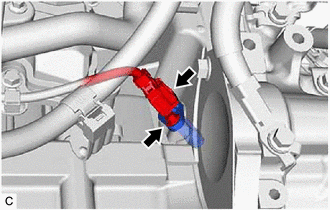
- REMOVE CRANKSHAFT POSITION SENSOR
- Disconnect the crankshaft position sensor connector.
- Using an 8 mm socket wrench, remove the bolt and crankshaft position sensor from the cylinder block sub-assembly.NOTE:
If the crankshaft position sensor has been struck or dropped, replace it.
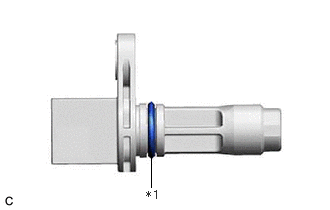
*1 O-ring Perform this procedure only when reusing the crankshaft position sensor.
- Remove the O-ring from the crankshaft position sensor.NOTE:
- Make sure to only remove the O-ring with bare hands.
- When removing the O-ring, be careful not to damage the O-ring groove of the crankshaft position sensor.
- If the O-ring groove of the crankshaft position sensor is damaged, replace the crankshaft position sensor with a new one.
- Remove the O-ring from the crankshaft position sensor.
- Disconnect the crankshaft position sensor connector.