Removal [11/2023 - ]: Procedure
- PRECAUTION
Refer to PRECAUTION [11/2023 - ]
- REMOVE SERVICE PLUG GRIP
Refer to REMOVAL [11/2023 - ]
- REMOVE NO. 2 INVERTER PROTECTOR
Refer to PROCEDURE - Step 9
- DISCONNECT ENGINE ROOM MAIN WIRE
See step 4
- REMOVE CONNECTOR COVER ASSEMBLY
Refer to PROCEDURE - Step 11
- CHECK TERMINAL VOLTAGE
Refer to PROCEDURE - Step 12
- INSTALL CONNECTOR COVER ASSEMBLY
Refer to PROCEDURE - Step 7
- CONNECT ENGINE ROOM MAIN WIRE
See step 31
- INSTALL NO. 2 INVERTER PROTECTOR
Refer to PROCEDURE - Step 17
- REMOVE REAR NO. 1 SEAT ASSEMBLY LH (for 60/40 Split Seat Type)
Refer to REMOVAL [12/2019 - ]
- REMOVE REAR NO. 1 SEAT ASSEMBLY RH (for 60/40 Split Seat Type)
Refer to REMOVAL [12/2019 - ]
- REMOVE REAR NO. 1 SEAT ASSEMBLY (for Captain Seat Type)
Refer to REMOVAL [12/2019 - ]
- REMOVE REAR CONSOLE BOX ASSEMBLY (for Captain Seat Type)
Refer to REMOVAL [12/2019 - ]
- SEPARATE FRONT FLOOR CARPET ASSEMBLY
See step 5
- REMOVE REAR FLOOR SILENCER
See step 6
- REMOVE NO. 10 HV BATTERY SHIELD PANEL
Refer to PROCEDURE - Step 20
- DISCONNECT FLOOR UNDER WIRE
Refer to PROCEDURE - Step 21
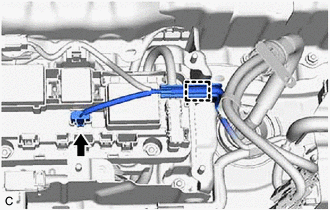
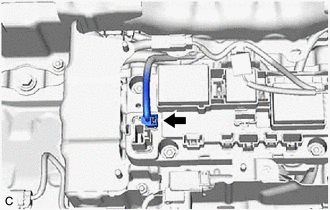
- DISCONNECT FLOOR WIRE WARNING:
Be sure to wear insulated gloves.
- Disengage the clamp.
- Disconnect the HV battery junction block assembly connector.
- w/ 1500w Voltage Inverter
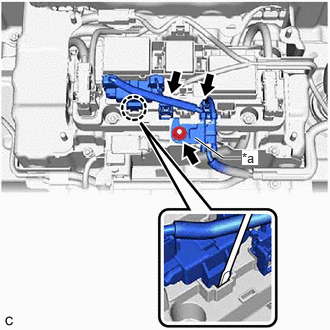
- Disconnect the 2 HV battery junction block assembly connectors.NOTE:
Insulate each disconnected high-voltage connector with insulating tape. Wrap the connector from the wire harness side to the end of the connector.
*a Shield Ground - Using a screwdriver disengage the claw.
- Remove the nut and disconnect the shield ground.
- Disconnect the 2 HV battery junction block assembly connectors.
- Disengage the clamp.
- REMOVE HV BATTERY JUNCTION BLOCK ASSEMBLY WARNING:
Be sure to wear insulated gloves.
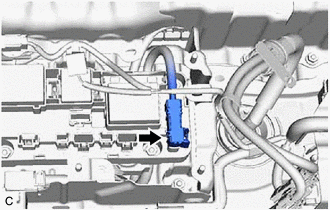
- Disconnect the HV battery junction block assembly connector.NOTE:
Insulate the disconnected connectors with insulating tape.
- Disconnect the HV battery junction block assembly connector.NOTE:
Insulate the disconnected connectors with insulating tape.
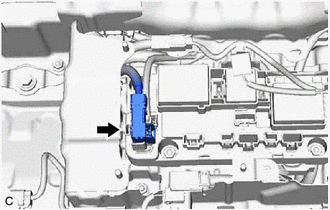
- Disconnect the HV battery junction block assembly connector.
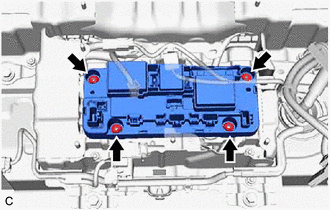
- Remove the 4 nuts and HV battery junction block assembly from the HV battery.NOTE:
If the HV battery junction block assembly has been struck or dropped, replace it with a new one.
- Disconnect the HV battery junction block assembly connector.