Removal [12/2019 - 10/2022]: Procedure
WARNING: This page is about a different variant/trim than selected.
- REMOVE FRONT ENGINE MOUNTING INSULATOR
Refer to REMOVAL [12/2019 - 10/2022]
- REMOVE FRONT FENDER APRON SEAL LH
Refer to PROCEDURE - Step 15 [12/2019 - 09/2020] , or refer to PROCEDURE - Step 15 [09/2020 - 10/2022]
- DRAIN AUTOMATIC TRANSAXLE FLUID
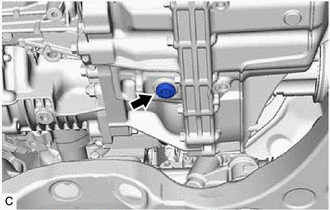
- Remove the refill plug and gasket from the automatic transaxle case sub-assembly.
- Using a 10 mm hexagon socket wrench, remove the overflow plug and gasket from the transaxle housing.
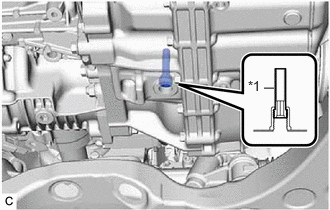
- Using a 6 mm hexagon socket wrench, remove the No. 1 transmission oil filler tube from the transaxle housing and drain the automatic transaxle fluid.
*1 No. 1 Transmission Oil Filler Tube - Using a 6 mm hexagon socket wrench, install the No. 1 transmission oil filler tube to the transaxle housing.
Torque: 1.7 N.m (17 kgf/cm, 15 in.lbf)
- Using a 10 mm hexagon socket wrench, temporarily install the gasket and overflow plug to the transaxle housing.
HINT:
Reuse the old gasket as the overflow plug will be removed again to adjust the automatic transaxle fluid level.
- Temporarily install the gasket and refill plug to avoid automatic transaxle fluid spillage.
HINT:
Reuse the old gasket as the refill plug will be removed again to adjust the automatic transaxle fluid level.
- Remove the refill plug and gasket from the automatic transaxle case sub-assembly.
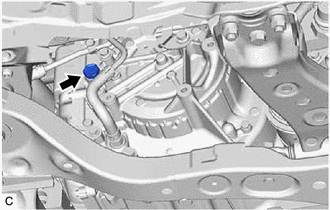
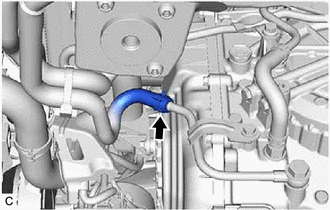
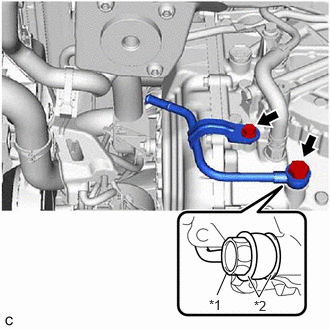
- DISCONNECT OUTLET NO. 1 OIL COOLER HOSE
- REMOVE OIL COOLER UNION SUB-ASSEMBLY
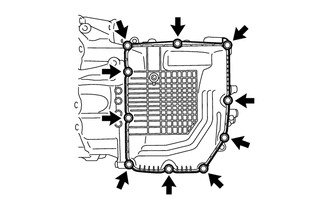
- REMOVE TRANSMISSION CASE SIDE COVER
- REMOVE TRANSMISSION WIRE (w/o Stop And Start System)
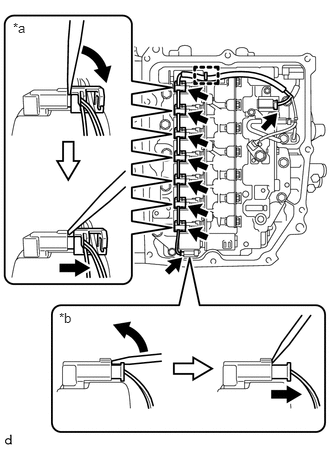
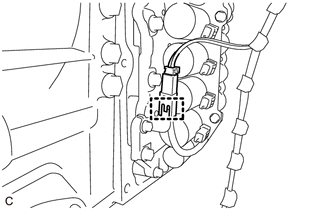
- Disengage the clamp to disconnect the transmission wire from the solenoid lock plate.
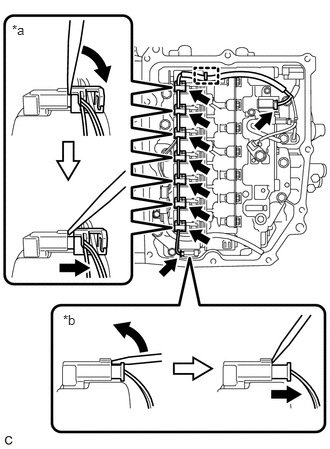
*a Connector (A) *b Connector (B) - Disconnect the 9 solenoid valve connectors.
HINT:
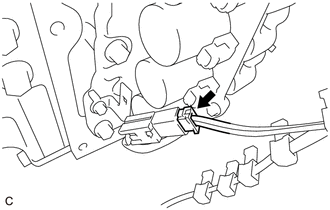
- Using a screwdriver, disconnect the solenoid valve connector (A) using the procedure shown in the illustration.
- Using a screwdriver, disconnect the solenoid valve connector (B) using the procedure shown in the illustration.
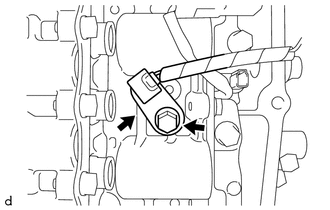
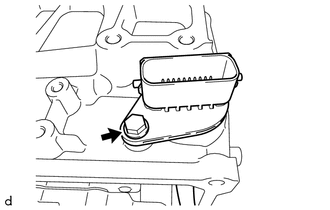
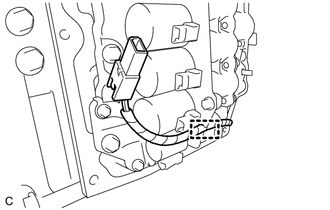
- Remove the bolt and temperature sensor clamp and separate the temperature sensor from the transmission valve body assembly.
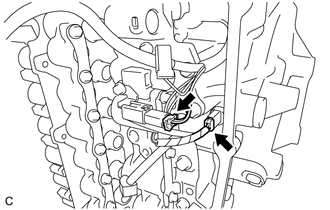
- Disconnect the transmission revolution sensor (NT) connector and transmission revolution sensor (NC) connector.
- Remove the bolt and transmission wire from the automatic transaxle case sub-assembly.
- Disengage the clamp to disconnect the transmission wire from the solenoid lock plate.
- REMOVE TRANSMISSION WIRE (w/ Stop And Start System)
- Disengage the clamp to disconnect the transmission wire from the solenoid lock plate.
*a Connector (A) *b Connector (B) - Disconnect the 9 solenoid valve connectors.
HINT:
- Using a screwdriver, disconnect the solenoid valve connector (A) using the procedure shown in the illustration.
- Using a screwdriver, disconnect the solenoid valve connector (B) using the procedure shown in the illustration.
- Disengage the wire harness clamp to disconnect the transmission wire (oil pump with solenoid assembly).
- Disconnect the transmission wire connector.
- Disengage the clamp to disconnect the transmission wire (oil pump with solenoid assembly) from the solenoid lock plate.
- Remove the bolt and temperature sensor clamp and separate the temperature sensor from the transmission valve body assembly.
- Disconnect the transmission revolution sensor (NT) connector and transmission revolution sensor (NC) connector.
- Remove the bolt and transmission wire from the automatic transmission case sub-assembly.
- Disengage the clamp to disconnect the transmission wire from the solenoid lock plate.