Removal [10/2021 - 10/2022]: Procedure
- PRECAUTION
Refer to PRECAUTION [10/2021 - ]
- ALIGN FRONT WHEELS FACING STRAIGHT AHEAD
- REMOVE HORN BUTTON ASSEMBLY
Refer to REMOVAL [12/2019 - 10/2022]
- REMOVE STEERING WHEEL ASSEMBLY
See step 3
- REMOVE LOWER STEERING COLUMN COVER NOTE:
Removing the lower steering column cover in the incorrect order will cause the parts to break.
- Release the tilt and telescopic lever and fully extend and lower the steering column assembly.
- Lock the tilt and telescopic lever.
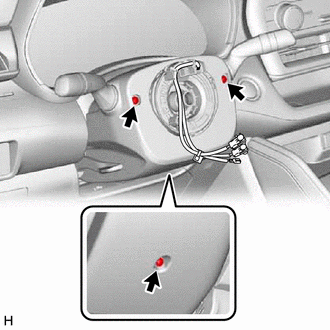
- Remove the 3 screws.

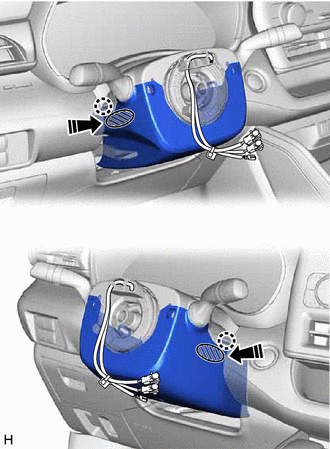
Push Area 
Push in this direction While pressing the push area shown in the illustration to disengage the 2 claws, slightly lower the lower steering column cover.
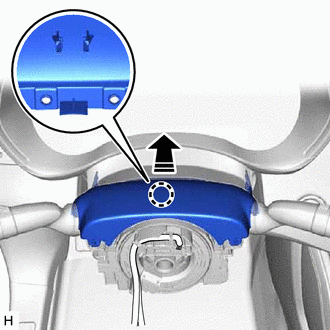
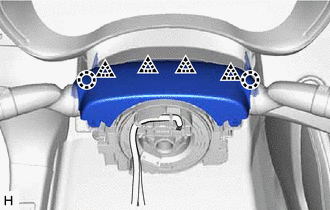
- REMOVE UPPER STEERING COLUMN COVER
- REMOVE TURN SIGNAL SWITCH ASSEMBLY WITH SPIRAL CABLE SUB-ASSEMBLY NOTE:
- Do not remove/install the spiral cable with sensor sub-assembly with the auxiliary battery connected and the ignition switch ON.
- Do not rotate the spiral cable with sensor sub-assembly without the steering wheel assembly installed, with the auxiliary battery connected and the ignition switch ON.
- Ensure that the steering wheel assembly is installed and aligned straight when inspecting the steering sensor.
- Disconnect each connector from the turn signal switch assembly with spiral cable sub-assembly.
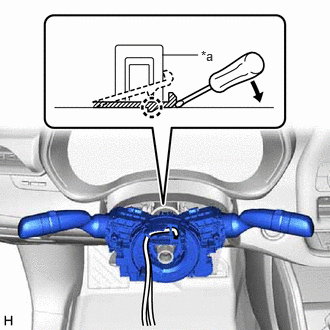
- Using pliers, expand the clamp.
*a Clamp - While holding the clamp expanded, raise the claw using a screwdriver to disengage it, and then remove the turn signal switch assembly with spiral cable sub-assembly from the steering column assembly.
- REMOVE LOWER NO. 1 INSTRUMENT PANEL AIRBAG ASSEMBLY
Refer to REMOVAL [12/2019 - 10/2022]
- REMOVE FRONT WHEEL LH
Refer to PROCEDURE - Step 1
- SEPARATE STEERING INTERMEDIATE SHAFT ASSEMBLY
Refer to PROCEDURE - Step 5
- REMOVE STEERING COLUMN HOLE COVER
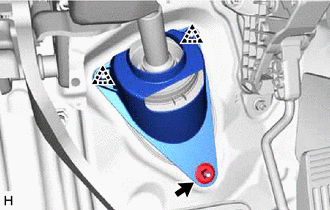
- REMOVE STEERING INTERMEDIATE SHAFT ASSEMBLY
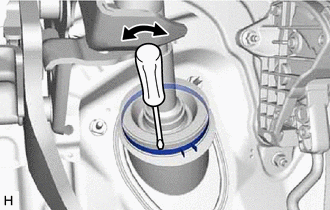
- Using a screwdriver, loosen the clamp as shown in the illustration.
- Remove the bolt and slide the steering intermediate shaft assembly.NOTE:
Do not remove the steering intermediate shaft assembly from the steering column assembly.
*a Matchmark Slide in this direction - Put matchmarks on the steering intermediate shaft assembly and steering column assembly.
- Remove the steering intermediate shaft assembly from the steering column assembly.
- Using a screwdriver, loosen the clamp as shown in the illustration.
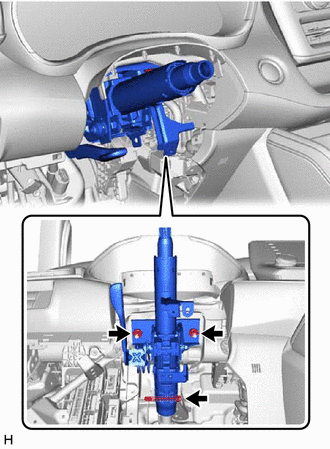
- REMOVE STEERING COLUMN ASSEMBLY