Disassembly [12/2019 - 10/2022]: Procedure
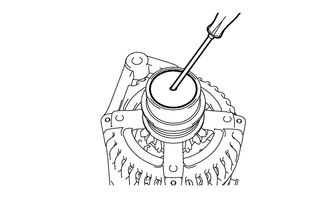
- REMOVE GENERATOR PULLEY CAP
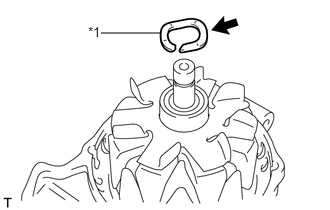
- Using a screwdriver, remove the generator pulley cap from the generator pulley with clutch.NOTE:
- Do not reuse the generator pulley cap.
- If the generator pulley cap is removed, replace the generator pulley cap and generator pulley with clutch with new ones as the correct grease amount cannot be confirmed.
HINT:
Although grease will be observed when the generator pulley cap is removed, this does not indicate a malfunction.
- Using a screwdriver, remove the generator pulley cap from the generator pulley with clutch.
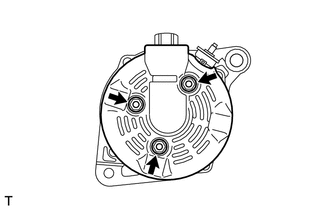
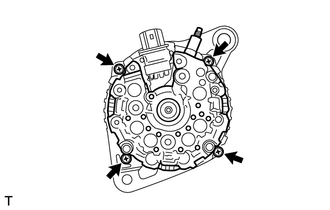
- REMOVE GENERATOR REAR END COVER
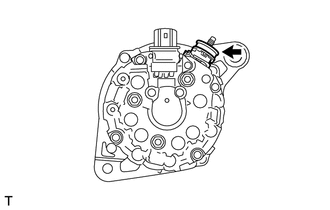
- REMOVE GENERATOR TERMINAL INSULATOR
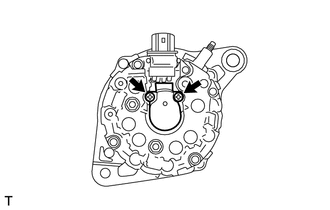
- REMOVE GENERATOR BRUSH HOLDER ASSEMBLY
- REMOVE GENERATOR COIL ASSEMBLY
- REMOVE GENERATOR PULLEY WITH CLUTCH
- Secure the generator drive end frame in a vise between aluminum plates.NOTE:
Do not overtighten the vise.
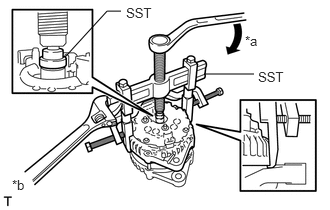
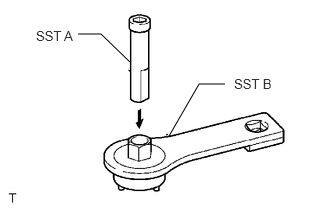
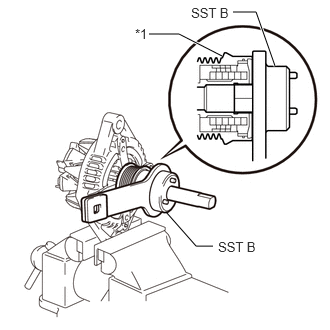
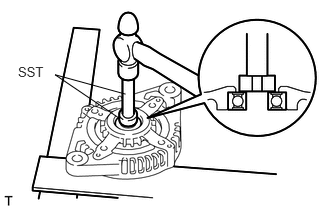
- Install SST (A) to SST (B) as shown in the illustration.
- SST: 09820-63021
- Fit the rotor shaft end into SST (A).
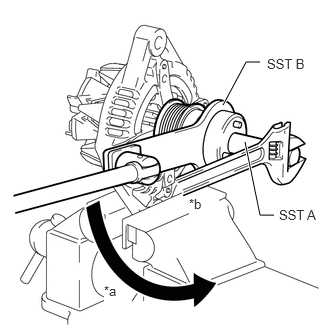
*a Rotor Shaft - Fit SST (B) to the generator pulley with clutch.
*1 Generator Pulley with Clutch - Loosen the generator pulley with clutch by turning SST (B) as shown in the illustration.
*a Turn *b Hold NOTE:- Check that the generator drive end frame is secured in the vise tightly.
- Hold SST (A) tightly during the operation.
- Remove SST (A) and (B) from the generator pulley with clutch.
- Remove the generator pulley with clutch from the rotor shaft.
- Remove the generator drive end frame from the vise.
- Secure the generator drive end frame in a vise between aluminum plates.
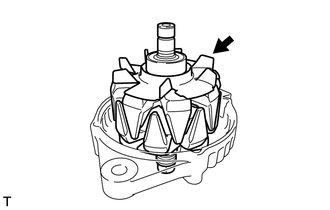
- REMOVE GENERATOR ROTOR ASSEMBLY
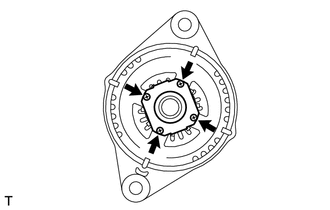
- INSPECT GENERATOR DRIVE END FRAME BEARING
See step 3
- REMOVE GENERATOR DRIVE END FRAME BEARING