Removal [12/2019 - 10/2022]: Procedure
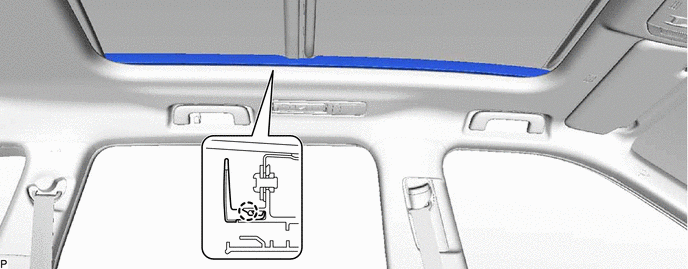
- REMOVE SLIDING ROOF SIDE GARNISH LH
- REMOVE SLIDING ROOF SIDE GARNISH RH
HINT:
Use the same procedure as for the LH side.
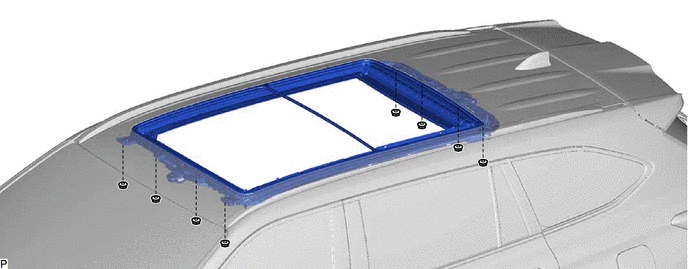
- REMOVE NO. 1 SLIDING ROOF GLASS SUB-ASSEMBLY
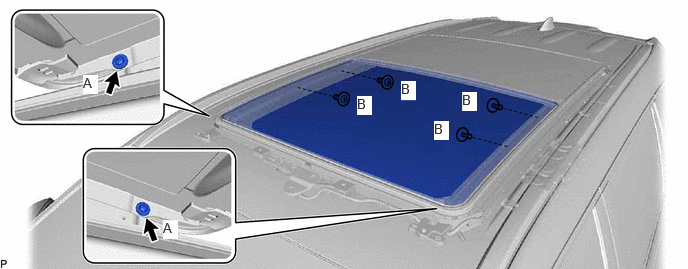
- Open the No. 1 sliding roof glass sub-assembly to a position where the 2 screws (A) can be removed.
- Using a T25 "TORX" socket wrench, remove the 2 screws (A).
- Fully close the No. 1 sliding roof glass sub-assembly.
- Using a T25 "TORX" socket wrench, remove the 4 screws (B) and No. 1 sliding roof glass sub-assembly.NOTE:
To prevent the No. 1 sliding roof glass sub-assembly and sliding roof drive gear assembly from being displaced, fully close the No. 1 sliding roof glass sub-assembly, and then remove the No. 1 sliding roof glass sub-assembly.
- Open the No. 1 sliding roof glass sub-assembly to a position where the 2 screws (A) can be removed.
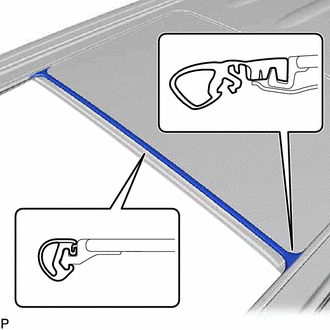
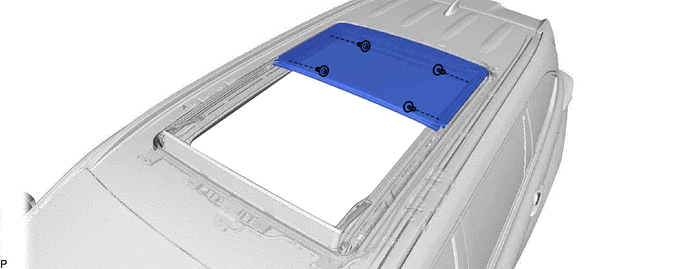
- REMOVE NO. 2 SLIDING ROOF GLASS SUB-ASSEMBLY
- REMOVE CURTAIN SHIELD AIRBAG ASSEMBLY LH
Refer to REMOVAL [12/2019 - 10/2022]
- REMOVE CURTAIN SHIELD AIRBAG ASSEMBLY RH
HINT:
Use the same procedure as for the LH side.
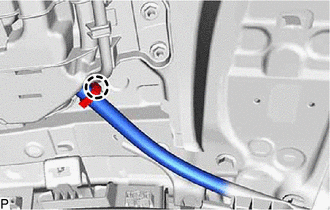
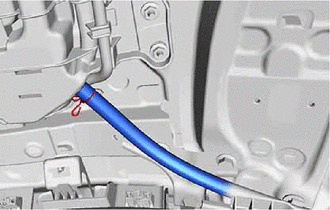
- DISCONNECT SLIDING ROOF DRAIN HOSE
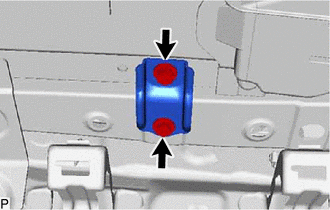
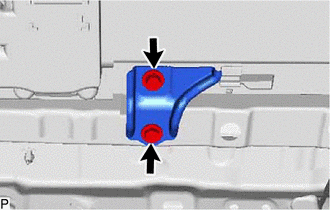
- REMOVE FRONT SLIDING ROOF HOUSING MOUNTING BRACKET LH
- REMOVE FRONT SLIDING ROOF HOUSING MOUNTING BRACKET RH
HINT:
Use the same procedure as for the LH side.
- REMOVE CENTER SLIDING ROOF HOUSING MOUNTING BRACKET LH
- REMOVE CENTER SLIDING ROOF HOUSING MOUNTING BRACKET RH
HINT:
Use the same procedure as for the LH side.
- REMOVE REAR SLIDING ROOF HOUSING MOUNTING BRACKET LH
- REMOVE REAR SLIDING ROOF HOUSING MOUNTING BRACKET RH
HINT:
Use the same procedure as for the LH side.
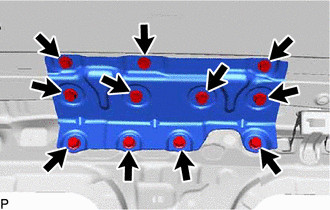
- REMOVE SLIDING ROOF HOUSING ASSEMBLY