Disassembly [12/2019 - ]: Procedure
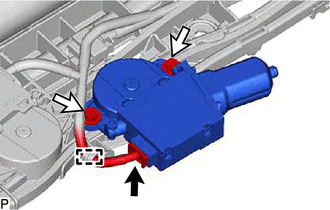
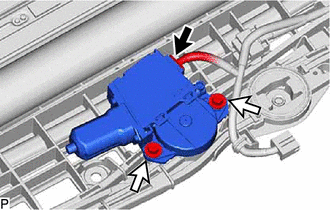
- REMOVE SLIDING ROOF DRIVE GEAR ASSEMBLY (for Sliding Roof)
- REMOVE SLIDING ROOF DRIVE GEAR ASSEMBLY (for Roof Sunshade)
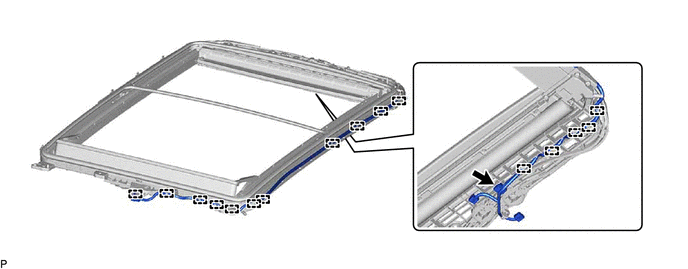
- REMOVE NO. 2 ROOF WIRE
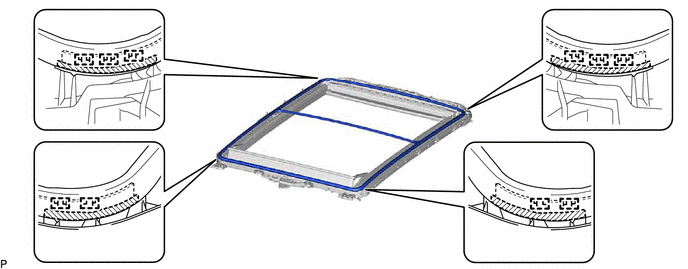
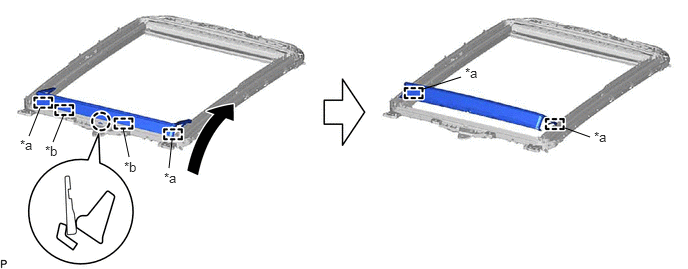
- REMOVE SLIDING ROOF WEATHERSTRIP
- Using a heat light, heat the sliding roof weatherstrip and sliding roof housing sub-assembly.HEATING TEMPERATURE
Item Temperature Sliding Roof Weatherstrip and Sliding Roof Housing Sub-assembly 20 to 30°C (68 to 86°F) NOTE:Do not heat the sliding roof weatherstrip and sliding roof housing sub-assembly excessively.
- Disengage the 10 guides and remove the sliding roof weatherstrip.

Double-sided Tape - -
- Using a heat light, heat the sliding roof weatherstrip and sliding roof housing sub-assembly.
- REMOVE ROOF WIND DEFLECTOR PANEL SUB-ASSEMBLY
- REMOVE SUNSHADE TRIM SUB-ASSEMBLY
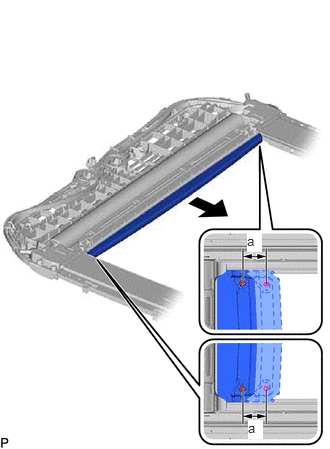
- Slide the sunshade trim sub-assembly as shown in the illustration.
Standard
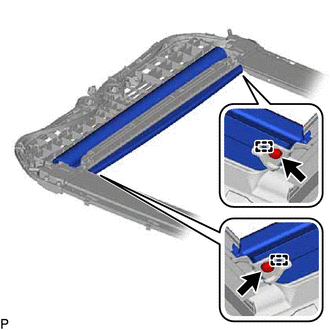
Area Dimension a 30 mm (1.18 in.) - Insert a 1.5 mm hexagon wrench into the sunshade trim sub-assembly as shown in the illustration.
*a Hexagon Wrench NOTE:Make sure that the hexagon wrench does not fall out when removing the sunshade trim sub-assembly.
- Using a T25 "TORX" socket wrench, remove the 2 screws.
- Disengage the 2 guides.
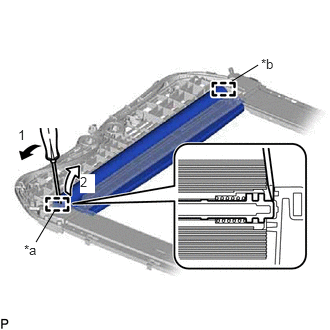
- Using a screwdriver, disengage the pin as indicated by the arrows, in the order shown in the illustration.
*a Pin *b Guide - Disengage the guide to remove the sunshade trim sub-assembly from the sliding roof housing sub-assembly.
- Slide the sunshade trim sub-assembly as shown in the illustration.