Reassembly [12/2019 - ]: Procedure
- INSTALL SUNSHADE TRIM SUB-ASSEMBLY
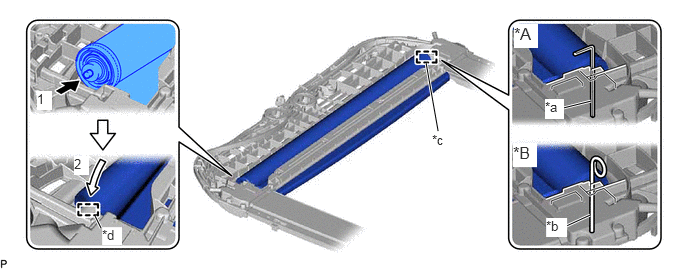
- Engage the guide so that the hexagon wrench (*A) or locking pin (*B) is upright as shown in the illustration.
*A When Reusing the Sunshade Trim Sub-assembly *B When Replacing the Sunshade Trim Sub-assembly *a Hexagon Wrench *b Locking Pin *c Guide *d Pin NOTE:Make sure that the hexagon wrench (*A) or locking pin (*B) does not fall out when installing the sunshade trim sub-assembly.
- Push the pin in the direction indicated by the arrow (1) shown in the illustration.
- Move the sunshade trim sub-assembly in the direction indicated by the arrow (2) shown in the illustration and engage the pin.
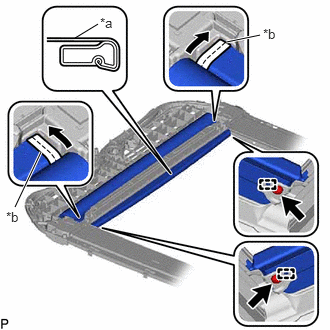
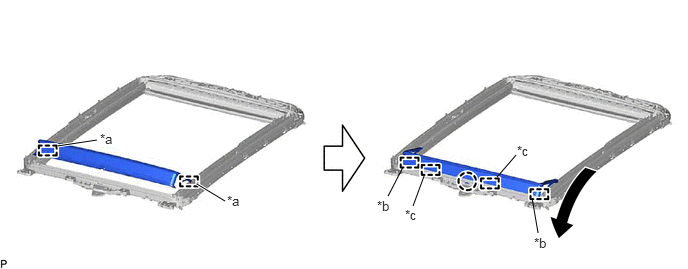
- Wrap the sunshade cover as shown in the illustration.
*a Sunshade Cover *b End of Sunshade Cover - Insert the ends of the sunshade cover into the sliding roof housing sub-assembly as shown in the illustration.
- Engage the 2 guides.
- Using a T25 "TORX" socket wrench, install the sunshade trim sub-assembly to the sliding roof housing sub-assembly with the 2 screws.
Torque: 4.0 N.m (41 kgf/cm, 35 in.lbf)
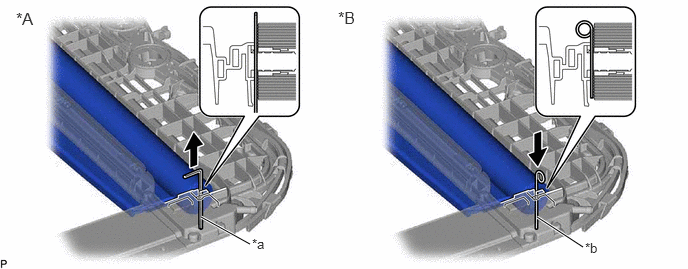
- Remove the 1.5 mm hexagon wrench (*A) or locking pin (*B) as shown in the illustration.
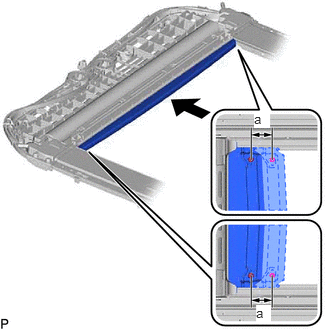
*A When Reusing the Sunshade Trim Sub-assembly *B When Replacing the Sunshade Trim Sub-assembly *a Hexagon Wrench *b Locking Pin - Slide the sunshade trim sub-assembly as shown in the illustration.
Standard
Area Dimension a 30 mm (1.18 in.)
- Engage the guide so that the hexagon wrench (*A) or locking pin (*B) is upright as shown in the illustration.
- INSTALL ROOF WIND DEFLECTOR PANEL SUB-ASSEMBLY
- INSTALL SLIDING ROOF WEATHERSTRIP
- Clean the sliding roof housing sub-assembly surface.
- Using a heat light, heat the sliding roof housing sub-assembly surface.HEATING TEMPERATURE
Item Temperature Sliding Roof Housing Sub-assembly 20 to 30°C (68 to 86°F) NOTE:Do not heat the sliding roof housing sub-assembly excessively.
- Remove the double-sided tape from the sliding roof housing sub-assembly.
- Clean off any tape adhesive residue with cleaner.
- Using a heat light, heat the sliding roof housing sub-assembly surface.
- Coat the installation surface of the sliding roof housing sub-assembly with primer.
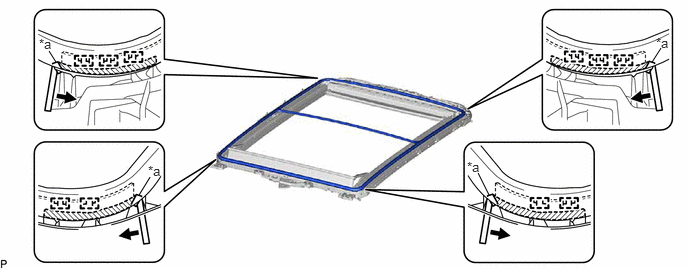
- Engage the 10 guides to temporarily install a new sliding roof weatherstrip.
*a Release Paper - - 
Double-sided Tape - - - Remove the release paper from the sliding roof weatherstrip as shown in the illustration and install the sliding roof weatherstrip.
HINT:
Press the sliding roof weatherstrip firmly to install it.
- Clean the sliding roof housing sub-assembly surface.
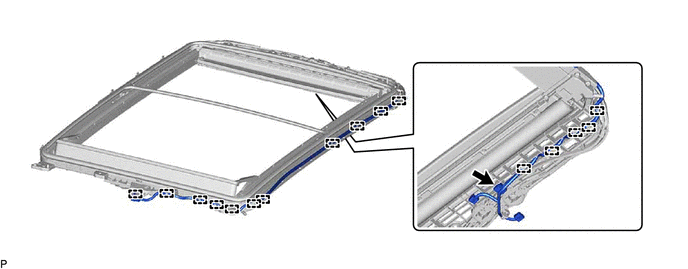
- INSTALL NO. 2 ROOF WIRE
- ADJUST FULLY CLOSED POSITION
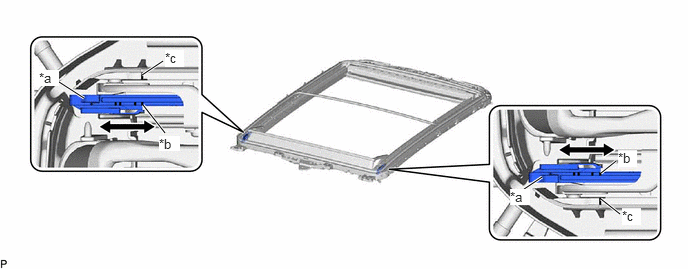
- Using a screwdriver, slide the sliding roof shoe sub-assembly in either direction and align the alignment mark with the edge of the sliding roof rail sub-assembly as shown in the illustration.
*a Sliding Roof Shoe Sub-assembly *b Alignment Mark *c Edge of Sliding Roof Rail Sub-assembly - - HINT:
Tape the screwdriver tip before use.
- Using a screwdriver, slide the sliding roof shoe sub-assembly in either direction and align the alignment mark with the edge of the sliding roof rail sub-assembly as shown in the illustration.
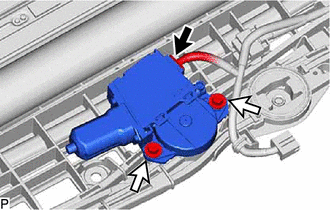
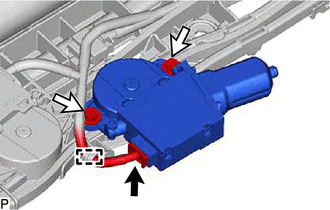
- INSTALL SLIDING ROOF DRIVE GEAR ASSEMBLY (for Roof Sunshade)
- INSTALL SLIDING ROOF DRIVE GEAR ASSEMBLY (for Sliding Roof)