Removal [09/2020 - 11/2023]: Procedure
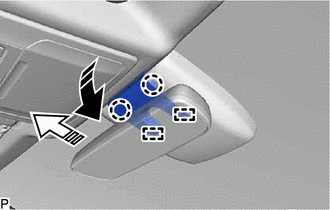
- REMOVE NO. 2 FORWARD RECOGNITION COVER
- Pull the No. 2 forward recognition cover in the direction indicated by the arrow (1) shown in the illustration to disengage the 2 claws.NOTE:
If these claws are disengaged separately, they may break. Insert a molding remover between them and pull it down to disengage the claws simultaneously.

Remove in this Direction (1) 
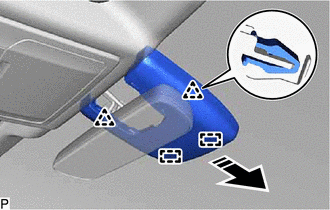
Remove in this Direction (2) - Pull the No. 2 forward recognition cover in the direction indicated by the arrow (2) shown in the illustration to disengage the 2 guides and remove the No. 2 forward recognition cover.
- Pull the No. 2 forward recognition cover in the direction indicated by the arrow (1) shown in the illustration to disengage the 2 claws.
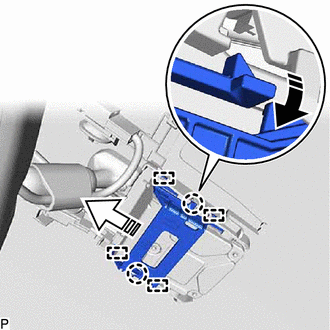
- REMOVE NO. 1 FORWARD RECOGNITION COVER
- REMOVE FORWARD RECOGNITION LATCH
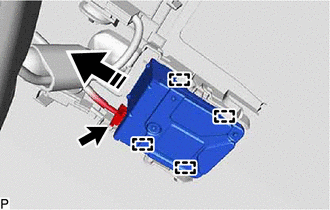
- REMOVE FORWARD RECOGNITION CAMERA NOTE:
If the forward recognition camera has been struck or dropped, replace it with a new one.
- Disconnect the connector.
Remove in this Direction NOTE:Do not pull the harness forcibly when disconnecting the connector.
- Disengage the 4 guides and remove the forward recognition camera as shown in the illustration.NOTE:
- Do not touch the camera lens.
- If the forward recognition camera bracket is deformed or damaged, replace it together with the windshield glass.
- Disconnect the connector.