Disassembly [12/2019 - ]: Procedure
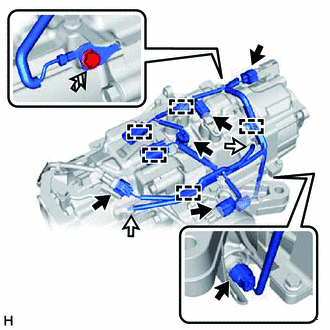
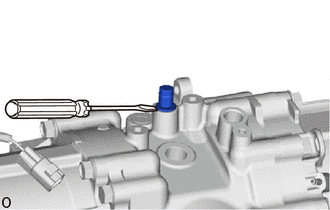
- REMOVE CLUTCH CONTROL SOLENOID WIRE
- REMOVE WIRE HARNESS CLAMP BRACKET
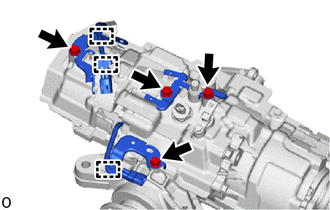
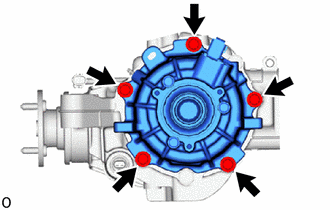
- REMOVE DIFFERENTIAL DISCONNECT COVER
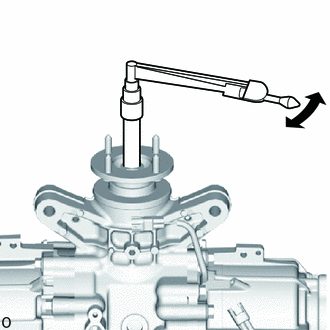
- INSPECT RUNOUT OF REAR DRIVE PINION COMPANION FLANGE SUB-ASSEMBLY
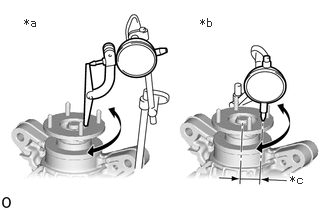
- Using a dial indicator, measure the runout of the rear drive pinion companion flange sub-assembly vertical runout and lateral runout.
Maximum Runout
Item Specified Condition Vertical runout 0.1 mm (0.00394 in.) Lateral runout 0.1 mm (0.00394 in.) *a Vertical Runout *b Lateral Runout *c 30 mm (1.18 in.) NOTE:Measure the runout of the rear drive pinion companion flange sub-assembly horizontally at a position 30 mm (1.18 in.) away from the center of the differential drive pinion shaft.
HINT:
If the runout is more than the maximum value, replace the torque vectoring differential carrier assembly.
- Using a dial indicator, measure the runout of the rear drive pinion companion flange sub-assembly vertical runout and lateral runout.
- INSPECT TOTAL PRELOAD NOTE:
- When replacing the rear drive pinion companion flange sub-assembly and rear differential carrier oil seal, be sure to check the preload.
- If the rear drive pinion companion flange sub-assembly and rear differential carrier oil seal were replaced without checking the preload, replace the torque vectoring differential carrier assembly.
- Using a torque wrench, check the starting torque (total preload) with the teeth of the drive pinion and ring gear in contact.
HINT:
- The torque wrench should be installed as shown in the illustration.
- Record the measured value as it is used during assembly.
- For a more accurate measurement, rotate the bearing forward and backward several times before the measurement.
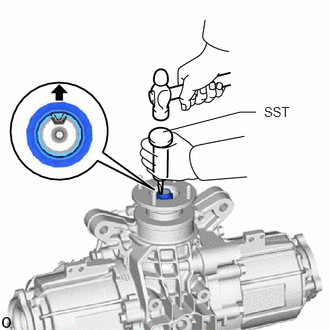
- REMOVE REAR DRIVE PINION NUT
- REMOVE REAR DRIVE PINION COMPANION FLANGE SUB-ASSEMBLY
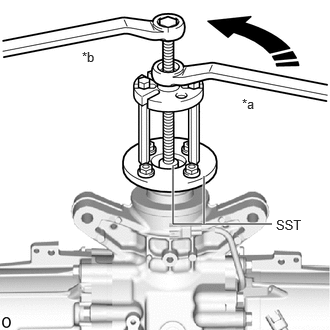
- REMOVE REAR DIFFERENTIAL CARRIER OIL SEAL (for Front Side)
See step 6 [12/2019 - 10/2022], or see step 6 [10/2022 - 11/2023], or see step 6 [11/2023 - ]
- REMOVE NO. 1 REAR DIFFERENTIAL DUST DEFLECTOR (for LH Side)
- REMOVE NO. 1 REAR DIFFERENTIAL DUST DEFLECTOR (for RH Side)
HINT:
Perform the same procedure as for the LH side.
- REMOVE ELECTRO MAGNETIC CONTROL COUPLING SUB-ASSEMBLY (for LH Side)
- REMOVE ELECTRO MAGNETIC CONTROL COUPLING SUB-ASSEMBLY (for RH Side)
HINT:
Perform the same procedure as for the LH side.
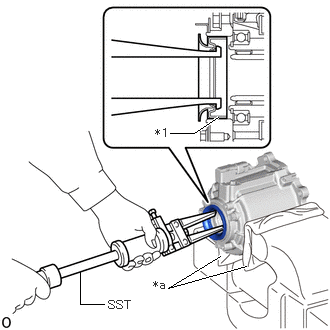
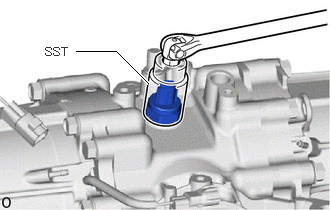
- REMOVE TRANSMISSION COUPLING DUST SEAL (for LH Side)
- Secure the electro magnetic control coupling sub-assembly in a vise using aluminum plates and cloths.NOTE:
Do not overtighten the vise, as the electro magnetic control coupling sub-assembly may become deformed.
*1 Transmission Coupling Dust Seal *a Cloth - Using SST, remove the transmission coupling dust seal from the electro magnetic control coupling sub-assembly.
- SST: 09308-00010
- Secure the electro magnetic control coupling sub-assembly in a vise using aluminum plates and cloths.
- REMOVE TRANSMISSION COUPLING DUST SEAL (for RH Side)
HINT:
Perform the same procedure as for the LH side.
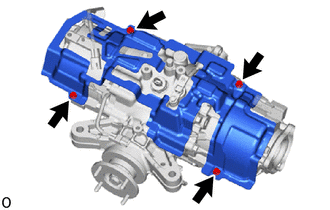
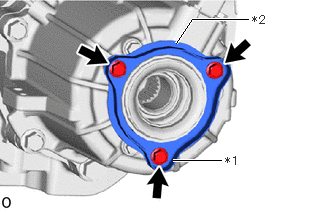
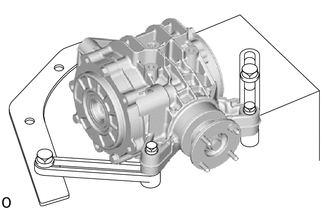
- SECURE REAR DIFFERENTIAL CARRIER ASSEMBLY
- INSPECT RUNOUT OF REAR DRIVE PINION COMPANION FLANGE SUB-ASSEMBLY
- Using a dial indicator, measure the runout of the rear drive pinion companion flange sub-assembly vertical runout and lateral runout.
Maximum Runout
Item Specified Condition Vertical runout 0.1 mm (0.00394 in.) Lateral runout 0.1 mm (0.00394 in.) *a Vertical Runout *b Lateral Runout *c 30 mm (1.18 in.) NOTE:Measure the runout of the rear drive pinion companion flange sub-assembly horizontally at a position 30 mm (1.18 in.) away from the center of the differential drive pinion shaft.
HINT:
If the runout is more than the maximum value, replace the rear differential carrier assembly.
- Using a dial indicator, measure the runout of the rear drive pinion companion flange sub-assembly vertical runout and lateral runout.
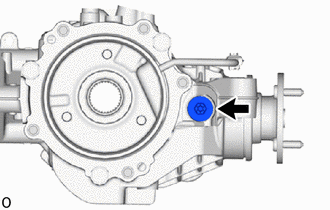
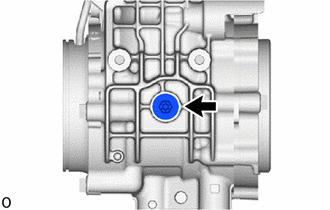
- REMOVE REAR DIFFERENTIAL FILLER PLUG
- REMOVE REAR DIFFERENTIAL DRAIN PLUG
- REMOVE REAR DIFFERENTIAL CARRIER COVER PLUG
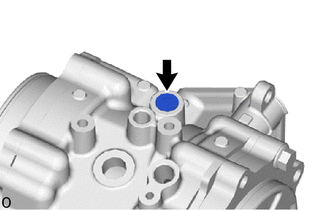
- REMOVE TRANSMISSION REVOLUTION SENSOR
- REMOVE NO. 2 4 WHEEL DRIVE POSITION SWITCH
- REMOVE TEMPERATURE SENSOR
See step 2
- REMOVE REAR DIFFERENTIAL BREATHER PLUG
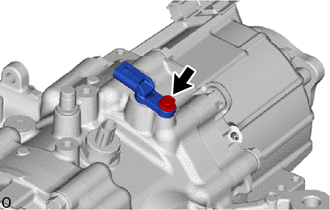
- REMOVE REAR DIFFERENTIAL CARRIER OIL SEAL (for LH Side)
See step 10 [12/2019 - 10/2022], or see step 10 [10/2022 - 11/2023], or see step 10 [11/2023 - ]
- REMOVE REAR DIFFERENTIAL CARRIER OIL SEAL (for RH Side)
See step 11 [12/2019 - 10/2022], or see step 11 [10/2022 - 11/2023], or see step 11 [11/2023 - ]