Reassembly [12/2019 - 10/2021]: Procedure
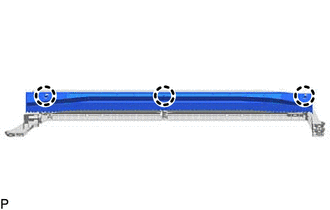
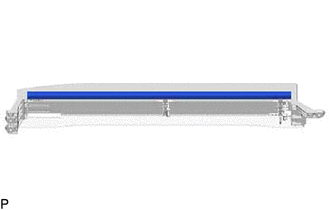
- INSTALL NO. 3 RADIATOR GRILLE SEAL
- INSTALL NO. 1 RADIATOR GRILLE SEAL
HINT:
When installing the No. 1 radiator grille seal, heat the radiator shutter sub-assembly using a heat light.
Standard Measurement
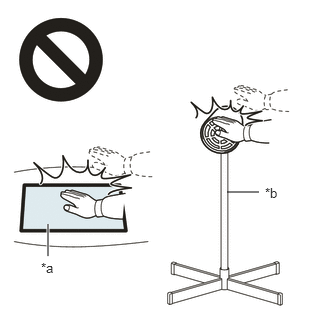
Item Measurement Radiator Shutter Sub-assembly 20 to 30 °C (68 to 86 °F) WARNING:- Do not touch the heat light and heated parts, touching the heat light may result in burns.
- Touching heated parts for a long time may result in burns.
*a Heated Part *b Heat Light NOTE:Do not heat the radiator shutter sub-assembly excessively.
- Clean the radiator shutter sub-assembly surface.
- Using a heat light, heat the radiator shutter sub-assembly surface.
- Remove any remaining double-sided tape from the radiator shutter sub-assembly.
- Wipe off any tape adhesive residue with cleaner.
- Install a new No. 1 radiator grille seal.
- Using a heat light, heat the radiator shutter sub-assembly surface.
- Remove the release paper from the No. 1 radiator grille seal.
HINT:
After removing the release paper, keep the exposed adhesive free from foreign matter.
- Install the No. 1 radiator grille seal.NOTE:
- If the No. 1 radiator grille seal has been removed, it must be replaced with a new one as it may be deformed or the strength of its adhesive may be deteriorated.
- Press the No. 1 radiator grille seal firmly to install it.
- INSTALL NO. 2 RADIATOR GRILLE SEAL
HINT:
- When installing the No. 2 radiator grille seal, heat the radiator shutter sub-assembly using a heat light.
- Use the same procedure for the RH side and LH side.
Standard Measurement
Item Measurement Radiator Shutter Sub-assembly 20 to 30 °C (68 to 86 °F) WARNING:- Do not touch the heat light and heated parts, touching the heat light may result in burns.
- Touching heated parts for a long time may result in burns.
*a Heated Part *b Heat Light NOTE:Do not heat the radiator shutter sub-assembly excessively.
- Clean the radiator shutter sub-assembly surface.
- Using a heat light, heat the radiator shutter sub-assembly surface.
- Remove any remaining double-sided tape from the radiator shutter sub-assembly.
- Wipe off any tape adhesive residue with cleaner.
- Install a new No. 2 radiator grille seal.
- Using a heat light, heat the radiator shutter sub-assembly surface.
- Remove the release paper from the No. 2 radiator grille seal.
HINT:
After removing the release paper, keep the exposed adhesive free from foreign matter.
- Install the No. 2 radiator grille seal.NOTE:
- If the No. 2 radiator grille seal has been removed, it must be replaced with a new one as it may be deformed or the strength of its adhesive may be deteriorated.
- Press the No. 2 radiator grille seal firmly to install it.
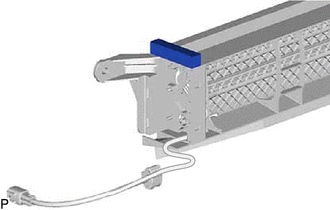
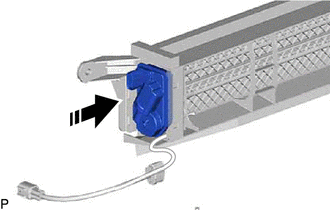
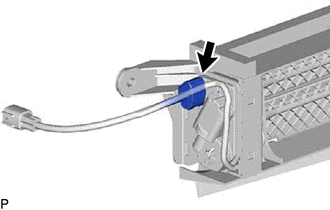
- INSTALL SWING GRILLE ACTUATOR ASSEMBLY
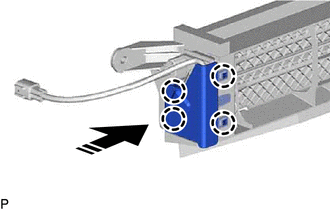
- INSTALL MOTOR COVER