Installation [12/2019 - 11/2023]: Procedure
WARNING: This page is about a different variant/trim than selected.
- INSTALL BATTERY VOLTAGE SENSOR WARNING:
Be sure to wear insulated gloves.
- Install the battery voltage sensor to the HV battery with the 2 nuts.
Torque: 7.5 N.m (76 kgf/cm, 66 in.lbf)
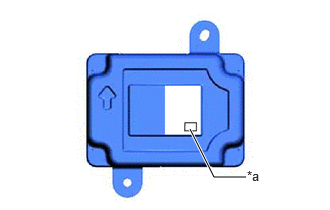
NOTE:- Check identification code of the label.
- If the battery voltage sensor has been struck or dropped, replace it.
*a Identification Code AA - Connect the 3 battery voltage sensor connectors.NOTE:
Make sure that the connector is connected securely.
- Install the battery voltage sensor to the HV battery with the 2 nuts.
- INSTALL NO. 6 HV BATTERY CARRIER BRACKET WARNING:
Be sure to wear insulated gloves.
- Install the No. 6 HV battery carrier bracket with the 4 nuts.
Torque: 7.5 N.m (76 kgf/cm, 66 in.lbf)
- Engage the clamp.
- Install the No. 6 HV battery carrier bracket with the 4 nuts.
- INSTALL NO. 1 HYBRID BATTERY SHIELD SUB-ASSEMBLY
Refer to PROCEDURE - Step 2
- CONNECT FLOOR WIRE WARNING:
Be sure to wear insulated gloves.
- Engage the 3 clamps to connect the floor wire.
- Connect the electric vehicle battery plug assembly connector.
- INSTALL HV BATTERY JUNCTION BLOCK ASSEMBLY
Refer to INSTALLATION [12/2019 - 11/2023]