Reassembly [12/2019 - ]: Procedure
- INSTALL NO. 1 ROOF CARRIER SEAL
HINT:
When installing new No. 1 roof carrier seals, heat the front roof rack leg using a heat light.
Standard
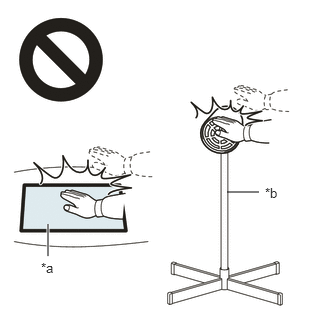
Item Temperature Front Roof Rack Leg 20 to 30°C (68 to 86°F) WARNING:- Do not touch the heat light and heated parts, touching the heat light may result in burns.
- Touching heated parts for a long time may result in burns.
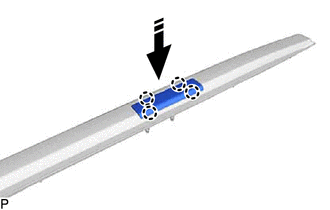
*a Heated Part *b Heat Light NOTE:Do not heat the front roof rack leg excessively.
- Clean the front roof rack leg.
- Using a heat light, heat the front roof rack leg surface.
- Remove any remaining double-sided tape from the front roof rack leg.
- Wipe off any tape adhesive residue with cleaner.
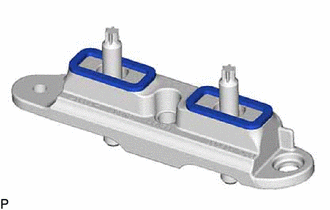
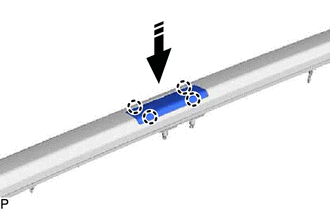
- Install 2 new No. 1 roof carrier seals.
- Using a heat light, heat the front roof rack leg surface.
- Remove the release paper from each No. 1 roof carrier seal.
HINT:
After removing the release paper, keep the exposed adhesive free from foreign matter.
- Install the 2 No. 1 roof carrier seals.
HINT:
Press the No. 1 roof carrier seals to install them.
- INSTALL NO. 2 ROOF CARRIER SEAL
HINT:
When installing new No. 2 roof carrier seals, heat the rear roof rack leg using a heat light.
Standard
Item Temperature Rear Roof Rack Leg 20 to 30°C (68 to 86°F) WARNING:- Do not touch the heat light and heated parts, touching the heat light may result in burns.
- Touching heated parts for a long time may result in burns.
*a Heated Part *b Heat Light NOTE:Do not heat the rear roof rack leg excessively.
- Clean the rear roof rack leg.
- Using a heat light, heat the rear roof rack leg surface.
- Remove any remaining double-sided tape from the rear roof rack leg.
- Wipe off any tape adhesive residue with cleaner.
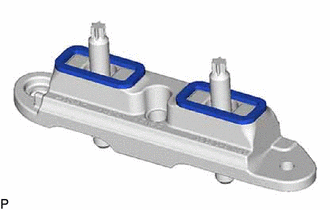
- Install 2 new No. 2 roof carrier seals.
- Using a heat light, heat the rear roof rack leg surface.
- Remove the release paper from each No. 2 roof carrier seal.
HINT:
After removing the release paper, keep the exposed adhesive free from foreign matter.
- Install the 2 No. 2 roof carrier seals.
HINT:
Press the No. 2 roof carrier seals to install them.
- INSTALL FRONT ROOF SIDE GARNISH SUB-ASSEMBLY
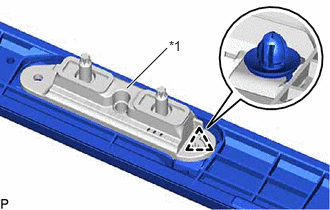
- Install 2 new clips to the front roof side garnish sub-assembly.
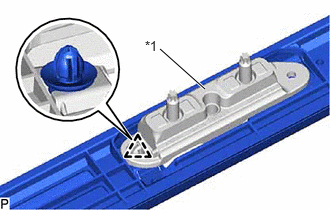
- Engage the clip.
*1 Rear Roof Rack Leg - Install the rear roof rack leg with the bolt.
Torque: 5.5 N.m (56 kgf/cm, 49 in.lbf)
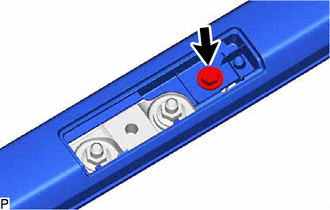
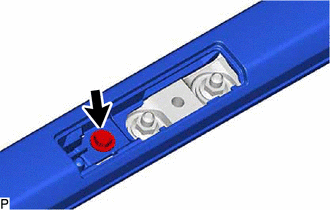
- Engage the clip.
*1 Front Roof Rack Leg - Install the front roof side garnish sub-assembly to the front roof rack leg with the bolt.
Torque: 5.5 N.m (56 kgf/cm, 49 in.lbf)
- INSTALL NO. 1 ROOF SIDE GARNISH LID
- INSTALL NO. 2 ROOF SIDE GARNISH LID