Reassembly [12/2019 - ]: Procedure
- INSTALL REAR SEAT CUSHION FRAME SUB-ASSEMBLY LH
- INSTALL FRONT INNER SEAT TRACK UPPER RAIL BRACKET LH
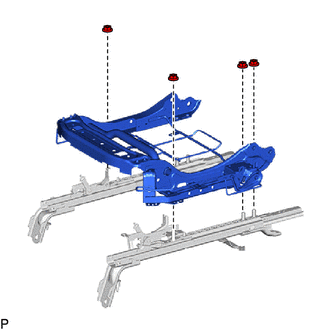
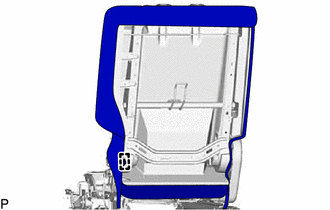
- INSTALL REAR SEATBACK FRAME SUB-ASSEMBLY LH
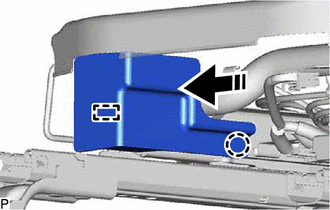
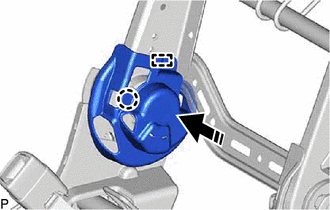
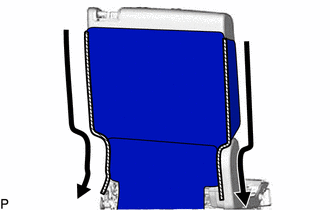
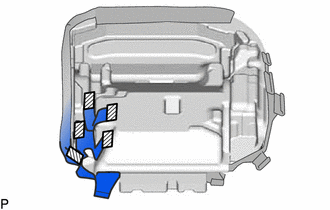
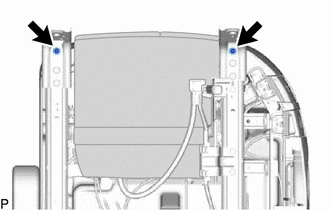
- Temporarily install the rear seatback frame sub-assembly LH to the No. 1 seat cushion frame sub-assembly LH as shown in the illustration.

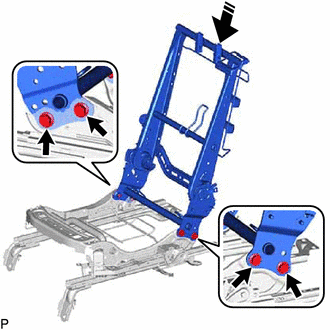
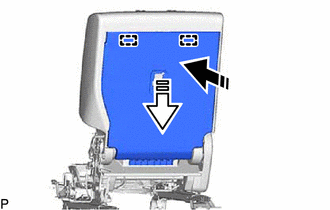
Install in this Direction - Temporarily install the 4 bolts.
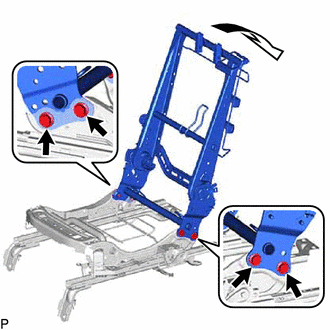
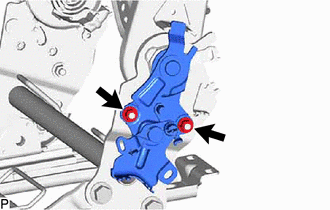
- Tighten the 4 bolts while pulling the rear seatback frame sub-assembly LH as shown in the illustration.
Torque: 42 N.m (428 kgf/cm, 31 ft.lbf)
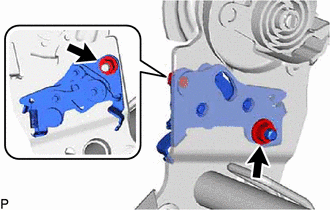
- Temporarily install the rear seatback frame sub-assembly LH to the No. 1 seat cushion frame sub-assembly LH as shown in the illustration.
- INSTALL NO. 2 RECLINING CONTROL LINK SUB-ASSEMBLY LH
- INSTALL NO. 1 RECLINING CONTROL LINK SUB-ASSEMBLY LH
- INSTALL REAR SEAT RECLINING CONTROL CABLE
- INSTALL REAR NO. 1 SEAT TRACK CONTROL CABLE ASSEMBLY LH
- INSTALL REAR SEAT WIRE LH
- INSTALL REAR NO. 2 SEAT CUSHION HINGE UPPER COVER RH
- INSTALL REAR NO. 2 SEAT CUSHION HINGE UPPER COVER LH
- INSTALL RECLINING HINGE COVER LH
- INSTALL REAR NO. 1 SEAT RECLINING COVER LH
- INSTALL REAR SEAT INNER BELT ASSEMBLY LH
Refer to PROCEDURE - Step 1
- INSTALL REAR SEAT CUSHION HINGE COVER LH
- INSTALL REAR NO. 1 SEAT RECLINING COVER RH
- INSTALL REAR SEAT CUSHION REAR MOULDING LH
- INSTALL RECLINING REMOTE CONTROL BEZEL LH
- INSTALL SEAT HEATER ASSEMBLY (w/ Seat Heater System)
Refer to PROCEDURE - Step 1
- INSTALL SEPARATE TYPE REAR SEATBACK COVER
HINT:
When installing a separate type rear seatback cover, refer to precaution in order to prevent wrinkles from forming.
Refer to PRECAUTION [12/2019 - ]
- INSTALL SEPARATE TYPE REAR SEATBACK COVER WITH PAD
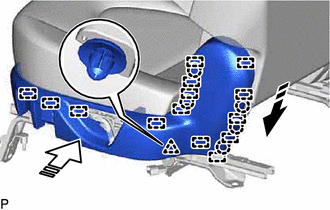
- INSTALL REAR SEATBACK BOARD SUB-ASSEMBLY LH
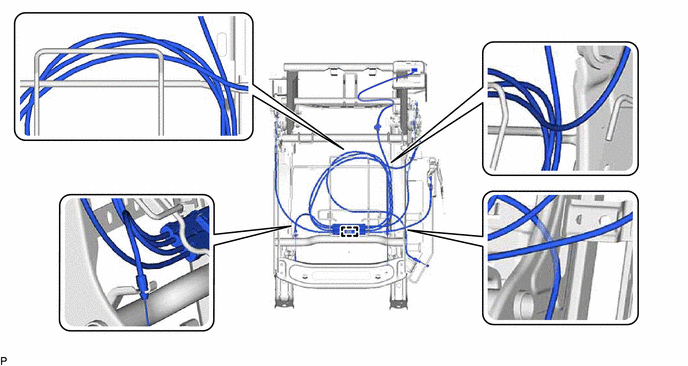
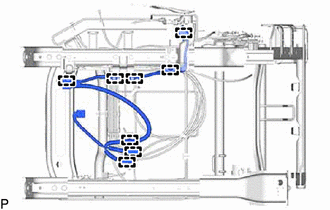
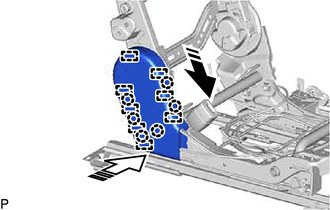
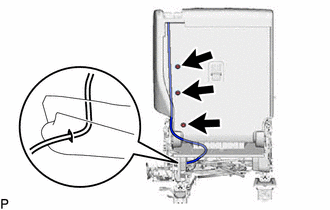
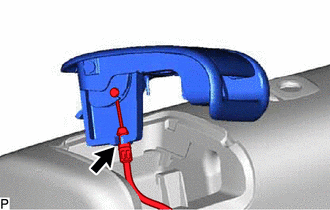
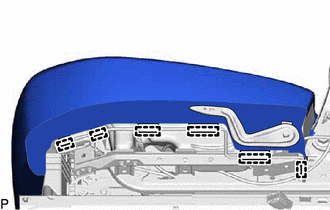
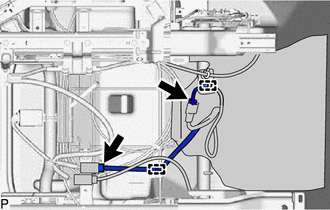
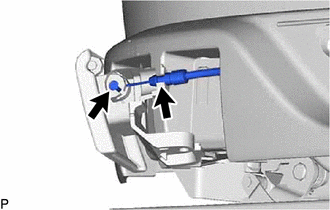
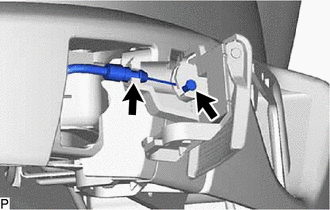
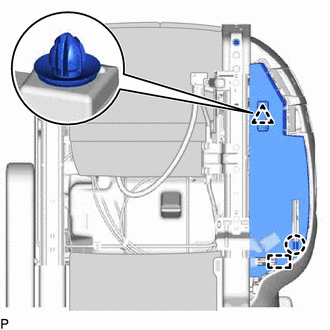
- Engage the rear seat reclining control cable as shown in the illustration.NOTE:
As shown in the illustration, pass the rear seat reclining control cable to the left of the clips used to install the rear seatback board sub-assembly LH.
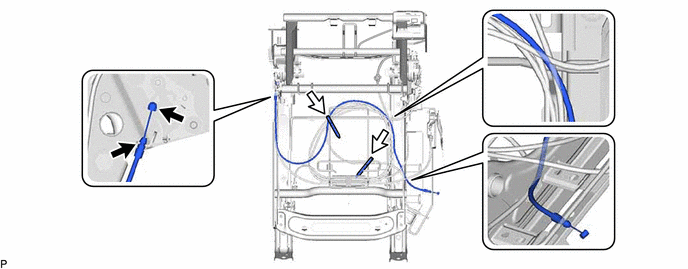
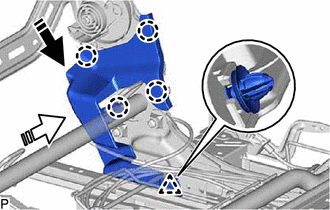
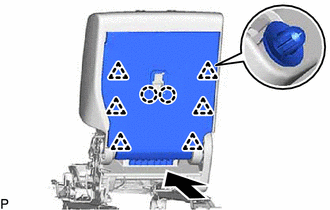
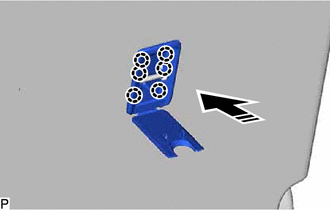
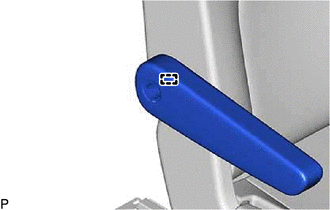
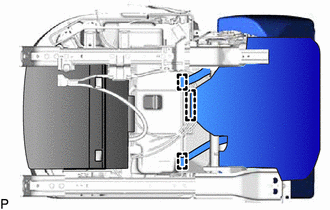
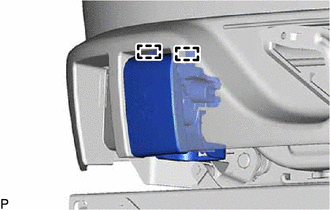
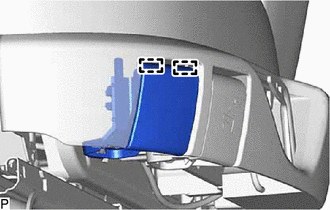
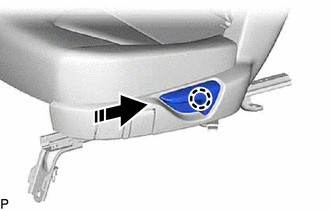
- Engage the 2 guides as shown in the illustration.
Install in this Direction (1) 
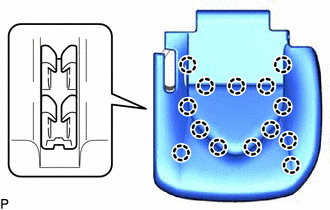
Install in this Direction (2) - Engage the 6 clips and 2 claws as shown in the illustration to install the rear seatback board sub-assembly LH.
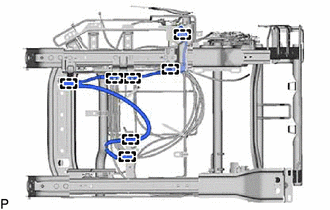
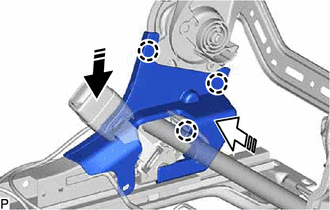
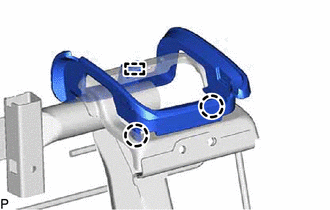
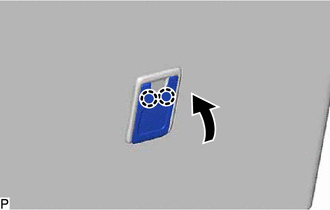
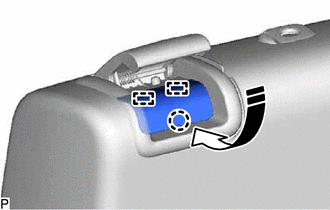
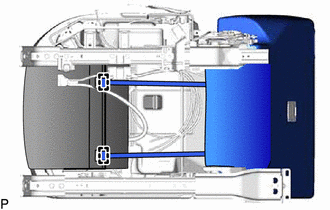
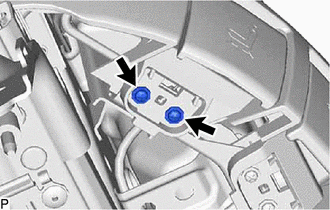
- Engage the hook.
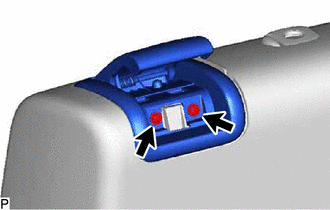
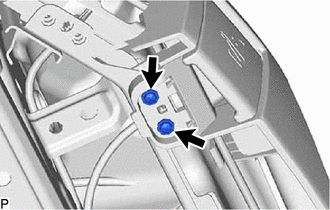
- Close the 2 fasteners as shown in the illustration.

Fastener
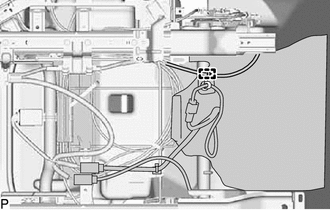
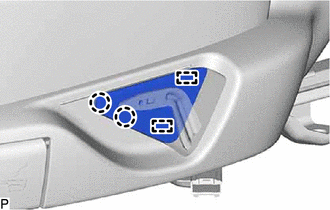
- Engage the rear seat reclining control cable as shown in the illustration.
- INSTALL REAR SEATBACK COVER LH
- INSTALL RECLINING REMOTE CONTROL LEVER SUB-ASSEMBLY LH
- INSTALL REAR SEATBACK LOCK STRIKER COVER LH
- INSTALL SEAT ARMREST ASSEMBLY LH
- INSTALL NO. 1 SEAT ARMREST CAP
- INSTALL SEAT HEATER CONTROL SUB-ASSEMBLY LH (w/ Seat Heater System)
- INSTALL SEAT HEATER ASSEMBLY (w/ Seat Heater System)
Refer to PROCEDURE - Step 1
- INSTALL SEPARATE TYPE REAR SEAT CUSHION COVER
HINT:
When installing a separate type rear seat cushion cover, refer to precaution in order to prevent wrinkles from forming.
Refer to PRECAUTION [12/2019 - ]
- INSTALL SEPARATE TYPE REAR SEAT CUSHION COVER WITH PAD
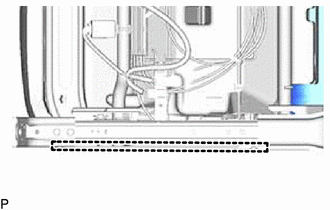
- Temporarily install the separate type rear seat cushion cover with pad to the No. 1 seat cushion frame sub-assembly LH.
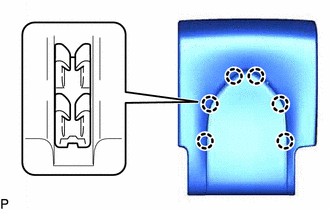
- Engage the 6 hooks.
- Engage the hook.
- Engage the 2 hooks.
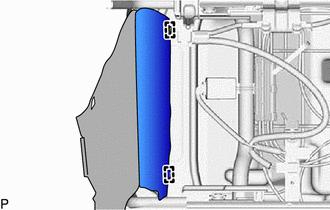
- w/ Seat Heater System:
- Engage the 2 clamps.
- Connect the 2 connectors.
- Engage the clamp.
- Engage the 3 hooks.
- Engage the 2 hooks to install the separate type rear seat cushion cover with pad.
- INSTALL REAR SEAT CUSHION MOULDING LH
- INSTALL REAR SEAT NO. 2 LOCK CONTROL LEVER SUB-ASSEMBLY LH
- INSTALL REAR SEAT NO. 1 LOCK CONTROL LEVER SUB-ASSEMBLY LH
- INSTALL SEAT ADJUSTER COVER CAP LH
- INSTALL REAR SEAT CUSHION UNDER COVER LH
- INSTALL RECLINING ADJUSTER RELEASE HANDLE LH
- INSTALL SEAT ADJUSTER COVER CAP