Removal [10/2022 - 11/2023]: Procedure
- PRECAUTION NOTE:
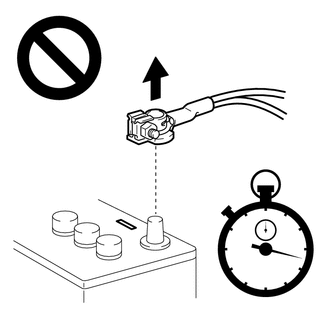
After turning the ignition switch off, waiting time may be required before disconnecting the cable from the negative (-) auxiliary battery terminal. Therefore, make sure to read the disconnecting the cable from the negative (-) auxiliary battery terminal notices before proceeding with work.
- REMOVE BATTERY SERVICE HOLE COVER (for HV Model)
Refer to PROCEDURE - Step 1
- DISCONNECT CABLE FROM NEGATIVE AUXILIARY BATTERY TERMINAL
for A25A-FXS: Refer to PROCEDURE - Step 2
for T24A-FTS: Refer to PROCEDURE - Step 1
WARNING:Wait at least 90 seconds after disconnecting the cable from the negative (-) auxiliary battery terminal to disable the SRS system.
NOTE:When disconnecting the cable, some systems need to be initialized after the cable is reconnected.
Refer to INITIALIZATION [10/2022 - 11/2023]
- REMOVE FRONT SEAT HEADREST ASSEMBLY
- Remove the front seat headrest assembly from the front seat assembly RH.
- REMOVE FRONT OUTER SEAT TRACK BRACKET COVER
- REMOVE FRONT INNER SEAT TRACK BRACKET COVER
- REMOVE SEAT TRACK COVER
- REMOVE INNER SEAT TRACK BRACKET COVER
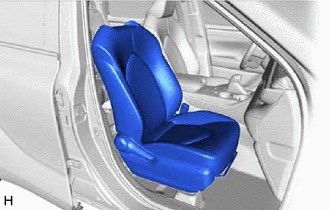
- REMOVE FRONT SEAT ASSEMBLY RH
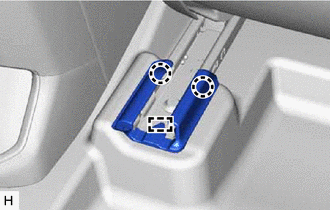
- Using a T50 "TORX" socket wrench, remove the 2 bolts on the rear side of the front seat assembly RH.
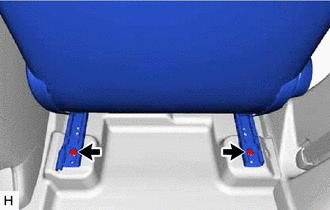
- Operate the seat track adjusting handle and move the front seat assembly RH to the rearmost position.
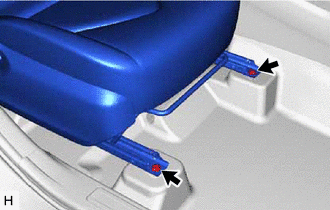
- Using a T50 "TORX" socket wrench, remove the 2 bolts on the front side of the front seat assembly RH.
- Operate the seat track adjusting handle and move the front seat assembly RH to the center position.
- Operate the reclining adjuster release handle and move the seatback to the upright position.
- Disconnect the front seat airbag assembly connector under the front seat assembly RH.NOTE:
When disconnecting any airbag connector, take care not to damage the airbag wire harness.
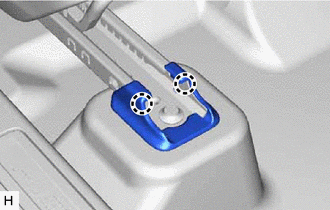
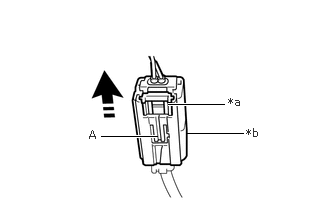
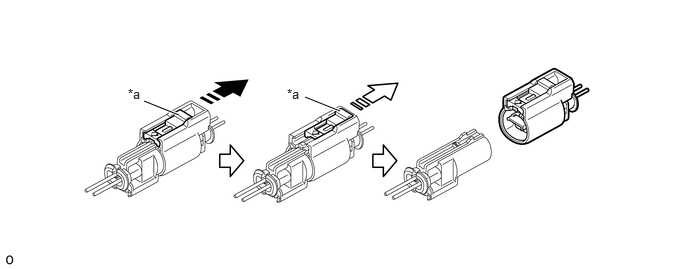
- Push down the white housing lock and slide the yellow CPA as shown in the illustration. (At this time, the connector cannot be disconnected yet.)
*a White Housing Lock *b Yellow CPA 
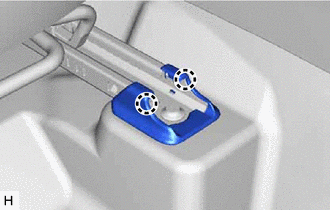
Slide in this Direction - Push down the white housing lock again and disconnect the connector.NOTE:
Do not push down the part (A) shown in the illustration when disconnecting the connector.
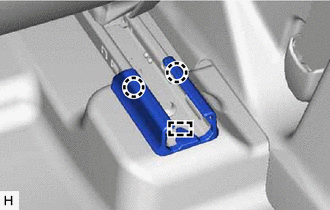
- Push down the white housing lock and slide the yellow CPA as shown in the illustration. (At this time, the connector cannot be disconnected yet.)
- Disconnect the front seat cushion airbag assembly RH connector under the front seat assembly RH.NOTE:
When disconnecting any airbag connector, take care not to damage the airbag wire harness.
- Disconnect each connector and disengage each clamp under the front seat assembly RH.
- Remove the front seat assembly RH.NOTE:
Be careful not to damage the vehicle body.
- Using a T50 "TORX" socket wrench, remove the 2 bolts on the rear side of the front seat assembly RH.