Reassembly [09/2020 - ]: Procedure
- INSTALL FRONT BUMPER SIDE STAY LH
HINT:
Perform this procedure only when replacement of the front bumper side stay LH is necessary.
See step 1
- INSTALL FRONT BUMPER SIDE STAY RH
HINT:
Use the same procedure as for the LH side.
- INSTALL NO. 2 FRONT BUMPER REINFORCEMENT
HINT:
Perform this procedure only when replacement of the No. 2 front bumper reinforcement is necessary.
See step 3
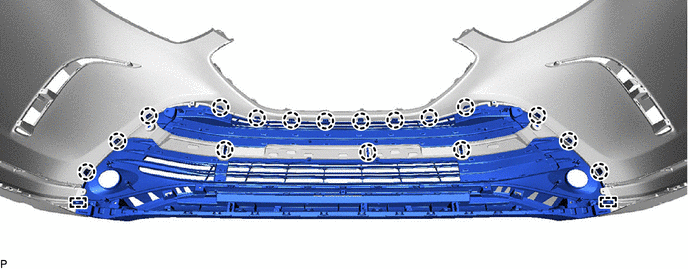
- INSTALL FRONT BUMPER REINFORCEMENT SUB-ASSEMBLY
HINT:
Perform this procedure only when replacement of the front bumper reinforcement sub-assembly is necessary.
See step 4
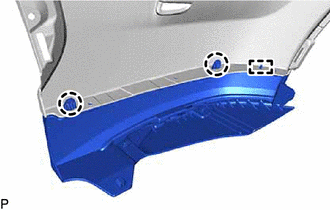
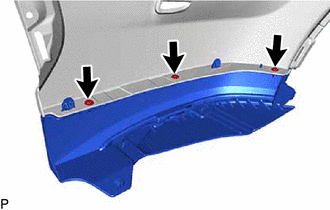
- INSTALL FRONT BUMPER LOWER ABSORBER
HINT:
Perform this procedure only when replacement of the front bumper lower absorber is necessary.
See step 5
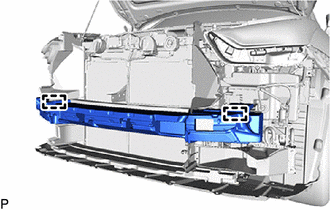
- INSTALL FRONT BUMPER ENERGY ABSORBER
HINT:
Perform this procedure only when replacement of the front bumper energy absorber is necessary.
- INSTALL FRONT BUMPER FILLER LH
- INSTALL FRONT BUMPER FILLER RH
HINT:
Use the same procedure as for the LH side.
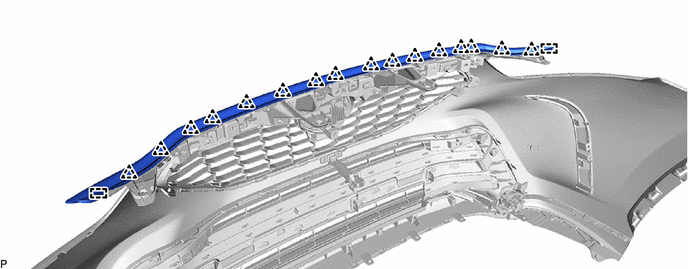
- INSTALL LOWER RADIATOR GRILLE SUB-ASSEMBLY
- INSTALL FRONT BUMPER SIDE MOULDING LH
- INSTALL FRONT BUMPER SIDE MOULDING RH
HINT:
Use the same procedure as for the LH side.
- INSTALL NO. 2 FRONT BUMPER EXTENSION INSERT LH
- INSTALL NO. 2 FRONT BUMPER EXTENSION INSERT RH
HINT:
Use the same procedure as for the LH side.
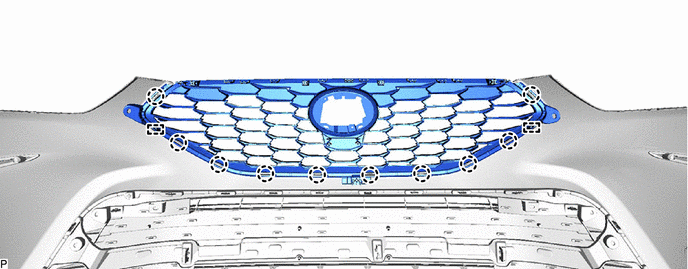
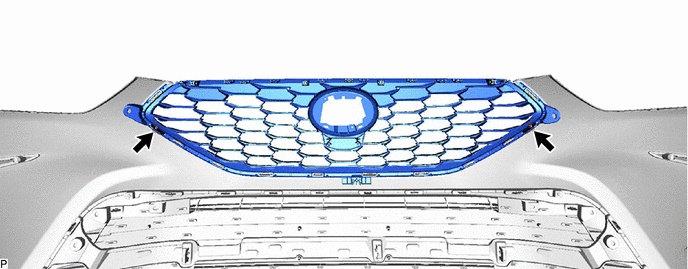
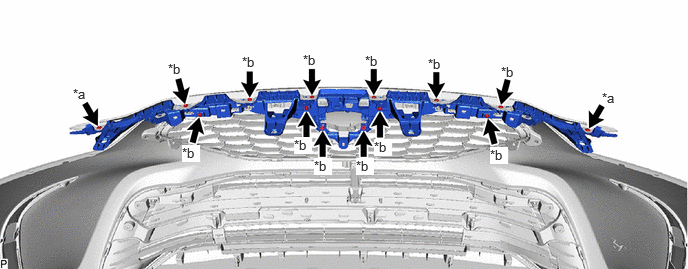
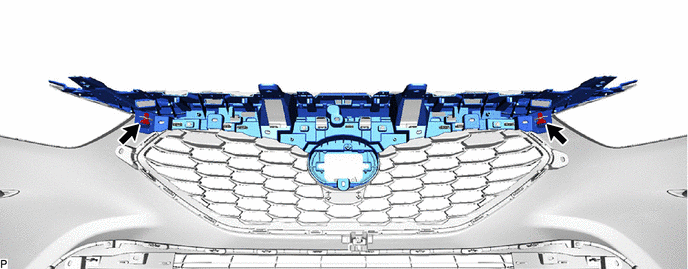
- INSTALL RADIATOR GRILLE SUB-ASSEMBLY
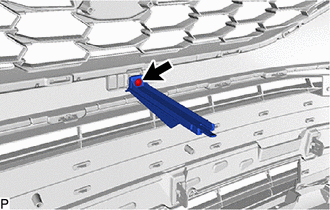
- INSTALL NO. 1 FRONT BUMPER LOWER RETAINER
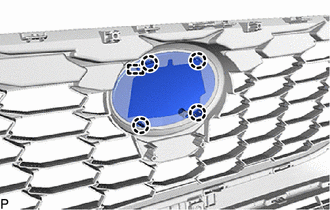
- INSTALL RADIATOR GRILLE (OR FRONT PANEL) EMBLEM
- INSTALL FRONT BUMPER MOULDING
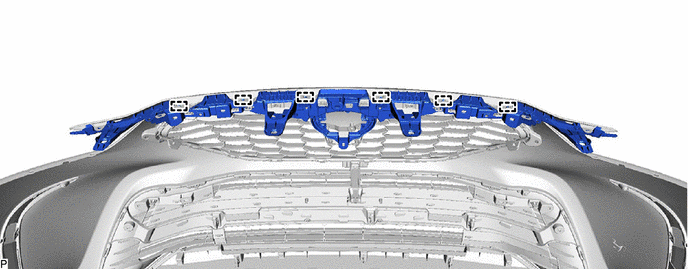
- INSTALL RADIATOR GRILLE BRACKET
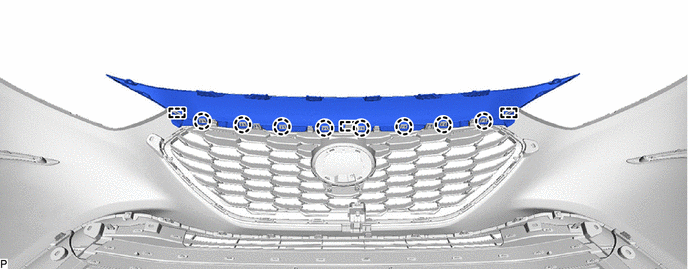
- INSTALL HOOD TO RADIATOR GRILLE SEAL
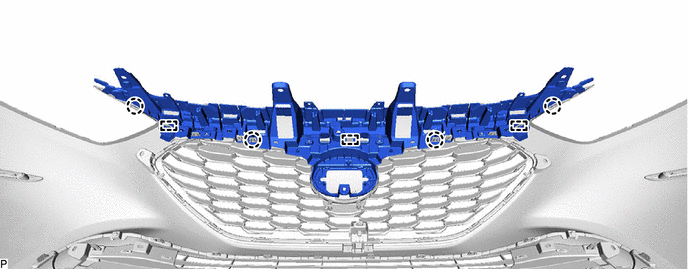
- INSTALL FRONT BUMPER EXTENSION MOUNTING BRACKET
- INSTALL ULTRASONIC SENSOR CLIP
HINT:
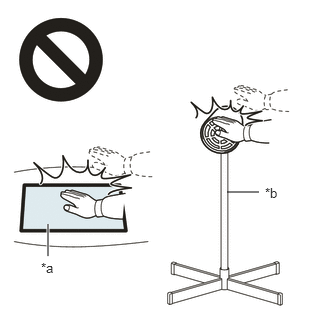
When installing the ultrasonic sensor clip, heat the front bumper cover using a heat light.
Heating Temperature
Item Temperature Front Bumper Cover 20 to 30 °C (68 to 86 °F) WARNING:- Do not touch the heat light and heated parts, touching the heat light may result in burns.
- Touching heated parts for a long time may result in burns.
*a Heated Part *b Heat Light NOTE:Do not heat the front bumper cover excessively.
- Clean the front bumper cover surface.
- Using a heat light, heat the front bumper cover surface.
- Remove the double-sided tape from the front bumper cover.
- Wipe off any tape adhesive residue with cleaner.
- Using a brush or felt, apply primer or equivalent to the ultrasonic sensor clip installation area.

Primer - Install a new ultrasonic sensor clip.
- Using a heat light, heat the front bumper cover surface.
- Remove the release paper from the ultrasonic sensor clip.
HINT:
After removing the release paper, keep the exposed adhesive free from foreign matter.
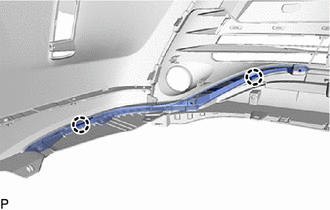
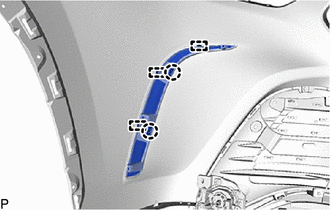
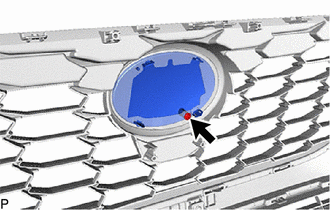
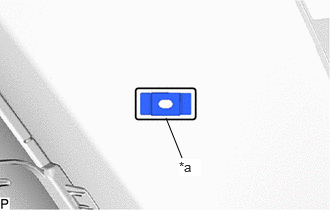
- Install the ultrasonic sensor clip as shown in the illustration.
*a Line HINT:
- Install the ultrasonic sensor clip within the line on the front bumper cover.
- Press the ultrasonic sensor clip firmly to install it.
- INSTALL NO. 4 ENGINE ROOM WIRE
- INSTALL MILLIMETER WAVE RADAR SENSOR ASSEMBLY
Refer to PROCEDURE - Step 1
- INSTALL FOG LIGHT BRACKET LH
- INSTALL FOG LIGHT BRACKET RH
HINT:
Use the same procedure as for the LH side.
- INSTALL FOG LIGHT ASSEMBLY LH
Refer to PROCEDURE - Step 1
- INSTALL FOG LIGHT ASSEMBLY RH
HINT:
Use the same procedure as for the LH side.