Removal [11/2023 - ]: Procedure
WARNING: This page is about a different variant/trim than selected.
- SECURE VEHICLE
- Fully apply the parking brake and chock a wheel.
- REMOVE NO. 1 ENGINE COVER SUB-ASSEMBLY
Refer to PROCEDURE - Step 19
- REMOVE COOL AIR INTAKE DUCT SEAL
Refer to PROCEDURE - Step 1
- REMOVE INLET AIR CLEANER ASSEMBLY
Refer to PROCEDURE - Step 6
- REMOVE AIR CLEANER ASSEMBLY WITH AIR CLEANER HOSE
Refer to PROCEDURE - Step 7
- DISCONNECT ENGINE WIRE
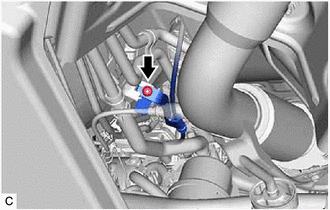
- Rotate the lever while pushing the lock, and disconnect the ECM connector.NOTE:
After disconnecting the ECM connector, make sure that dirt, water and other foreign matter does not contact the connecting parts of the ECM connector.
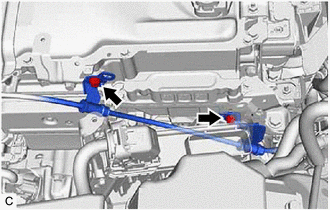
- Remove the 2 bolts and disconnect the engine wire.
- Disengage the clamp.
- Rotate the lever while pushing the lock, and disconnect the ECM connector.
- DISCONNECT ENGINE ROOM MAIN WIRE
Refer to PROCEDURE - Step 10
- REMOVE CONSOLE BOX ASSEMBLY
Refer to REMOVAL [10/2022 - ]
- REMOVE NO. 1 SWITCH HOLE BASE
Refer to PROCEDURE - Step 20
- REMOVE NO. 1 INSTRUMENT PANEL UNDER COVER SUB-ASSEMBLY
Refer to PROCEDURE - Step 17
- REMOVE FRONT CONSOLE BOX INSERT
Refer to PROCEDURE - Step 41
- REMOVE TRANSMISSION CONTROL CABLE ASSEMBLY NOTE:
Before removing the transmission control cable assembly, check that the shift lever is in N.
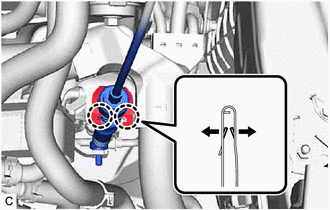
- Disconnect the transmission control cable assembly from the transmission floor shift assembly.
- Rotate the lock nut counterclockwise approximately 180° and, while holding the lock nut in that position, disconnect the transmission control cable assembly from the transmission floor shift assembly.
*a Counterclockwise - Remove the nut and disconnect the transmission control cable assembly from the control shaft lever.
- Using a screwdriver, disengage the 4 claws and disconnect the transmission control cable assembly with the clip from the No. 1 transmission control cable bracket.
- Using a screwdriver, disengage the 2 claws and remove the clip from the transmission control cable assembly.
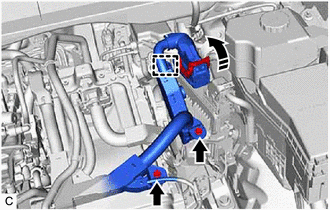
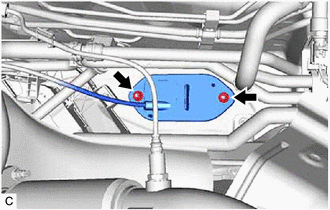
- Remove the 2 bolts and disconnect the transmission control cable assembly from the inverter with converter assembly.
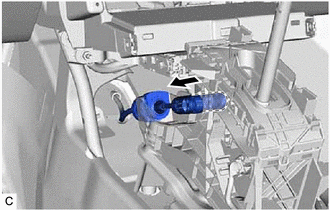
- Remove the nut and disconnect the transmission control cable assembly from the vehicle body.
- Remove the 2 nuts and then remove the transmission control cable assembly from the vehicle body.
- Disconnect the transmission control cable assembly from the transmission floor shift assembly.