Installation [12/2019 - ]: Procedure
- INSTALL REAR NO. 1 SEAT ASSEMBLY RH
- Place the rear No. 1 seat assembly RH in the cabin.NOTE:
Be careful not to damage the rear No. 1 seat assembly RH, vehicle body or vehicle interior.
- Engage the 2 pins to temporarily install the rear No. 1 seat assembly RH.
- Operate the seat track adjusting handle and move the rear No. 1 seat assembly RH to the rearmost position.
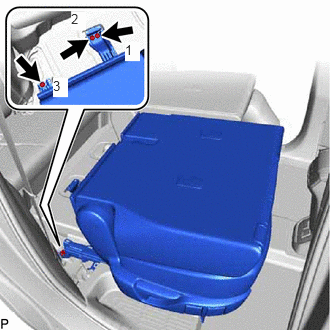
- Temporarily install the 2 bolts on the front side of the rear No. 1 seat assembly RH.
- Operate the seat track adjusting handle and move the rear No. 1 seat assembly RH to the foremost position.
- Temporarily install the 3 bolts on the rear side of the rear No. 1 seat assembly RH.
- Connect the connector.
- Operate the seat track adjusting handle and move the rear No. 1 seat assembly RH to the rearmost position.
- Tighten the 2 bolts on the front side of the rear No. 1 seat assembly RH.
HINT:
Tighten the bolts in the order shown in the illustration.
Torque: 36.7 N.m (374 kgf/cm, 27 ft.lbf)
- Operate the seat track adjusting handle and move the rear No. 1 seat assembly RH to the foremost position.
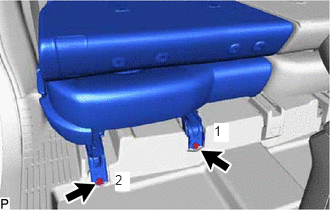
- Tighten the 3 bolts on the rear side of the rear No. 1 seat assembly RH to install it.
HINT:
Tighten the bolts in the order shown in the illustration.
Torque: 36.7 N.m (374 kgf/cm, 27 ft.lbf)
- Place the rear No. 1 seat assembly RH in the cabin.
- INSTALL REAR DOOR SCUFF PLATE RH
HINT:
Use the same procedure as for the LH side.
Refer to PROCEDURE - Step 47 [12/2019 - 10/2022] , or refer to PROCEDURE - Step 45 [10/2022 - ]
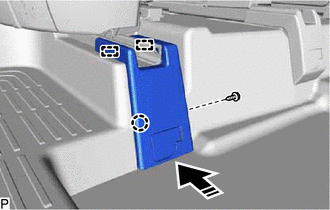
- INSTALL REAR OUTER SEAT TRACK BRACKET COVER RH
- Engage the 2 guides and 6 clips to install the rear outer seat track bracket cover RH.
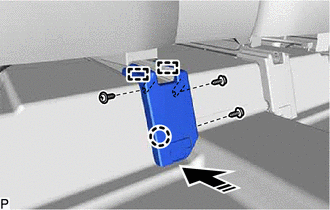
- INSTALL REAR INNER SEAT TRACK BRACKET COVER RH
- Engage the 2 clips and 2 claws to install the rear inner seat track bracket cover RH.
- INSTALL FRONT OUTER SEAT TRACK BRACKET COVER RH
- INSTALL FRONT INNER SEAT TRACK BRACKET COVER RH (for Gasoline Model)
HINT:
Use the same procedure as for the front outer seat track bracket cover RH.
- INSTALL FRONT INNER SEAT TRACK BRACKET COVER RH (for HV Model)
- INSTALL REAR SEAT CENTER HEADREST ASSEMBLY
- Install the rear seat center headrest assembly.
- INSTALL REAR SEAT HEADREST ASSEMBLY
- Install the rear seat headrest assembly.
- CHECK SEAT HEATER (w/ Seat Heater System)
Refer to OPERATION CHECK [12/2019 - ]