Installation [10/2022 - ]: Procedure
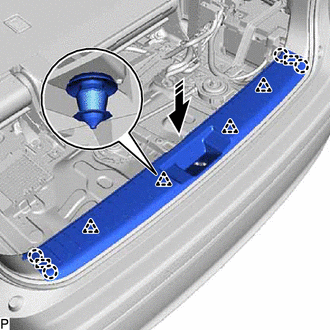
- INSTALL ROOF HEADLINING ASSEMBLY
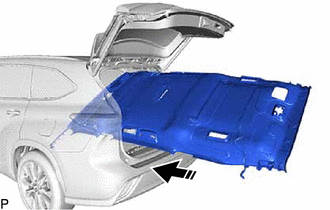
- Put the roof headlining assembly into the vehicle through the back door as shown in the illustration.

Install in this Direction NOTE:Do not damage the roof headlining assembly or vehicle interior.
- Connect the 2 connectors.
- for Normal Roof:
- Install the roof headlining assembly with the 6 clips.
- for Moon Roof:
- Engage the 11 fasteners and install the roof headlining assembly with the 4 clips.
- Connect the connector.
- for Panoramic Moon Roof:
- Engage the 20 fasteners and install the roof headlining assembly with the 2 clips.
- Connect the connector.
- for Rear Pillar LH Side:
- Connect the washer hose assembly.
- Connect the connector.
- for Front Pillar LH Side:
- Connect the washer hose assembly.
- Connect the 3 connectors.
- Engage the 4 clamps.
- for Front Pillar RH Side:
- Install the bolt.
Torque: 12.5 N.m (127 kgf/cm, 9 ft.lbf)
- Connect the 3 connectors.
- Engage the 4 clamps.
- Install the bolt.
- for Windshield Glass Side:
- Connect each connector.
- Put the roof headlining assembly into the vehicle through the back door as shown in the illustration.
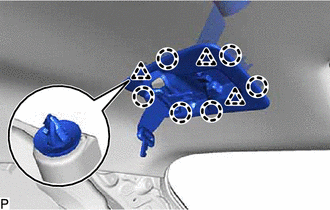
- INSTALL VISOR HOLDER
HINT:
Use the same procedure for the LH side and RH side.
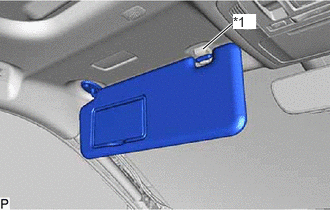
- INSTALL VISOR ASSEMBLY LH
- INSTALL VISOR BRACKET COVER LH (w/ Cover)
- Engage the 4 claws to install the visor bracket cover.
- INSTALL VISOR ASSEMBLY RH
HINT:
Use the same procedure as for the LH side.
- INSTALL VISOR BRACKET COVER RH (w/ Cover)
HINT:
Use the same procedure as for the LH side.
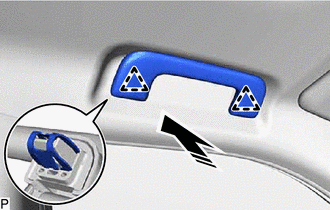
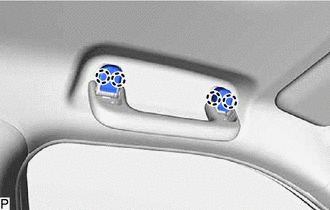
- INSTALL ASSIST GRIP SUB-ASSEMBLY
HINT:
Use the same procedure for all assist grip sub-assemblies.
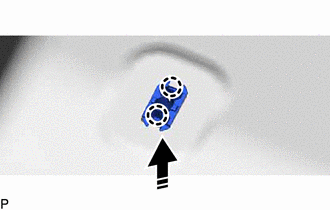
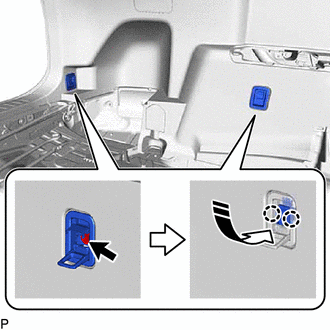
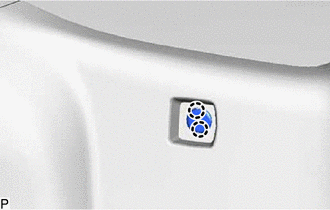
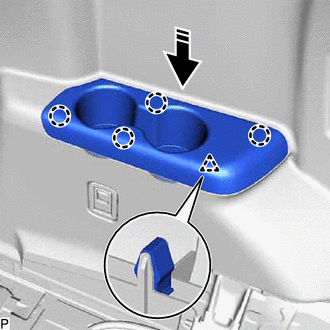
- Install the 2 clips to the assist grip.
*a Assist Grip - Temporarily install the 2 assist grip covers to the assist grip as shown in the illustration.
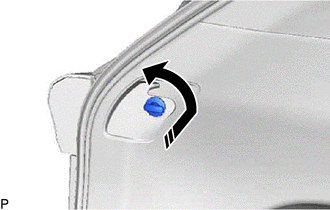
- Engage the 2 clips to install the assist grip assembly as shown in the illustration.
Install in this Direction - Engage the 4 claws to install the assist grip cover LH and assist grip cover RH.NOTE:
Make sure that the clips are engaged securely.
- Install the 2 clips to the assist grip.
- INSTALL REAR ASSIST GRIP ASSEMBLY LH
HINT:
Use the same procedure as for the assist grip sub-assembly.
- INSTALL REAR ASSIST GRIP ASSEMBLY LH
HINT:
Use the same procedure as for the assist grip sub-assembly.
- INSTALL REAR NO. 1 SIDE AIR DUCT
Refer to PROCEDURE - Step 4
- INSTALL COOLER PLATE
Refer to PROCEDURE - Step 5
- INSTALL NO. 1 ROOM LIGHT ASSEMBLY
Refer to PROCEDURE - Step 2
- INSTALL UPPER SHOULDER BELT ANCHOR COVER
- INSTALL SPOT LIGHT ASSEMBLY (except Panoramic Moon Roof)
Refer to PROCEDURE - Step 3
- INSTALL MAP LIGHT ASSEMBLY
Refer to PROCEDURE - Step 1
- INSTALL NO. 1 FORWARD RECOGNITION COVER
Refer to PROCEDURE - Step 3 [09/2020 - 11/2023] , or refer to PROCEDURE - Step 3 [11/2023 - ]
- INSTALL NO. 2 FORWARD RECOGNITION COVER
Refer to PROCEDURE - Step 4 [09/2020 - 11/2023] , or refer to PROCEDURE - Step 4 [11/2023 - ]
- INSTALL RAIN SENSOR COVER (w/ Rain Sensor)
Refer to PROCEDURE - Step 3
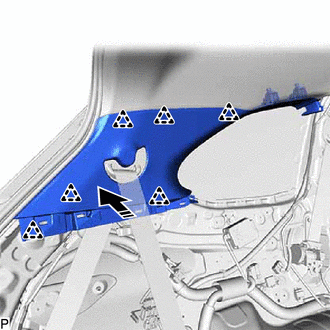
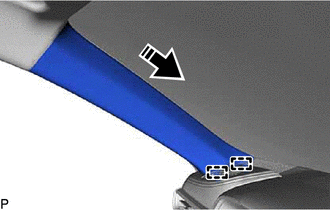
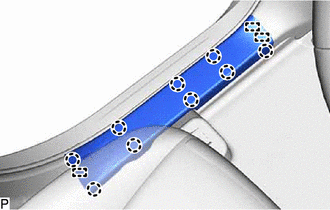
- INSTALL INNER ROOF SIDE GARNISH ASSEMBLY LH
- Install 2 new roof side garnish clips to the inner roof side garnish assembly LH.
*1 Roof Side Garnish Clip *2 Inner Roof Side Garnish Assembly LH HINT:
Make sure that the roof side garnish clip is engaged correctly.
- Pass the anchor of the rear No. 2 seat outer belt assembly LH through the inner roof side garnish assembly LH.
- Engage the 6 clips as shown in the illustration.
Install in this Direction - Engage the 2 clips to install the inner roof side garnish assembly LH as shown in the illustration.
Install in this Direction
- Install 2 new roof side garnish clips to the inner roof side garnish assembly LH.
- INSTALL QUARTER PILLAR GARNISH LH
- Pass the anchor of the rear seat outer belt assembly LH through the quarter pillar garnish LH.
- Engage the guide, 2 clips and claw to install the quarter pillar garnish LH.
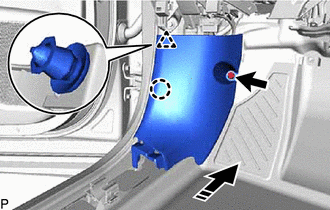
- INSTALL DECK TRIM SIDE PANEL ASSEMBLY LH
- w/ Voltage Inverter:
- Connect the connector.
- Engage the 5 guides, 10 clips and claw.
- Install the deck trim side panel assembly LH with the 3 bolts.
- w/ Voltage Inverter:
- INSTALL ROPE HOOK (for LH Side)
- INSTALL NO. 1 LUGGAGE COMPARTMENT TRIM HOOK (for LH Side)
- INSTALL DECK TRIM POCKET COVER (for LH Side)
- CONNECT REAR NO. 2 SEAT OUTER BELT ASSEMBLY LH
Refer to PROCEDURE - Step 9
- INSTALL NO. 2 DECK SIDE TRIM COVER
- CONNECT REAR SEAT OUTER BELT ASSEMBLY LH
Refer to PROCEDURE - Step 11
- INSTALL FRONT DECK SIDE TRIM COVER LH
- Engage the 3 guides and 5 clips.
- Install the front deck side trim cover LH with the clip.
- INSTALL INNER ROOF SIDE GARNISH ASSEMBLY RH
HINT:
Use the same procedure as for the LH side.
- INSTALL QUARTER PILLAR GARNISH RH
HINT:
Use the same procedure as for the LH side.
- INSTALL DECK TRIM SIDE PANEL ASSEMBLY RH
- Engage the 5 guides, 10 clips and claw.
- Install the deck trim side panel assembly RH with the 3 bolts.
- INSTALL ROPE HOOK (for RH Side)
HINT:
Use the same procedure as for the LH side.
- INSTALL NO. 1 LUGGAGE COMPARTMENT TRIM HOOK (for RH Side)
HINT:
Use the same procedure as for the LH side.
- INSTALL DECK TRIM POCKET COVER (for RH Side)
HINT:
Use the same procedure as for the LH side.
- INSTALL COOLER (NO. 2 ROOM TEMP. SENSOR) THERMISTOR (w/ Rear Automatic Air Conditioning System)
Refer to PROCEDURE - Step 1 [12/2019 - 11/2023] , or refer to PROCEDURE - Step 1 [11/2023 - ]
- CONNECT REAR NO. 2 SEAT OUTER BELT ASSEMBLY RH
HINT:
Use the same procedure as for the LH side.
- INSTALL NO. 1 DECK SIDE TRIM COVER
HINT:
Use the same procedure as for the No. 2 deck side trim cover.
- CONNECT REAR SEAT OUTER BELT ASSEMBLY RH
HINT:
Use the same procedure as for the LH side.
- INSTALL FRONT DECK SIDE TRIM COVER RH
- Engage the 2 guides and 5 clips.
- Install the front deck side trim cover RH with the clip.
- INSTALL CENTER PILLAR GARNISH ASSEMBLY LH
- INSTALL LOWER CENTER PILLAR GARNISH LH
- CONNECT FRONT SEAT OUTER BELT ASSEMBLY LH
Refer to PROCEDURE - Step 6
- INSTALL LAP BELT OUTER ANCHOR COVER (for LH Side)
Refer to PROCEDURE - Step 7
- INSTALL REAR DOOR OPENING TRIM WEATHERSTRIP LH
Refer to PROCEDURE - Step 1
- INSTALL REAR DOOR SCUFF PLATE LH
- INSTALL REAR OUTER SEAT TRACK BRACKET COVER LH
- Engage the 2 guides and 6 clips to install the rear outer seat track bracket cover LH.
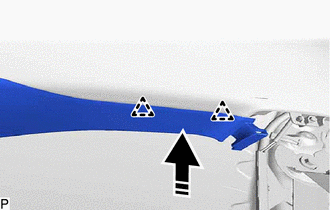
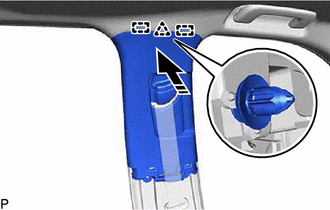
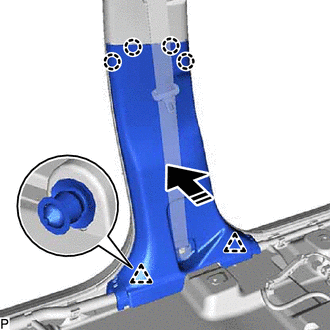
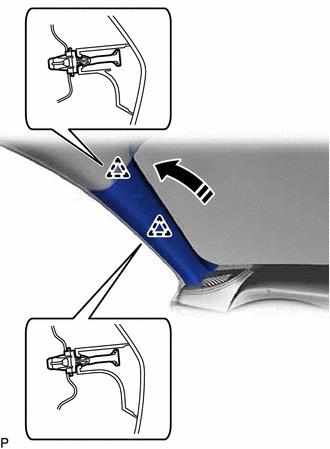
- INSTALL FRONT PILLAR GARNISH ASSEMBLY LH
- Remove the protective cover.
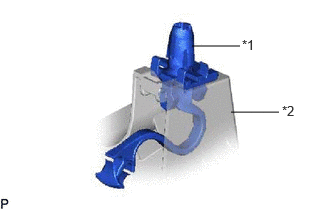
- Install 2 new front pillar garnish clips to the front pillar garnish assembly LH.
*1 Front Pillar Garnish Clip *2 Front Pillar Garnish LH HINT:
Make sure that the front pillar garnish clip is engaged correctly.
- w/ Front No. 3 Speaker:
- Connect the connector.
- Push the front pillar garnish assembly LH as shown in the illustration to engage the 2 guides.
Install in this Direction - Engage the 2 front pillar garnish clips to install the front pillar garnish assembly LH as shown in the illustration.
Install in this Direction HINT:
Make sure that the curtain shield airbag assembly LH is not pinched.
- INSTALL FRONT DOOR OPENING TRIM WEATHERSTRIP LH
Refer to PROCEDURE - Step 1
- INSTALL COWL SIDE TRIM SUB-ASSEMBLY LH
- INSTALL FRONT DOOR SCUFF PLATE LH
- INSTALL CENTER PILLAR GARNISH ASSEMBLY RH
HINT:
Use the same procedure as for the LH side.
- INSTALL LOWER CENTER PILLAR GARNISH RH
HINT:
Use the same procedure as for the LH side.
- CONNECT FRONT SEAT OUTER BELT ASSEMBLY RH
HINT:
Use the same procedure as for the LH side.
- INSTALL LAP BELT OUTER ANCHOR COVER (for RH Side)
HINT:
Use the same procedure as for the LH side.
- INSTALL REAR DOOR OPENING TRIM WEATHERSTRIP RH
HINT:
Use the same procedure as for the LH side.
- INSTALL REAR DOOR SCUFF PLATE RH
HINT:
Use the same procedure as for the LH side.
- INSTALL REAR OUTER SEAT TRACK BRACKET COVER RH
HINT:
Use the same procedure as for the LH side.
- INSTALL FRONT PILLAR GARNISH ASSEMBLY RH
HINT:
Use the same procedure as for the LH side.
- INSTALL FRONT DOOR OPENING TRIM WEATHERSTRIP RH
HINT:
Use the same procedure as for the LH side.
- INSTALL COWL SIDE TRIM SUB-ASSEMBLY RH
HINT:
Use the same procedure as for the LH side.
- INSTALL FRONT DOOR SCUFF PLATE RH
HINT:
Use the same procedure as for the LH side.
- INSTALL REAR NO. 2 SEAT ASSEMBLY
Refer to INSTALLATION [12/2019 - ]
- INSTALL REAR FLOOR FINISH PLATE
- INSTALL DECK SIDE TRIM BOX LH (w/o Woofer)
- Engage the 4 claws to install the deck side trim box LH.
- INSTALL REAR DECK FLOOR BOX
- Engage the 2 clips and 7 claws.
- Install the rear deck floor box with the nut.
- Install the 7 clips.
- INSTALL BATTERY SERVICE HOLE COVER
- Engage the 2 guides and 6 claws to install the battery service hole cover.
- INSTALL TONNEAU COVER ASSEMBLY (w/ Tonneau Cover)
- Install the tonneau cover assembly.
- INSTALL NO. 3 DECK BOARD SUB-ASSEMBLY (w/o Woofer)
- Install the No. 3 deck board sub-assembly.
- INSTALL DECK BOARD ASSEMBLY
- Install the deck board assembly.