Installation [12/2019 - 10/2022]: Procedure
- INSTALL HORN BUTTON ASSEMBLY
- Check that the ignition switch is off.
- Check that the cable is disconnected from the negative (-) auxiliary battery terminal.WARNING:
Wait at least 90 seconds after disconnecting the cable from the negative (-) auxiliary battery terminal to disable the SRS system.
- When using a new spiral cable sub-assembly:
- When reusing a spiral cable sub-assembly or spiral cable with sensor sub-assembly:
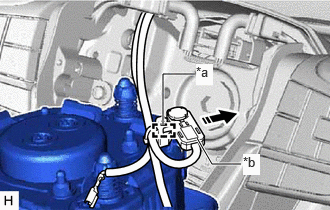
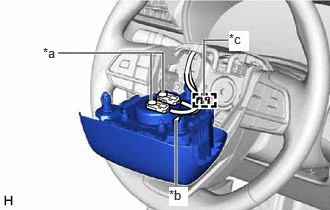
*a Airbag Connector *b Horn Connector *c Wire Harness Clamp - Engage the wire harness clamp.
HINT:
Be sure to engage the wire harness clamp until it is locked.
- Engage the wire harness clamp.
- Connect the 2 airbag connectors to the horn button assembly.NOTE:
- When connecting any airbag connector, take care not to damage the airbag wire harness.
- Be sure to connect the connectors to each corresponding color.
HINT:
Refer to How to Connect or Disconnect Airbag Connector.
Refer to HOW TO CONNECT OR DISCONNECT AIRBAG CONNECTOR [12/2019 - 11/2023]
- Connect the horn connector to the horn button assembly.
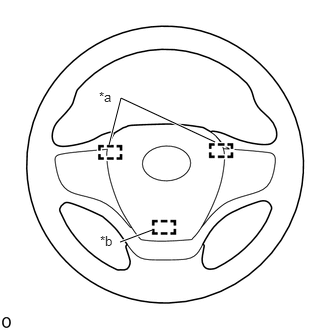
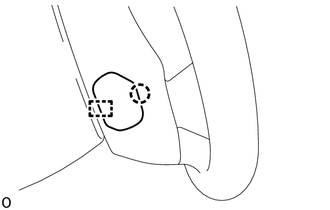
- Push the horn button assembly to engage the 3 pins carefully and install the horn button assembly.
*a Upper Pin *b Lower Pin NOTE:- Make sure that the pins are securely inserted into the steering wheel assembly holes.
- Make sure to engage the 2 upper pins first.
- Make sure that the horn button assembly is securely installed.
- INSTALL LOWER NO. 3 STEERING WHEEL COVER
- INSTALL LOWER NO. 2 STEERING WHEEL COVER
- CONNECT CABLE TO NEGATIVE AUXILIARY BATTERY TERMINAL
for 2GR-FKS: Refer to PROCEDURE - Step 2
for A25A-FXS: Refer to PROCEDURE - Step 2
NOTE:When disconnecting the cable, some systems need to be initialized after the cable is reconnected.
Refer to INITIALIZATION [12/2019 - 09/2020] , or refer to INITIALIZATION [09/2020 - 10/2021] , or refer to INITIALIZATION [10/2021 - 10/2022]
- INSTALL BATTERY SERVICE HOLE COVER (for HV Model)
Refer to PROCEDURE - Step 3
- INSPECT HORN BUTTON ASSEMBLY
- Make sure that the horn sounds.
If the horn does not sound, inspect the horn system.
- Make sure that the horn sounds.
- PERFORM DIAGNOSTIC SYSTEM CHECK
- INSPECT SRS WARNING LIGHT
Refer to OPERATION CHECK [12/2019 - 10/2022]