Removal [12/2019 - 10/2022]: Procedure
- REMOVE BATTERY
Refer to REMOVAL [12/2019 - 10/2022]
- REMOVE ECM
Refer to REMOVAL [12/2019 - 09/2020] , or refer to REMOVAL [09/2020 - 10/2022]
- REMOVE BATTERY CLAMP SUB-ASSEMBLY
Refer to PROCEDURE - Step 30 [12/2019 - 09/2020] , or refer to PROCEDURE - Step 30 [09/2020 - 10/2022]
- REMOVE CONSOLE BOX ASSEMBLY
Refer to REMOVAL [12/2019 - 10/2022]
- REMOVE NO. 1 SWITCH HOLE BASE
Refer to PROCEDURE - Step 20
- REMOVE NO. 1 INSTRUMENT PANEL UNDER COVER SUB-ASSEMBLY
Refer to PROCEDURE - Step 17
- REMOVE FRONT CONSOLE BOX INSERT
Refer to PROCEDURE - Step 42
- REMOVE TRANSMISSION CONTROL CABLE ASSEMBLY NOTE:
Before removing the transmission control cable assembly, check that the shift lever is in N.
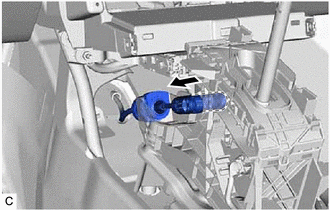
- Disconnect the transmission control cable assembly from the transmission floor shift assembly.
- Rotate the lock nut counterclockwise approximately 180° and, while holding the lock nut in that position, disconnect the transmission control cable assembly from the transmission floor shift assembly.
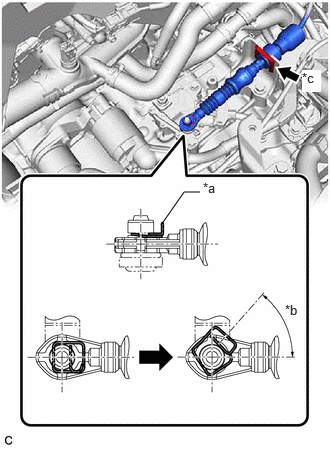
*a Counterclockwise - While disengaging the clip (A) as shown in the illustration, disconnect the transmission control cable assembly from the transmission control shaft lever together with the clip (A).
*a Clip (A) *b 45° to 60° *c Clip (B) - Remove the clip (B) and disconnect the transmission control cable assembly from the No. 1 transmission control cable bracket.
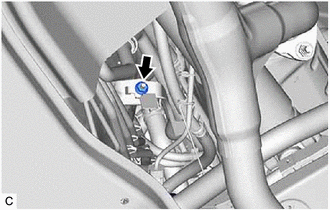
- Remove the nut and disconnect the transmission control cable assembly from the vehicle body.
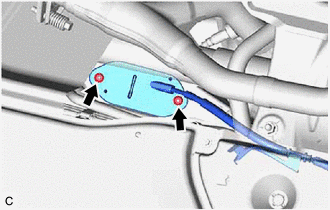
- Remove the 2 nuts and then remove the transmission control cable assembly from the vehicle body.
- Disconnect the transmission control cable assembly from the transmission floor shift assembly.