Installation [12/2019 - ]: Procedure
- INSTALL FRONT DISC
- INSTALL FRONT DISC BRAKE CYLINDER MOUNTING
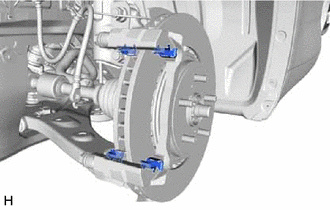
- Install the front disc brake cylinder mounting to the steering knuckle with the 2 bolts.
Torque: 192 N.m (1958 kgf/cm, 142 ft.lbf)
- Install the front disc brake cylinder mounting to the steering knuckle with the 2 bolts.
- INSTALL FRONT DISC BRAKE BUSHING DUST BOOT
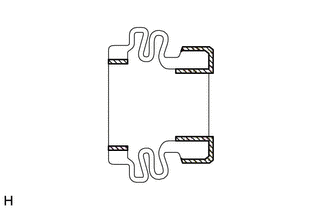
- Apply a light layer of lithium soap base glycol grease to the entire circumference of 2 new front disc brake bushing dust boots.
HINT:
Apply more than 0.3 g (0.01 oz) of lithium soap base glycol grease to each front disc brake bushing dust boot.

Lithium Soap Base Glycol Grease - Install the 2 front disc brake bushing dust boots to the front disc brake cylinder mounting.
- Apply a light layer of lithium soap base glycol grease to the entire circumference of 2 new front disc brake bushing dust boots.
- INSTALL FRONT DISC BRAKE CYLINDER SLIDE PIN
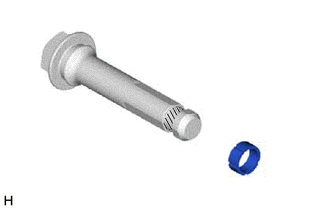
- Apply a light layer of lithium soap base glycol grease to the contact surface of the front disc brake cylinder slide pin (lower side) and a new front disc brake cylinder slide bushing.
Lithium Soap Base Glycol Grease - Install the front disc brake cylinder slide bushing to the front disc brake cylinder slide pin (lower side).
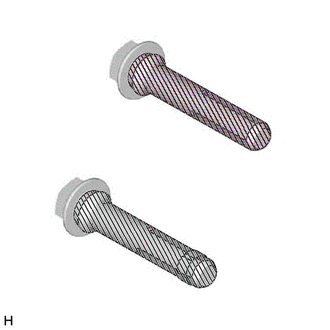
- Apply a light layer of lithium soap base glycol grease to the sliding part and the sealing surfaces of the 2 front disc brake cylinder slide pins.
Lithium Soap Base Glycol Grease - Install the 2 front disc brake cylinder slide pins to the front disc brake cylinder mounting.
- Push each front disc brake cylinder slide pin into the front disc brake bushing dust boot to engage the pin to the boot.
- Apply a light layer of lithium soap base glycol grease to the contact surface of the front disc brake cylinder slide pin (lower side) and a new front disc brake cylinder slide bushing.
- INSTALL FRONT DISC BRAKE PAD SUPPORT PLATE
- INSTALL FRONT DISC BRAKE ANTI-SQUEAL SHIM KIT
Refer to PROCEDURE - Step 1
- INSTALL FRONT DISC BRAKE PAD
- Install the 2 front disc brake pads to the front disc brake cylinder mounting.NOTE:
- Keep the friction surfaces of the front disc brake pads and front disc free from oil and grease.
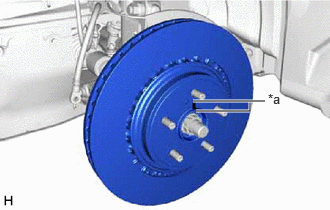
- Install the front disc brake pad so that the front disc brake pad wear indicator plate is mounted on the upper side of the vehicle.
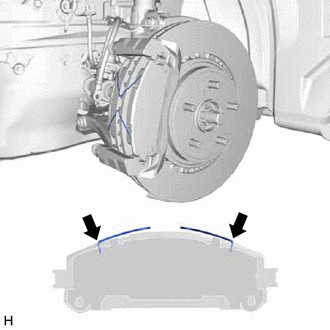
- Install the 2 anti-squeal springs to the front disc brake pads.NOTE:
- When replacing the front disc brake pads with new ones, make sure to replace the anti-squeal springs at the same time.
- Be sure to install the anti-squeal springs into the front disc brake pad installation holes as far as they will go.
- Install the 2 front disc brake pads to the front disc brake cylinder mounting.
- INSTALL FRONT DISC BRAKE CYLINDER ASSEMBLY
- Hold each front disc brake cylinder slide pin and install the front disc brake cylinder assembly to the front disc brake cylinder mounting with the 2 bolts.
Torque: 45 N.m (459 kgf/cm, 33 ft.lbf)
NOTE:- Install the front disc brake cylinder assembly while holding both of the front disc brake pads because the anti-squeal springs may fall off the front disc brake pads.
- Be sure that the anti-squeal springs are installed to the front disc brake pads.
- Hold each front disc brake cylinder slide pin and install the front disc brake cylinder assembly to the front disc brake cylinder mounting with the 2 bolts.
- CONNECT FRONT FLEXIBLE HOSE
- Connect the front flexible hose to the front disc brake cylinder assembly with a new union bolt and a new gasket.
Torque: 29.4 N.m (300 kgf/cm, 22 ft.lbf)
NOTE:Install the front flexible hose lock securely into the lock hole in the front disc brake cylinder assembly.
- Connect the front flexible hose to the front disc brake cylinder assembly with a new union bolt and a new gasket.
- CONNECT CABLE TO NEGATIVE AUXILIARY BATTERY TERMINAL (for HV Model)
- Connect the reservoir level switch connector.
- Install the brake master cylinder reservoir assembly to the reservoir bracket with the bolt and nut.
Torque: 9.0 N.m (92 kgf/cm, 80 in.lbf)
- Engage the clamp to install the wire harness to the brake master cylinder reservoir assembly.
- Connect the cable to the negative (-) auxiliary battery terminal.
Refer to PROCEDURE - Step 2 [12/2019 - 11/2023] , or refer to PROCEDURE - Step 2 [11/2023 - ]
- Perform the following procedure if air bleeding is not necessary:
- Turn the ignition switch to ON (READY).
- Depress the brake pedal and release it.
- Clear the DTCs.
Refer to DTC CHECK / CLEAR [12/2019 - ]
- BLEED BRAKE LINE
for HV Model: Refer to BLEEDING [12/2019 - ]
for Gasoline Model: Refer to BLEEDING [12/2019 - 10/2022] , or refer to BLEEDING [10/2022 - ]
- INSTALL FRONT WHEEL
Refer to PROCEDURE - Step 1 [12/2019 - 10/2022] , or refer to PROCEDURE - Step 1 [10/2022 - ]