Removal [11/2023 - ]: Procedure
WARNING: This page is about a different variant/trim than selected.
- REMOVE HV BATTERY
Refer to REMOVAL [11/2023 - ]
- REMOVE NO. 10 HV BATTERY SHIELD PANEL
Refer to PROCEDURE - Step 20
- REMOVE HV BATTERY JUNCTION BLOCK ASSEMBLY
See step 19
- REMOVE NO. 1 HYBRID BATTERY SHIELD SUB-ASSEMBLY
See step 19
- REMOVE NO. 6 HV BATTERY CARRIER BRACKET
Refer to PROCEDURE - Step 4
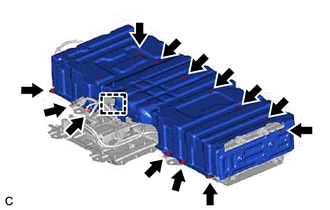
- REMOVE UPPER HV BATTERY COVER SUB-ASSEMBLY WARNING:
Be sure to wear insulated gloves and protective goggles.
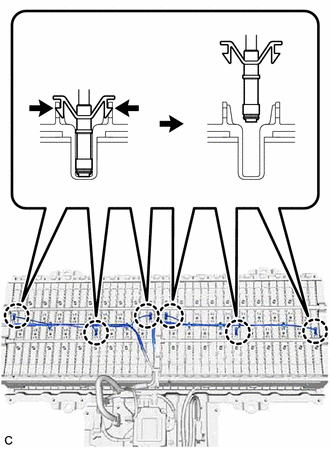
- REMOVE HYBRID BATTERY THERMISTOR WARNING:
Be sure to wear insulated gloves and protective goggles.
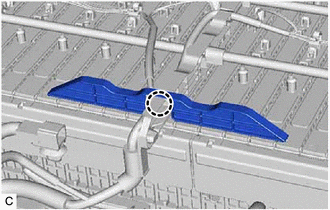
- Disengage the claw and remove the No. 3 hybrid battery packing from the HV battery.
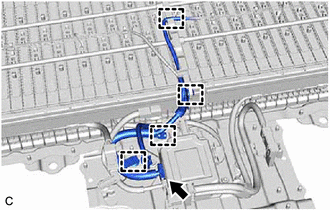
- Disengage the 4 clamps.
- Disconnect the battery voltage sensor connector.
- Disengage the 5 clamps.
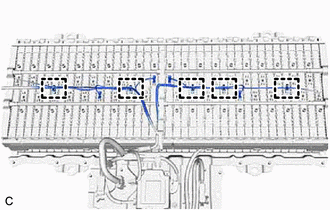
- Disengage the 6 claws of the hybrid battery thermistor (sensor portions) and remove the hybrid battery thermistor from the HV battery.
- Disengage the claw and remove the No. 3 hybrid battery packing from the HV battery.