Removal [12/2019 - 10/2022]: Procedure
- PRECAUTION NOTE:
After turning the ignition switch off, waiting time may be required before disconnecting the cable from the negative (-) battery terminal. Therefore, make sure to read the disconnecting the cable from the negative (-) battery terminal notices before proceeding with work.
- DISCHARGE FUEL SYSTEM PRESSURE
Refer to PRECAUTION [12/2019 - 10/2022]
- DISCONNECT CABLE FROM NEGATIVE BATTERY TERMINAL
Refer to PROCEDURE - Step 1
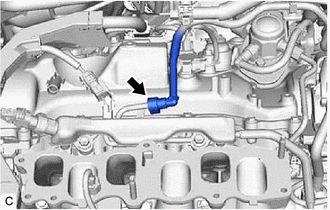
- REMOVE INTAKE AIR SURGE TANK ASSEMBLY
Refer to REMOVAL [12/2019 - 10/2022]
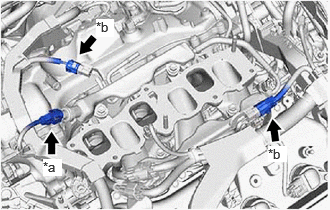
- DISCONNECT FUEL TUBE SUB-ASSEMBLY
- Disconnect the fuel tube sub-assembly from the fuel delivery pipe with sensor assembly.
Refer to PRECAUTION [12/2019 - 10/2022]
- Disconnect the fuel tube sub-assembly from the fuel delivery pipe with sensor assembly.
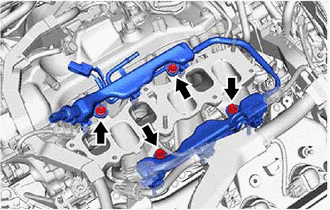
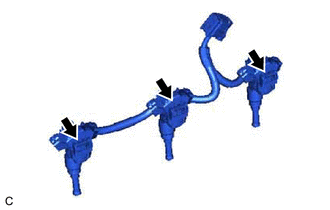
- REMOVE FUEL DELIVERY PIPE WITH SENSOR ASSEMBLY
- Disconnect the fuel pressure sensor connector.
*a Fuel Pressure Sensor Connector *b No. 5 Engine Wire Connector - Disconnect the 2 No. 5 engine wire connectors.
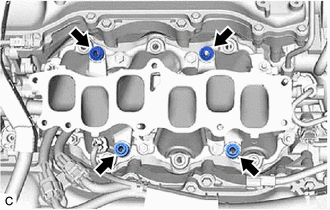
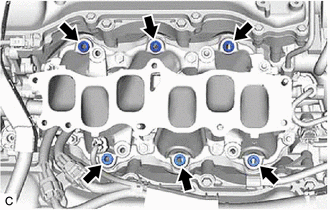
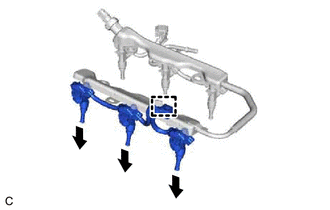
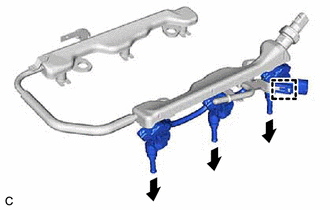
- Remove the 4 bolts and fuel delivery pipe with sensor assembly with the 6 port fuel injector assemblies from the intake manifold.NOTE:
- If fuel intrudes into the combustion chamber, there may be adverse effects to the engine main body.
- Be careful not to drop the port fuel injector assemblies when removing the fuel delivery pipe with sensor assembly.
- When removing the fuel delivery pipe with sensor assembly, hold the pipe by both ends and pull it straight upward.
- Disconnect the fuel pressure sensor connector.
- REMOVE NO. 1 DELIVERY PIPE SPACER
- REMOVE INJECTOR VIBRATION INSULATOR
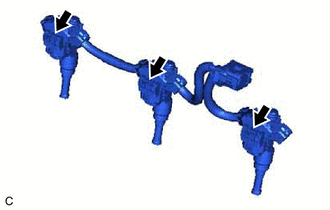
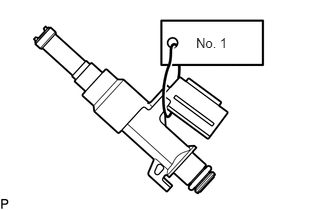
- REMOVE PORT FUEL INJECTOR ASSEMBLY
- for Bank 2:
- for Bank 1:
- Remove the O-ring from each port fuel injector assembly.
- Attach a tag or label with the corresponding cylinder number to each port fuel injector assembly so that they can be installed to their original locations.NOTE:
Cover the port fuel injector assemblies with plastic bags to prevent damage and contamination.