Removal [12/2019 - 10/2022]: Procedure
- DISCONNECT CABLE FROM NEGATIVE BATTERY TERMINAL
Refer to PROCEDURE - Step 1
NOTE:When disconnecting the cable, some systems need to be initialized after the cable is reconnected.
Refer to INITIALIZATION [12/2019 - 09/2020] , or refer to INITIALIZATION [09/2020 - 10/2021] , or refer to INITIALIZATION [10/2021 - 10/2022]
- DRAIN BRAKE FLUID NOTE:
If brake fluid leaks onto any painted surface, immediately wash it off.
- REMOVE FRONT WHEEL RH
Refer to REMOVAL [12/2019 - 10/2022]
- REMOVE FRONT FENDER APRON SEAL RH
Refer to PROCEDURE - Step 16 [12/2019 - 09/2020] , or refer to PROCEDURE - Step 16 [09/2020 - 10/2022]
- REMOVE WINDSHIELD WIPER MOTOR AND LINK ASSEMBLY
Refer to REMOVAL [12/2019 - ]
- REMOVE FENDER SPLASH SHIELD SUB-ASSEMBLY REAR LH
Refer to PROCEDURE - Step 3
- REMOVE FENDER SPLASH SHIELD SUB-ASSEMBLY REAR RH
HINT:
Perform the same procedure as for the LH side.
- REMOVE FRONT FENDER SPLASH SHIELD SEAL FRONT LH
Refer to PROCEDURE - Step 5
- REMOVE FRONT FENDER SPLASH SHIELD SEAL FRONT RH
HINT:
Perform the same procedure as for the LH side.
- REMOVE FRONT UPPER SUSPENSION TO COWL BRACE SUB-ASSEMBLY LH
Refer to PROCEDURE - Step 7
- REMOVE FRONT UPPER SUSPENSION TO COWL BRACE SUB-ASSEMBLY RH
HINT:
Perform the same procedure as for the LH side.
- REMOVE COWL VENTILATOR PANEL SUB-ASSEMBLY
Refer to PROCEDURE - Step 9
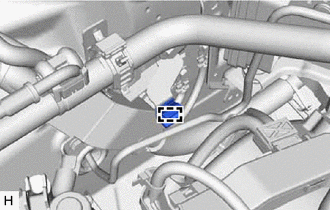
- SEPARATE HEATER WATER PUMP ASSEMBLY (w/ Stop and Start System)
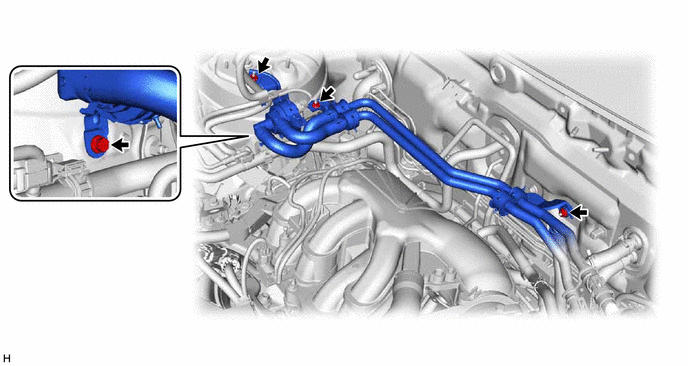
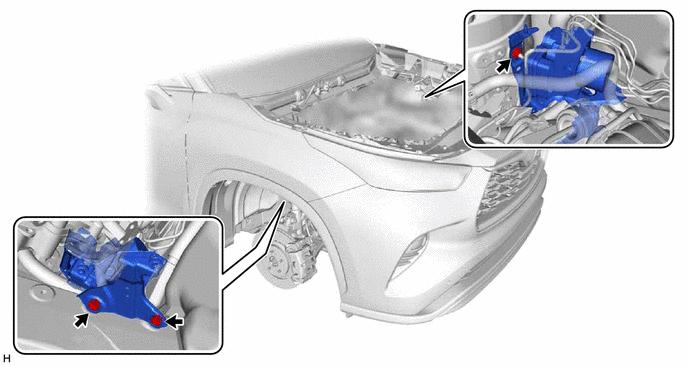
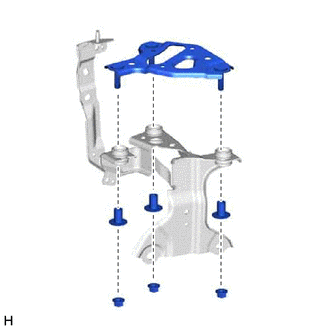
- REMOVE BRAKE ACTUATOR WITH BRACKET
- Release the lock lever and disconnect the connector from the brake actuator assembly.

Release the lock lever 
Disconnect the connector NOTE:Be careful not to allow any brake fluid to enter the connector.
- Remove the 2 bolts to separate the brake lines.
- Use tags or make a memo to identify the places to reconnect the brake lines.
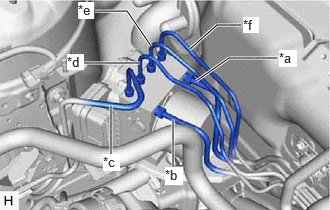
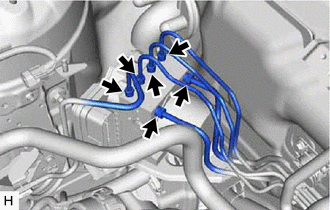
*a From 1st Chamber of Brake Master Cylinder Sub-assembly *b From 2nd Chamber of Brake Master Cylinder Sub-assembly *c To Front Wheel Cylinder Assembly RH *d To Rear Wheel Cylinder Assembly LH *e To Rear Wheel Cylinder Assembly RH *f To Front Wheel Cylinder Assembly LH - Using a union nut wrench, disconnect the 6 brake lines from the brake actuator assembly.NOTE:
- Do not kink or damage the brake lines.
- Do not allow any foreign matter such as dirt or dust to enter the brake lines from the connecting parts.
- Using a union nut wrench, disconnect the front brake tube while holding the front flexible hose with a wrench.NOTE:
- Do not kink or damage the front brake tube.
- Do not allow any foreign matter such as dirt or dust to enter the front brake tube from the connecting parts.
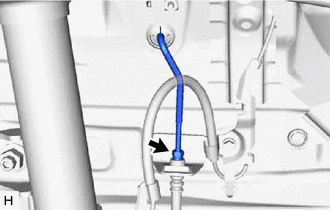
- Disengage the clamp and separate the front brake tube.NOTE:
Do not kink or damage the front brake tube.
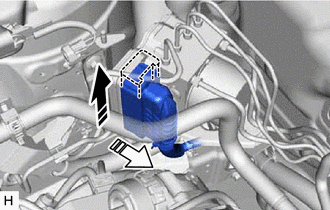
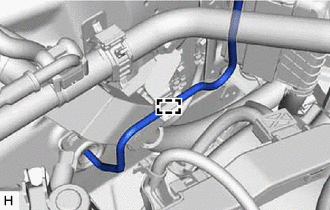
- Move aside the front brake tube as shown in the illustration.NOTE:
Do not apply excessive force to the front brake tube.
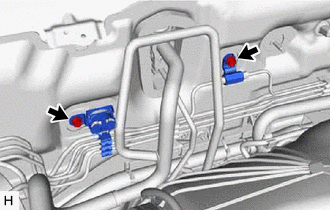
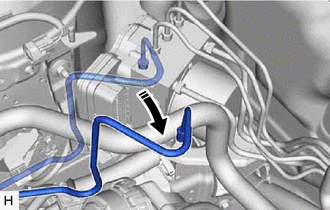
- Disengage the clamp and remove the brake tube clamp.
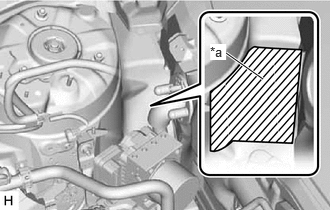
- Apply protective tape to the vehicle body as shown in the illustration.
*a Protective Tape - Remove the 2 bolts.
HINT:
Insert the tool from the bottom of the vehicle.
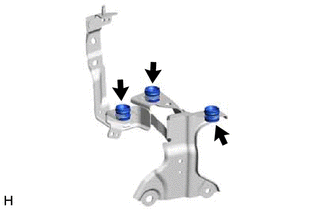
- Remove the nut and brake actuator with bracket.NOTE:
- Do not kink or damage the brake lines.
- Do not allow any foreign matter such as dirt or dust to enter the brake lines from the connecting parts.
- Be careful not to allow any brake fluid to enter the connector.
- Do not hold the brake actuator with bracket by the connector.
- Do not drop the brake actuator with bracket when carrying it.
HINT:
Remove the brake actuator with bracket while avoiding the brake lines.
- Release the lock lever and disconnect the connector from the brake actuator assembly.
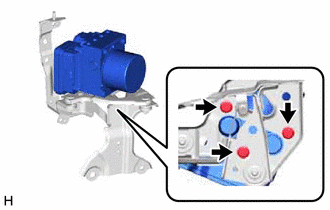
- REMOVE BRAKE ACTUATOR ASSEMBLY
- REMOVE NO. 2 BRAKE ACTUATOR CASE COLLAR
HINT:
Perform this procedure only when replacement of the No. 2 brake actuator case collars is necessary.
- REMOVE BRAKE ACTUATOR BRACKET CUSHION
HINT:
Perform this procedure only when replacement of the brake actuator bracket cushions is necessary.