Reassembly [10/2022 - ]: Procedure
- INSTALL REAR BUMPER REINFORCEMENT
HINT:
Perform this procedure only when replacement of the rear bumper reinforcement is necessary.
- INSTALL RECEIVER HITCH BRACKET SUB-ASSEMBLY (w/ Towing Hitch)
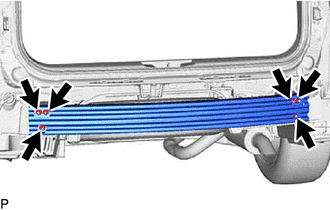
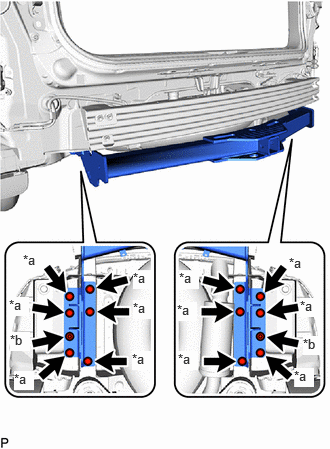
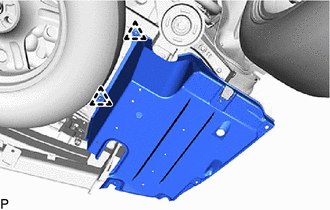
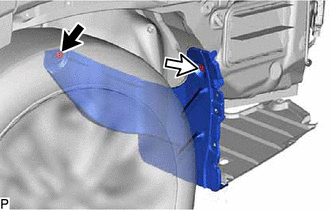
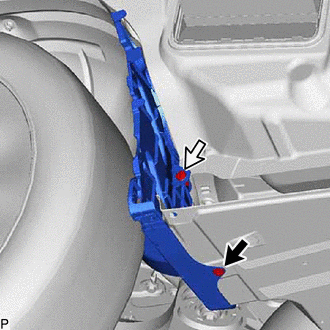
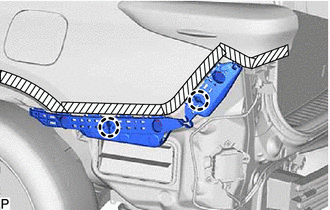
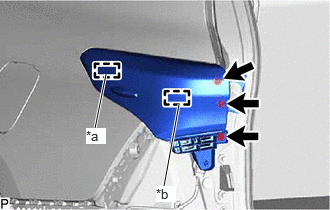
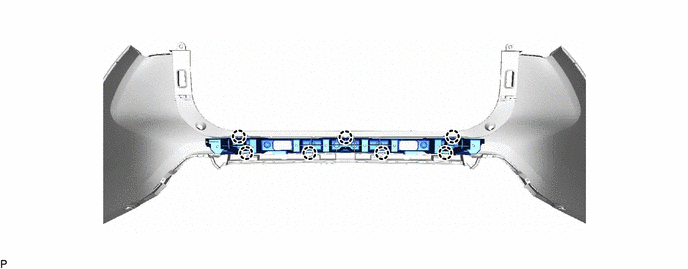
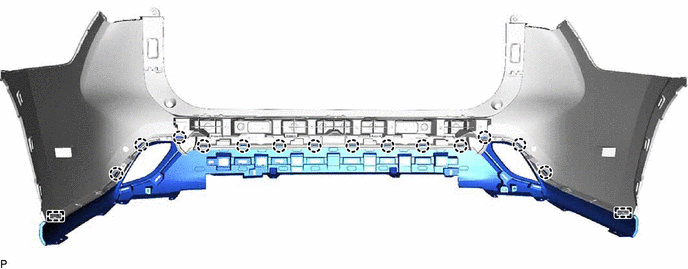
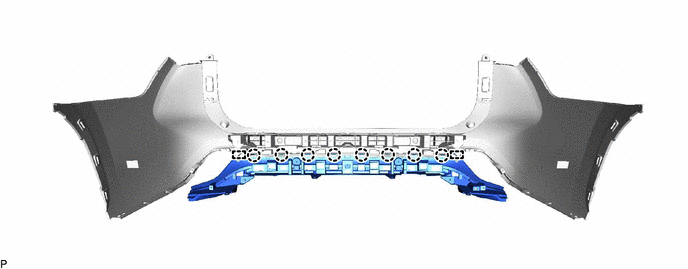
- Install the receiver hitch bracket sub-assembly with the 12 bolts and 2 nuts.
Bolt:
Torque: 80 N.m (816 kgf/cm, 59 ft.lbf)
Nut:
Torque: 80 N.m (816 kgf/cm, 59 ft.lbf)
NOTE:Because the receiver hitch bracket sub-assembly is very heavy, it may cause injury or fall resulting in damage to the vehicle body when it is being handled. During removal or installation, make sure that there are enough people available to hold the hitch bracket securely.
*a Bolt *b Nut
- Install the receiver hitch bracket sub-assembly with the 12 bolts and 2 nuts.
- INSTALL RECEIVER HITCH BRACKET LH (w/ Towing Hitch)
- INSTALL RECEIVER HITCH BRACKET RH (w/ Towing Hitch)
- INSTALL RECEIVER HITCH CAP (w/ Towing Hitch)
- Install the receiver hitch cap.
- INSTALL TOWING SOCKET (w/ Towing Hitch)
Refer to PROCEDURE - Step 1
- INSTALL NO. 2 LUGGAGE COMPARTMENT SIDE COVER PROTECTOR (w/ Towing Hitch)
- INSTALL NO. 1 LUGGAGE COMPARTMENT SIDE COVER PROTECTOR (w/ Towing Hitch)
- Install the No. 1 luggage compartment side cover protector.
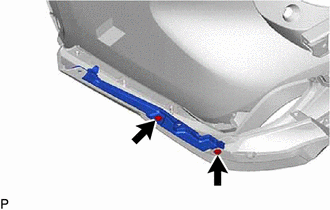
- INSTALL REAR BUMPER SIDE SEAL LH
HINT:
Perform this procedure only when replacement of the rear bumper side seal LH is necessary.
- INSTALL REAR BUMPER SIDE SEAL RH
HINT:
Use the same procedure as for the LH side.
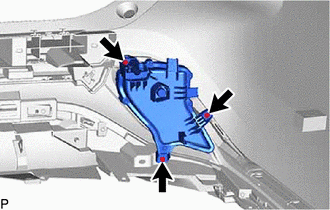
- INSTALL REAR BUMPER SIDE SUPPORT LH
HINT:
Perform this procedure only when replacement of the rear bumper side support LH is necessary.
- INSTALL REAR BUMPER SIDE SUPPORT RH
HINT:
Use the same procedure as for the LH side.
- INSTALL REAR BUMPER UPPER RETAINER LH
- INSTALL REAR BUMPER UPPER RETAINER RH
HINT:
Use the same procedure as for the LH side.
- INSTALL REAR COMBINATION LIGHT ASSEMBLY LH
- INSTALL REAR COMBINATION LIGHT ASSEMBLY RH
HINT:
Use the same procedure as for the LH side.
- INSTALL REAR BUMPER PAD LH
HINT:
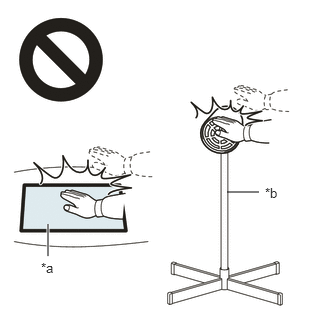
When installing the rear bumper pad LH, heat the rear bumper cover using a heat light.
Heating Temperature
Item Temperature Rear Bumper Cover 20 to 30 °C (68 to 86 °F) WARNING:- Do not touch the heat light and heated parts, touching the heat light may result in burns.
- Touching heated parts for a long time may result in burns.
*a Heated Part *b Heat Light NOTE:Do not heat the rear bumper cover excessively.
- Clean the rear bumper cover surface.
- Using a heat light, heat the rear bumper cover surface.
- Remove any double-sided tape from the rear bumper cover.
- Wipe off any tape adhesive residue with cleaner.
- Install a new rear bumper pad LH.
- Using a heat light, heat the rear bumper cover surface.
- Remove the release paper from the rear bumper pad LH.
HINT:
After removing the release paper, keep the exposed adhesive free from foreign matter.
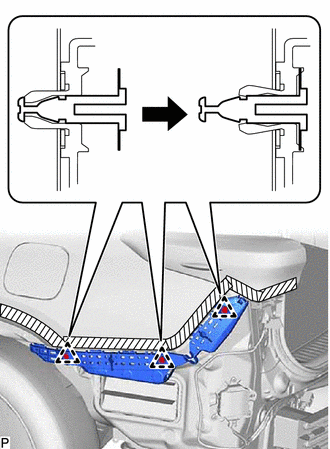
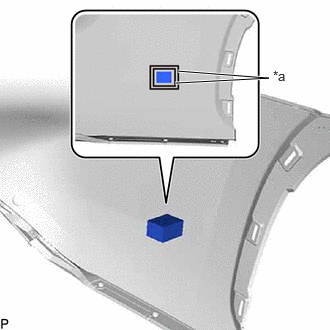
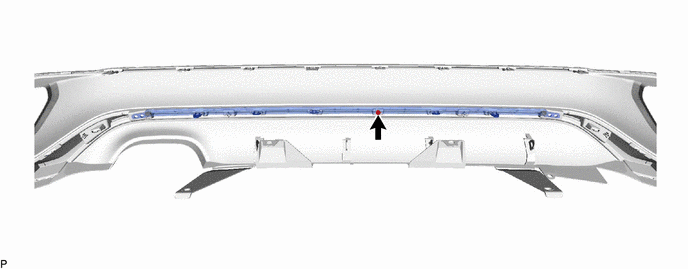
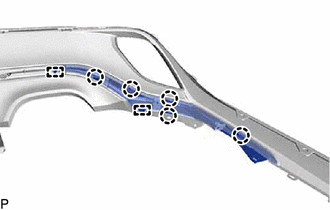
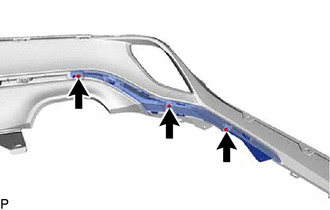
- Install the rear bumper pad LH as shown in the illustration.
*a Line HINT:
- Install the rear bumper pad LH along the line on the rear bumper cover.
- Press the rear bumper pad LH firmly to install it.
- Use the same procedure for the RH side and LH side.
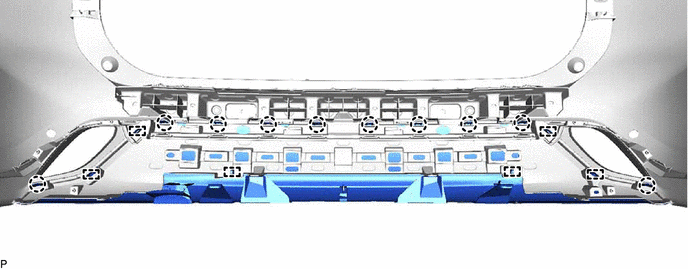
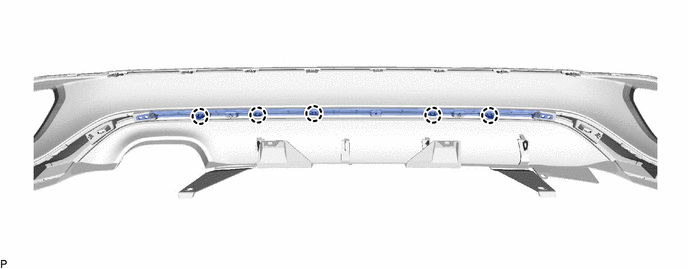
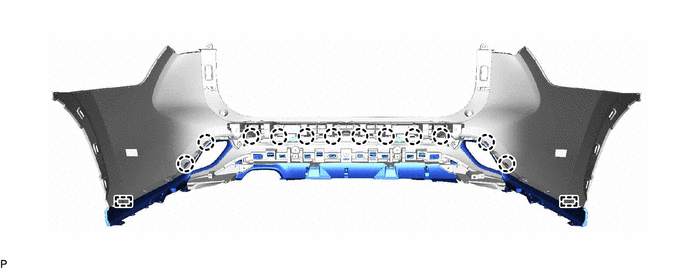
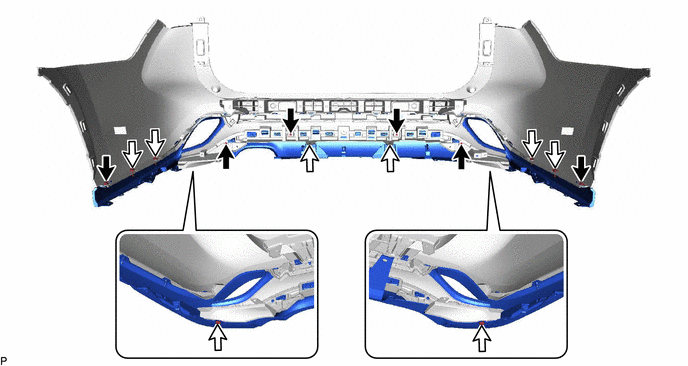
- INSTALL REAR BUMPER ENERGY ABSORBER
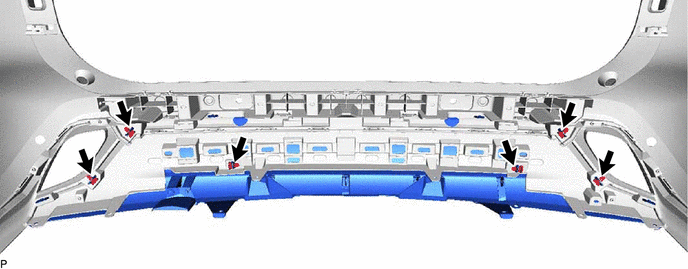
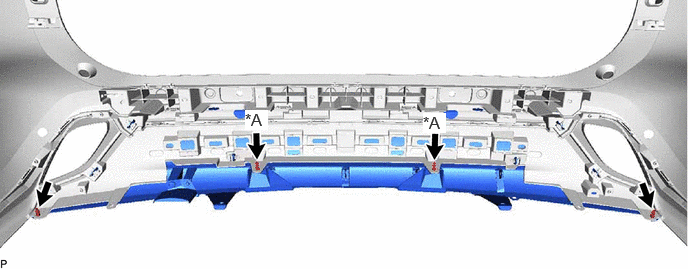
- INSTALL REAR BUMPER LOWER COVER (except Sport Package)
- INSTALL REAR BUMPER EXTENSION (except Sport Package)
- INSTALL REAR BUMPER MOULDING (for Sport Package)
- INSTALL REAR BUMPER SIDE MOULDING LH (for Sport Package)
- INSTALL REAR BUMPER SIDE MOULDING RH (for Sport Package)
HINT:
Use the same procedure as for the LH side.
- INSTALL REAR BUMPER EXTENSION (for Sport Package)
- INSTALL REAR BUMPER LOWER COVER (for Sport Package)
- INSTALL REAR BUMPER CORNER EXTENSION LH (for Sport Package)
- INSTALL REAR BUMPER CORNER EXTENSION RH (for Sport Package)
HINT:
Use the same procedure as for the LH side.
- INSTALL REFLEX REFLECTOR ASSEMBLY LH
- INSTALL REFLEX REFLECTOR ASSEMBLY RH
HINT:
Use the same procedure as for the LH side.
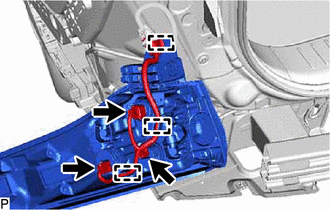
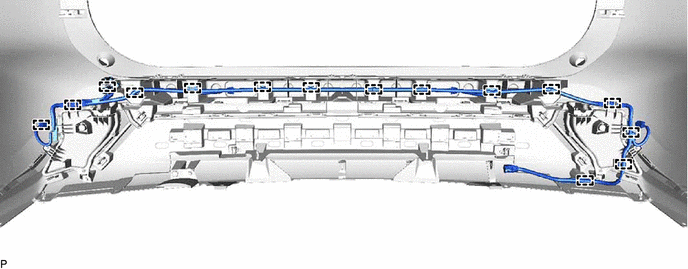
- INSTALL NO. 3 LUGGAGE ROOM WIRE (w/ Intuitive Parking Assist System)
- INSTALL KICK DOOR CONTROL SENSOR WITH BRACKET (w/ Kick Sensor)
Refer to PROCEDURE - Step 2
- INSTALL REAR CORNER ULTRASONIC SENSOR RETAINER (w/ Intuitive Parking Assist System)
Refer to PROCEDURE - Step 2 [12/2019 - 11/2023] , or refer to PROCEDURE - Step 2 [11/2023 - ]
- INSTALL REAR CENTER ULTRASONIC SENSOR RETAINER (w/ Intuitive Parking Assist System)
Refer to PROCEDURE - Step 3 [12/2019 - 11/2023] , or refer to PROCEDURE - Step 3 [11/2023 - ]
- INSTALL REAR CORNER ULTRASONIC SENSOR (w/ Intuitive Parking Assist System)
Refer to PROCEDURE - Step 4 [12/2019 - 11/2023] , or refer to PROCEDURE - Step 4 [11/2023 - ]
- INSTALL REAR CENTER ULTRASONIC SENSOR (w/ Intuitive Parking Assist System)
Refer to PROCEDURE - Step 5 [12/2019 - 11/2023] , or refer to PROCEDURE - Step 5 [11/2023 - ]