DSD Information System
Home >> Toyota >> 2021 >> Highlander LE, 4WD >> Repair and Diagnosis >> Accessories & Equipment >> Entertainment Systems >> Audio / Video System - Service Information >> Radio Receiver >> Removal [11/2023 - ] >> Procedure

Removal [11/2023 - ]: Procedure

  1. PRECAUTION 

    Refer to PRECAUTION [11/2023 - ]

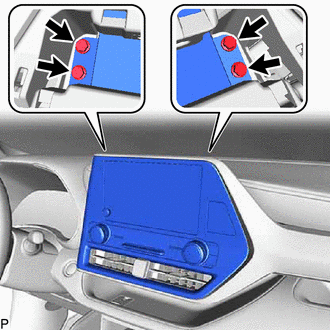
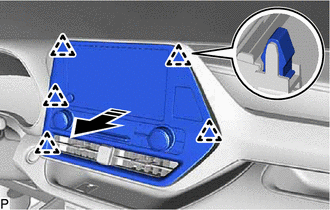
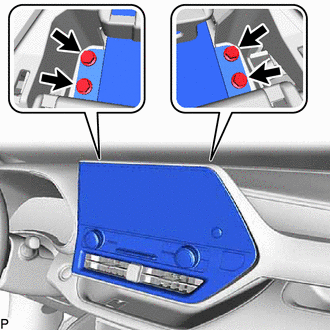
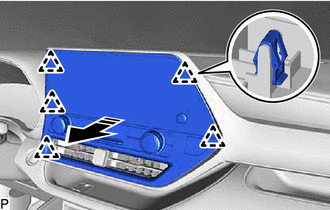
  2. REMOVE CENTER INSTRUMENT CLUSTER FINISH PANEL SUB-ASSEMBLY (for 8 Inch Display) 

    Refer to PROCEDURE - Step 22

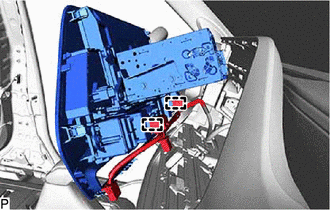
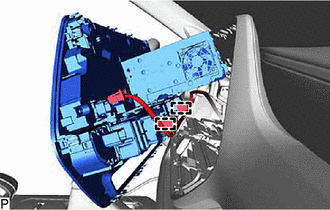
  3. REMOVE RADIO AND DISPLAY ASSEMBLY WITH AIR CONDITIONING CONTROL (for 8 Inch Display) 
    1. Remove the 4 bolts.
      GTY1119663Courtesy of © TOYOTA, LICENSE AGREEMENT TMS1002
    2. Pull the radio and display assembly with air conditioning control as shown in the illustration to disengage the 5 clips.
      GTY1120871Courtesy of © TOYOTA, LICENSE AGREEMENT TMS1002
      Remove in this Direction
    3. Disconnect each connector.
    4. Disengage the 2 clamps to remove the radio and display assembly with air conditioning control.
      GTY916364Courtesy of © TOYOTA, LICENSE AGREEMENT TMS1002
  4. REMOVE RADIO AND DISPLAY RECEIVER ASSEMBLY WITH BRACKET (for 8 Inch Display) 
    1. Remove the 4 screws.
      GTY916666Courtesy of © TOYOTA, LICENSE AGREEMENT TMS1002
    2. Disengage the 3 claws to remove the radio and display receiver assembly with bracket.
      GTY916665Courtesy of © TOYOTA, LICENSE AGREEMENT TMS1002
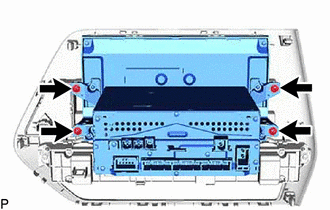
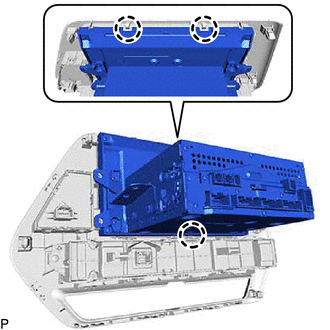
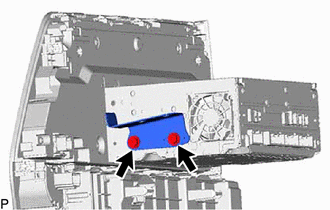
  5. REMOVE NO. 1 RADIO RECEIVER BRACKET (for 8 Inch Display) 
    1. Remove the 2 screws and No. 1 radio receiver bracket.
      GTY916366Courtesy of © TOYOTA, LICENSE AGREEMENT TMS1002
  6. REMOVE NO. 2 RADIO RECEIVER BRACKET (for 8 Inch Display) 
    1. Remove the 2 screws and No. 2 radio receiver bracket.
      GTY916365Courtesy of © TOYOTA, LICENSE AGREEMENT TMS1002
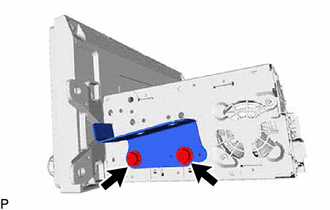
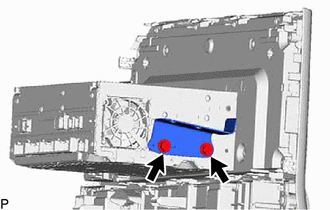
  7. REMOVE RADIO AND DISPLAY RECEIVER ASSEMBLY (for 8 Inch Display) 
  8. REMOVE CENTER INSTRUMENT CLUSTER FINISH PANEL SUB-ASSEMBLY (for 12.3 Inch Display) 

    Refer to PROCEDURE - Step 22

  9. REMOVE RADIO AND DISPLAY ASSEMBLY WITH AIR CONDITIONING CONTROL (for 12.3 Inch Display) 
    1. Remove the 4 bolts.
      GTY1119670Courtesy of © TOYOTA, LICENSE AGREEMENT TMS1002
    2. Pull the radio and display assembly with air conditioning control as shown in the illustration to disengage the 5 clips.
      GTY1120054Courtesy of © TOYOTA, LICENSE AGREEMENT TMS1002
      Remove in this Direction
    3. Disconnect each connector.
    4. Disengage the 2 clamps to remove the radio and display assembly with air conditioning control.
      GTY1119672Courtesy of © TOYOTA, LICENSE AGREEMENT TMS1002
  10. REMOVE NO. 1 RADIO BRACKET (for 12.3 Inch Display) 
    1. Remove the 3 screws and No. 1 radio bracket.
      GTY1121861Courtesy of © TOYOTA, LICENSE AGREEMENT TMS1002
  11. REMOVE NO. 2 RADIO BRACKET (for 12.3 Inch Display) 
    1. Remove the 3 screws and No. 2 radio bracket.
      GTY1121859Courtesy of © TOYOTA, LICENSE AGREEMENT TMS1002
  12. REMOVE AIR CONDITIONING CONTROL ASSEMBLY (for 12.3 Inch Display) 

    Refer to PROCEDURE - Step 4

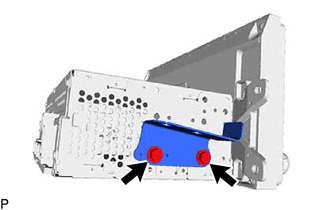
  13. REMOVE RADIO AND DISPLAY RECEIVER ASSEMBLY (for 12.3 Inch Display)