Removal [10/2022 - 11/2023]: Procedure
- PRECAUTION NOTE:
- Make sure to read the precautions of the electric parking brake system before removing the rear brake assembly.
for HV Model: Refer to PRECAUTION [10/2022 - 11/2023]
for Gasoline Model: Refer to PRECAUTION [10/2022 - 11/2023]
- Make sure to read the precautions of the electric parking brake system before removing the rear brake assembly.
- REMOVE REAR WHEEL
Refer to PROCEDURE - Step 1
- PERFORM REAR BRAKE PAD REPLACEMENT MODE
for HV Model: Refer to TEST MODE PROCEDURE [12/2019 - ]
for Gasoline Model: Refer to TEST MODE PROCEDURE [12/2019 - ]
- DISABLE BRAKE CONTROL (for HV Model)
- Wait 4 minutes after turning the ignition switch off to ensure that the skid control ECU is in sleep mode.NOTE:
- When the brake pedal is depressed or the door courtesy switch is turned on even if the ignition switch is off, the brake control system activates. Therefore do not depress the brake pedal or open/close the doors until the reservoir level switch connector is disconnected.
- Do not operate the electric parking brake switch assembly when the electric parking brake system is in rear brake pad replacement mode.
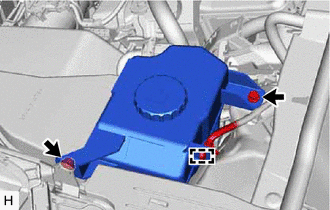
- Disengage the clamp to separate the wire harness from the brake master cylinder reservoir assembly.
- Remove the bolt and nut and separate the brake master cylinder reservoir assembly.
- Disconnect the connector from the brake master cylinder reservoir assembly
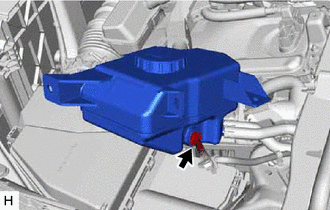
- Return the brake master cylinder reservoir assembly to its original position.
HINT:
Do this to prevent brake fluid leakage.
- Disconnect the cable from the negative (-) auxiliary battery terminal.
Refer to REMOVAL [10/2022 - 11/2023]
- In order to prevent pressurized brake fluid in the accumulator from being applied to the brake calipers, depress the brake pedal 40 times or more to return the pressurized brake fluid in the accumulator back to the brake master cylinder reservoir assembly.
- Check that the brake pedal cannot be further depressed.
- Wait 4 minutes after turning the ignition switch off to ensure that the skid control ECU is in sleep mode.
- DRAIN BRAKE FLUID NOTE:
If brake fluid leaks onto any painted surface, immediately wash it off.
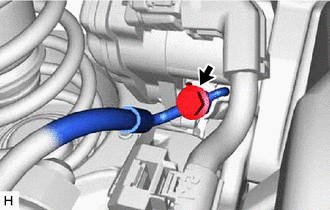
- SEPARATE REAR FLEXIBLE HOSE
- DISCONNECT NO. 2 PARKING BRAKE WIRE ASSEMBLY
Refer to PROCEDURE - Step 4
- REMOVE PARKING BRAKE ACTUATOR ASSEMBLY
Refer to PROCEDURE - Step 5
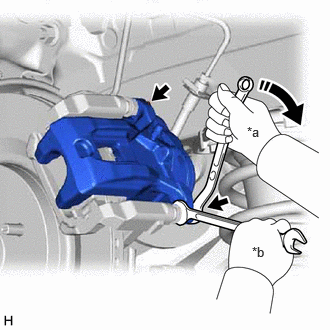
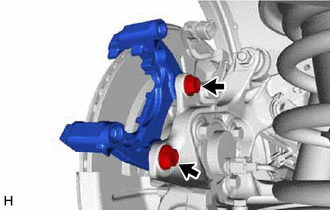
- REMOVE REAR DISC BRAKE CYLINDER ASSEMBLY
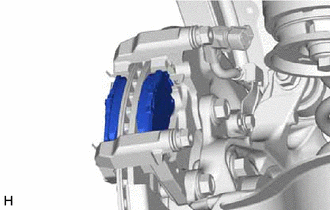
- REMOVE REAR DISC BRAKE PAD
- REMOVE REAR DISC BRAKE ANTI-SQUEAL SHIM KIT
Refer to PROCEDURE - Step 9
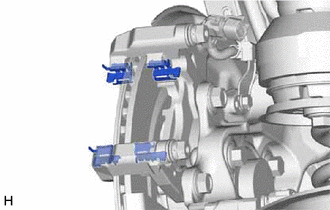
- REMOVE REAR DISC BRAKE PAD SUPPORT PLATE
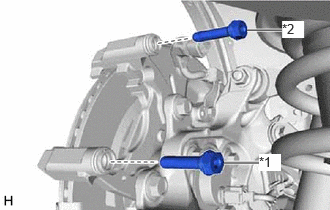
- REMOVE REAR DISC BRAKE CYLINDER SLIDE PIN
- Remove the rear No. 1 disc brake cylinder slide pin and rear No. 2 disc brake cylinder slide pin from the rear disc brake cylinder mounting.
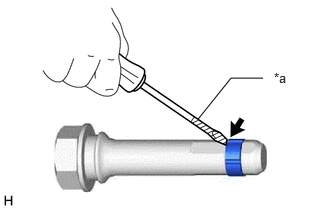
*1 Rear No. 1 Disc Brake Cylinder Slide Pin *2 Rear No. 2 Disc Brake Cylinder Slide Pin - Using a screwdriver with its tip wrapped with protective tape, remove the rear disc brake cylinder slide bushing from the rear No. 2 disc brake cylinder slide pin.NOTE:
Do not damage the rear No. 2 disc brake cylinder slide pin.
*a Protective Tape
- Remove the rear No. 1 disc brake cylinder slide pin and rear No. 2 disc brake cylinder slide pin from the rear disc brake cylinder mounting.
- REMOVE REAR DISC BRAKE BUSHING DUST BOOT
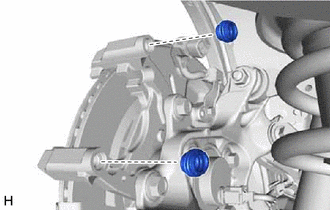
- REMOVE REAR DISC BRAKE CYLINDER MOUNTING
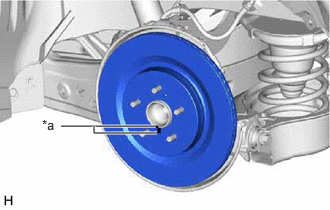
- REMOVE REAR DISC