Removal [12/2019 - 10/2022]: Procedure
- PRECAUTION (for 8 Inch Display)
- for Audio and Visual System:
Refer to PRECAUTION [12/2019 - 10/2022]
- for Navigation System:NOTE:
- After performing any of the following procedures, the navigation system may restart after turning the ignition switch to ACC for the first time (due to radio and display receiver assembly and navigation ECU certification).
- Disconnecting and reconnecting the cable from the negative (-) terminal of the auxiliary battery, replacing the auxiliary battery, or recharging the auxiliary battery after being discharged.
- Removing and installing or replacing the radio and display receiver assembly or navigation ECU.
- After replacing the radio and display receiver assembly, if "New software is not compatible with the system. Contact your dealer." is displayed on the multi-display, update the software of the navigation ECU.
Refer to PRECAUTION [12/2019 - 10/2022]
- After performing any of the following procedures, the navigation system may restart after turning the ignition switch to ACC for the first time (due to radio and display receiver assembly and navigation ECU certification).
- for Audio and Visual System:
- PRECAUTION (for 12.3 Inch Display) NOTE:
- After performing any of the following procedures, the navigation system may restart after turning the ignition switch to ACC for the first time (due to radio receiver assembly and navigation ECU certification).
- Disconnecting and reconnecting the cable from the negative (-) terminal of the auxiliary battery, replacing the auxiliary battery, or recharging the auxiliary battery after being discharged.
- Removing and installing or replacing the radio receiver assembly or navigation ECU.
- After replacing the radio receiver assembly, if "New software is not compatible with the system. Contact your dealer." is displayed on the multi-display, update the software of the navigation ECU.
Refer to PRECAUTION [12/2019 - 10/2022]
- After performing any of the following procedures, the navigation system may restart after turning the ignition switch to ACC for the first time (due to radio receiver assembly and navigation ECU certification).
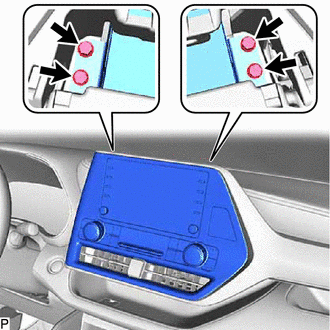
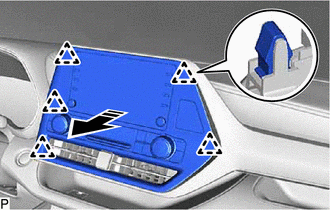
- REMOVE CENTER INSTRUMENT CLUSTER FINISH PANEL SUB-ASSEMBLY (for 8 Inch Display)
Refer to PROCEDURE - Step 22
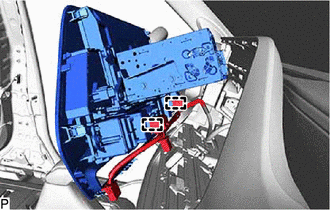
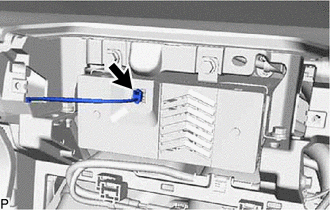
- REMOVE RADIO AND DISPLAY ASSEMBLY WITH AIR CONDITIONING CONTROL (for 8 Inch Display)
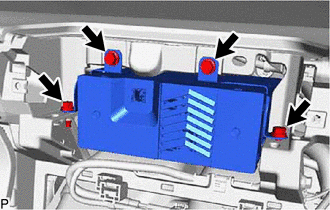
- REMOVE RADIO AND DISPLAY RECEIVER ASSEMBLY WITH BRACKET (for 8 Inch Display)
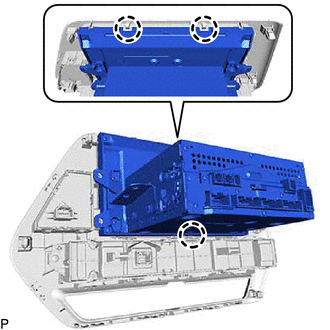
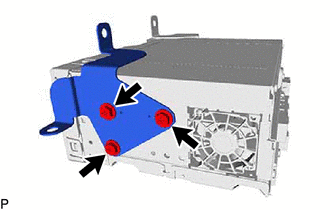
- REMOVE NO. 1 RADIO RECEIVER BRACKET (for 8 Inch Display)
- REMOVE NO. 2 RADIO RECEIVER BRACKET (for 8 Inch Display)
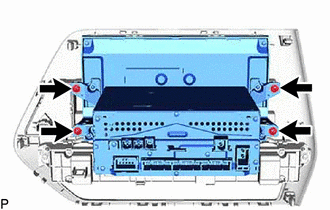
- REMOVE RADIO AND DISPLAY RECEIVER ASSEMBLY (for 8 Inch Display)
- REMOVE CENTER INSTRUMENT CLUSTER FINISH PANEL SUB-ASSEMBLY (for 12.3 Inch Display)
Refer to PROCEDURE - Step 22
- REMOVE MULTI-DISPLAY WITH AIR CONDITIONING CONTROL (for 12.3 Inch Display)
Refer to PROCEDURE - Step 2
- REMOVE CENTER INSTRUMENT CLUSTER FINISH PANEL ASSEMBLY (for 12.3 Inch Display)
Refer to PROCEDURE - Step 25
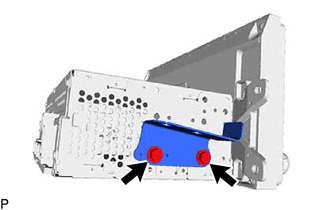
- REMOVE RADIO RECEIVER ASSEMBLY WITH BRACKET (for 12.3 Inch Display)
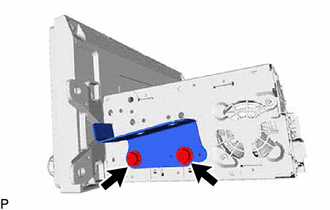
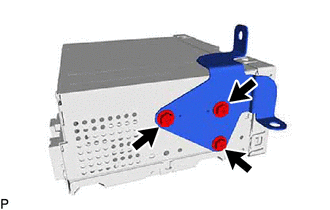
- REMOVE NO. 1 RADIO BRACKET (for 12.3 Inch Display)
- REMOVE NO. 2 RADIO BRACKET (for 12.3 Inch Display)
- REMOVE RADIO RECEIVER ASSEMBLY (for 12.3 Inch Display)