Reassembly [10/2022 - ]: Procedure
- INSTALL REAR CONSOLE BOX WIRE
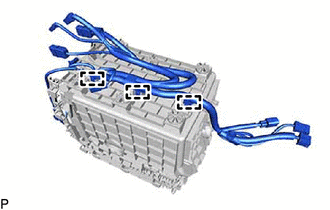
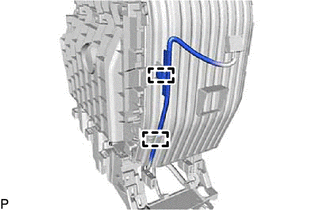
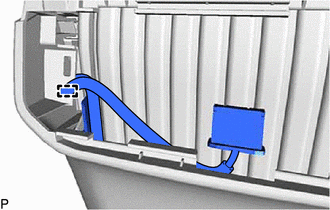
- Engage the 3 clamps to install the rear console box wire.
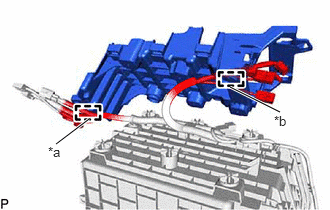
- Engage the clamp and guide.
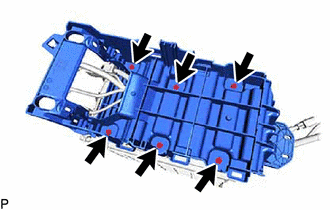
*a Clamp *b Guide - Install the No. 1 trash box retainer support with the 6 screws.
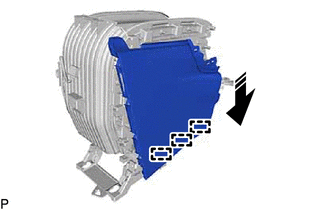
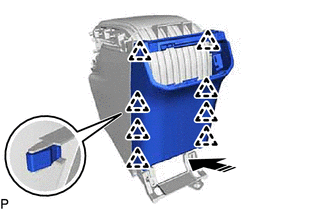
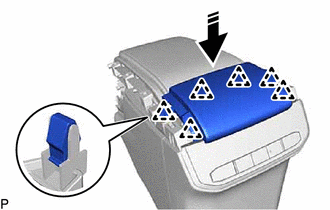
- Engage the 6 claws as shown in the illustration to install the No. 2 console mounting retainer.

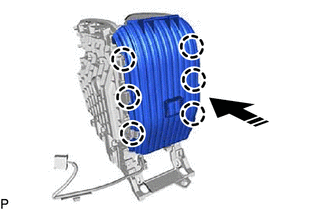
Install in this Direction - Engage the 2 clamps.
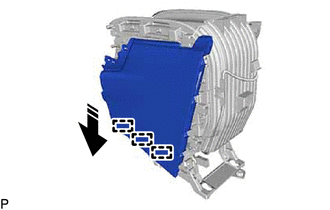
- Engage the 3 guides as shown in the illustration.
Install in this Direction - Engage the 4 clips to install the No. 3 box panel.
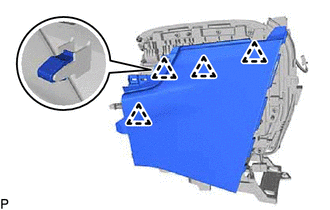
- Engage the 3 guides as shown in the illustration.
Install in this Direction - Engage the 4 clips to install the No. 1 box panel.
- Engage the 3 clamps to install the rear console box wire.
- INSTALL UPPER CONSOLE DOOR SUB-ASSEMBLY
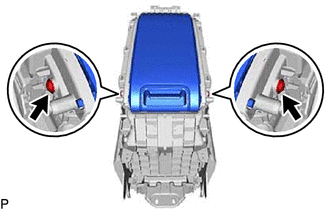
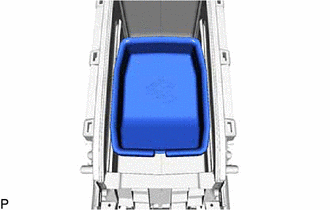
- While slightly pulling areas (A) and (B) in the direction shown in the illustration to enable the upper console door sub-assembly to pass over the stoppers, insert the upper console door sub-assembly in the direction shown in the illustration to install it.
*a Stopper 
Pull Install in this Direction NOTE:To prevent damage to the console box assembly, do not pull it excessively.
HINT:
2 persons are required for this procedure.
- Install the upper console door sub-assembly with the 2 screws.
- While slightly pulling areas (A) and (B) in the direction shown in the illustration to enable the upper console door sub-assembly to pass over the stoppers, insert the upper console door sub-assembly in the direction shown in the illustration to install it.
- INSTALL CONSOLE BOX POCKET (w/ Console Box Pocket)
- INSTALL NO. 2 INDOOR ELECTRICAL KEY ANTENNA ASSEMBLY
Refer to PROCEDURE - Step 1
- INSTALL NO. 2 POWER OUTLET SOCKET COVER
Refer to PROCEDURE - Step 1
- INSTALL NO. 2 POWER OUTLET SOCKET ASSEMBLY
Refer to PROCEDURE - Step 2
- INSTALL CONSOLE REAR END PANEL
- INSTALL NO. 2 AIR CONDITIONING CONTROL ASSEMBLY
Refer to PROCEDURE - Step 1
- INSTALL REAR CONSOLE COVER