Removal [09/2020 - 10/2022]: Procedure
- REMOVE FLYWHEEL HOUSING UNDER COVER
Refer to REMOVAL [09/2020 - 10/2022]
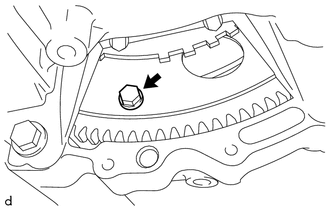
- REMOVE DRIVE PLATE AND TORQUE CONVERTER ASSEMBLY SETTING BOLT
- Turn the crankshaft to gain access to the 6 drive plate and torque converter assembly setting bolts and remove each drive plate and torque converter assembly setting bolt while holding the crankshaft pulley set bolt with a wrench.
HINT:
There will be one black colored drive plate and torque converter assembly setting bolt.
- Turn the crankshaft to gain access to the 6 drive plate and torque converter assembly setting bolts and remove each drive plate and torque converter assembly setting bolt while holding the crankshaft pulley set bolt with a wrench.
- REMOVE FRONT BUMPER LOWER ABSORBER (for Sport Package)
Refer to PROCEDURE - Step 23
- REMOVE FRONT BUMPER LOWER ABSORBER (except Sport Package)
Refer to PROCEDURE - Step 26
- REMOVE NO. 2 FRONT BUMPER REINFORCEMENT (for Sport Package)
Refer to PROCEDURE - Step 25
- REMOVE NO. 2 FRONT BUMPER REINFORCEMENT (except Sport Package)
Refer to PROCEDURE - Step 28
- REMOVE ENGINE ASSEMBLY WITH TRANSAXLE
Refer to PROCEDURE - Step 53
- REMOVE STARTER ASSEMBLY
Refer to PROCEDURE - Step 7
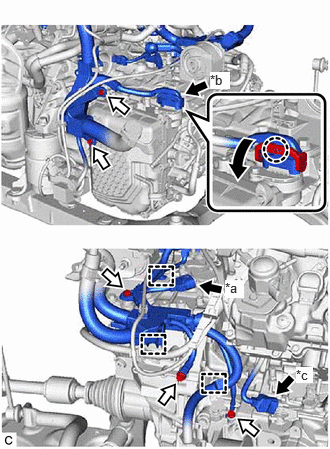
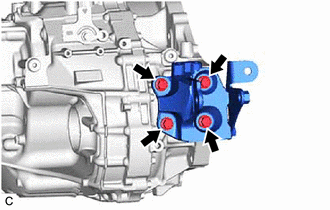
- DISCONNECT ENGINE WIRE
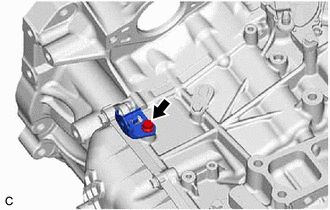
- Disconnect the park/neutral position switch assembly connector.
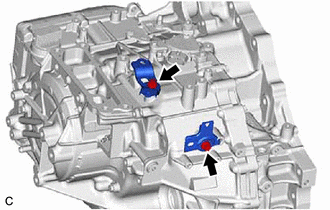
*a Park/Neutral Position Switch Assembly Connector *b Transmission Wire Connector *c Connector - Disengage the claw, rotate the lever and disconnect the transmission wire connector.
- Disconnect the connector.
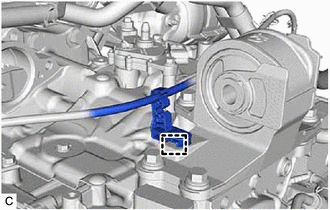
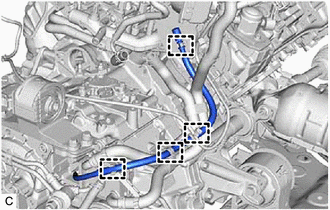
- Remove the 5 bolts and disengage the 3 clamps to disconnect the engine wire from the automatic transaxle assembly.
- Disconnect the park/neutral position switch assembly connector.
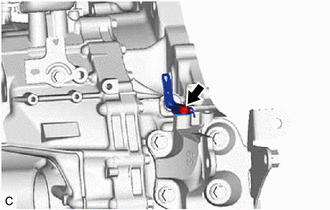
- DISCONNECT VACUUM HOSE
- SEPARATE BREATHER PLUG HOSE
- REMOVE TRANSMISSION BREATHER CLAMP
Refer to PROCEDURE - Step 14
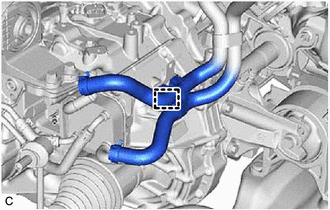
- DISCONNECT WATER BY-PASS HOSE ASSEMBLY
Refer to PROCEDURE - Step 15
- DISCONNECT HOSE CLAMP
- INSTALL ENGINE HANGERS
Refer to PROCEDURE - Step 61
- REMOVE FRONT FRAME ASSEMBLY
Refer to PROCEDURE - Step 62
- REMOVE MANIFOLD STAY
Refer to PROCEDURE - Step 6
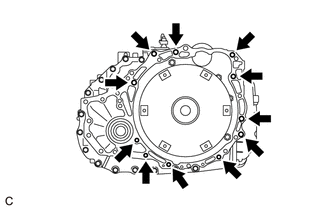
- REMOVE AUTOMATIC TRANSAXLE ASSEMBLY
- Support the automatic transaxle assembly with a transmission jack.NOTE:
Secure the automatic transaxle assembly to the transmission jack using a suitable adapter, such as a rope or attachment.
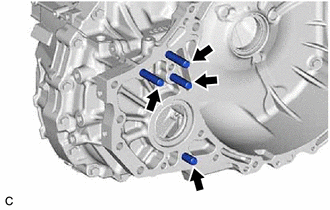
- Remove the 11 bolts and automatic transaxle assembly from the engine assembly.NOTE:
To prevent damage to the 2 knock pins, do not pry between the automatic transaxle assembly and engine assembly.
- Support the automatic transaxle assembly with a transmission jack.
- DISCONNECT INLET NO. 2 OIL COOLER HOSE
Refer to PROCEDURE - Step 16
- DISCONNECT OUTLET NO. 3 OIL COOLER HOSE
Refer to PROCEDURE - Step 19
- REMOVE TRANSMISSION OIL COOLER
Refer to PROCEDURE - Step 18
- REMOVE NO. 1 OIL COOLER TUBE SUB-ASSEMBLY WITHOUT HOSE
Refer to PROCEDURE - Step 20
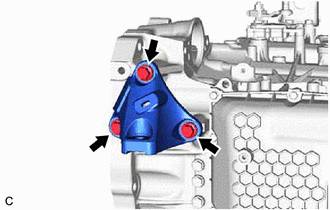
- REMOVE FRONT ENGINE MOUNTING BRACKET
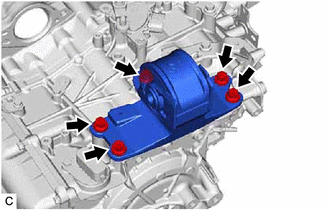
- REMOVE ENGINE MOUNTING INSULATOR LH
- REMOVE REAR ENGINE MOUNTING BRACKET SUB-ASSEMBLY
- REMOVE TRANSFER ASSEMBLY
Refer to PROCEDURE - Step 3
- REMOVE NO. 1 TRANSMISSION CONTROL CABLE BRACKET
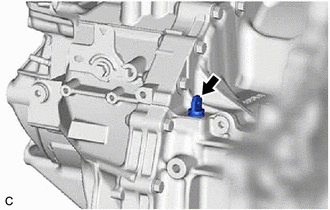
- REMOVE TRANSMISSION CASE PLUG ASSEMBLY
- REMOVE WIRE HARNESS CLAMP BRACKET
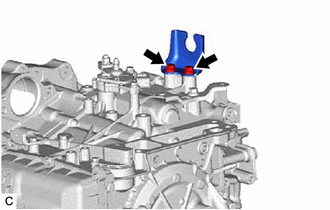
- REMOVE BREATHER PLUG HOSE
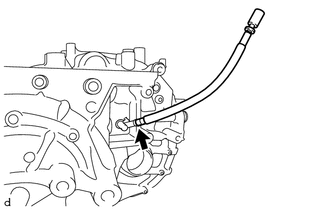
- Using a screwdriver, remove the breather plug hose from the No. 1 breather plug (ATM).NOTE:
Be careful not to damage the No. 1 breather plug (ATM).
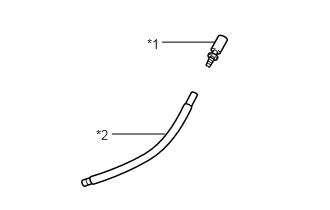
- Remove the breather plug sub-assembly from the breather plug hose.
*1 Breather Plug Sub-assembly *2 Breather Plug Hose NOTE:Be careful not to damage the breather plug sub-assembly.
- Using a screwdriver, remove the breather plug hose from the No. 1 breather plug (ATM).
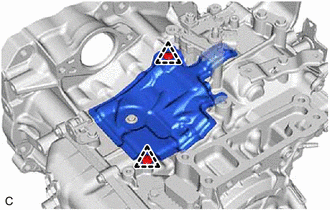
- REMOVE UPPER TRANSAXLE CASE COVER
- REMOVE TORQUE CONVERTER ASSEMBLY
- Remove the torque converter assembly from the automatic transaxle assembly.
- REMOVE TRANSFER AND TRANSAXLE SETTING STUD BOLT
- INSPECT TORQUE CONVERTER ASSEMBLY
See step 1
- INSPECT DRIVE PLATE AND RING GEAR SUB-ASSEMBLY
See step 2